

Support
SupportBrowse articlesCommunity DiscussionsSign in
Support

Self-service technical support, hardware setup guides and Totum user guides from the Inovus Medical team.

Support

  • Support Center
  • Browse articles

Policies

  • Warranty Information
  • Returns & Refunds
  • Delivery Information
  • Customs Information

Legal

  • Privacy Policy
  • Terms of Use
  • Cookies

© 2026 Inovus Medical Ltd. All rights reserved.

Support Center

Hardware
  • How do I clean my simulator?
  • I am using QuickTime player for Mac to run my camera and the image is inverted (flipped round), how do I fix this?
  • I've purchased a Pyxus HD or Pyxus HD Move simulator and cannot get the camera to work (Mac and Windows users)
  • I've purchased a Pyxus HD or Pyxus HD Move simulator but can't access or log on to LapSkills, what should I do?
  • LapAR Pro Setup Manual
  • LapAR Setup Manual
  • MISHUB Basic Setup Manual
  • MISHUB Setup Manual
  • Pyxus HD Move Setup Manual
  • Pyxus HD Setup Manual
  • Pyxus Pro Move Setup Manual
  • Lab Range Cholecystectomy
  • MISHUB Basic Setup Manual
Product Videos
Software
  • I have an issue with the Totum software
Accounts
Downloads
Assessments
Groups
Connections
Permissions
Administration
Policies
  • Customs Information
  • Delivery Information
  • My order has arrived damaged or with a missing item
  • Returns & Refunds
  • Warranty Information
Support CenterHardware
Setup guide

MISHUB Basic Setup Manual

Assemble the MISHUB Basic trainer body and model mounting jig.

Overview
Easy•15+ mins
MIS HUB#mis-hub-basic#assembly#hardwareUpdated 17/09/2026
Open video
Open video

Welcome to the step-by-step assembly guide for the MISHUB Basic. Whether you prefer step-by-step instructions or a video demonstration, this guide will walk you through the assembly process.

Before you begin, take a moment to review the package's contents and acquaint yourself with the included components. The following content has been crafted to provide you with all the insights required to transform individual parts into a functional and invaluable tool for honing your surgical skills.

Step 1

Place the MISHUB base plate on a stable, flat surface.
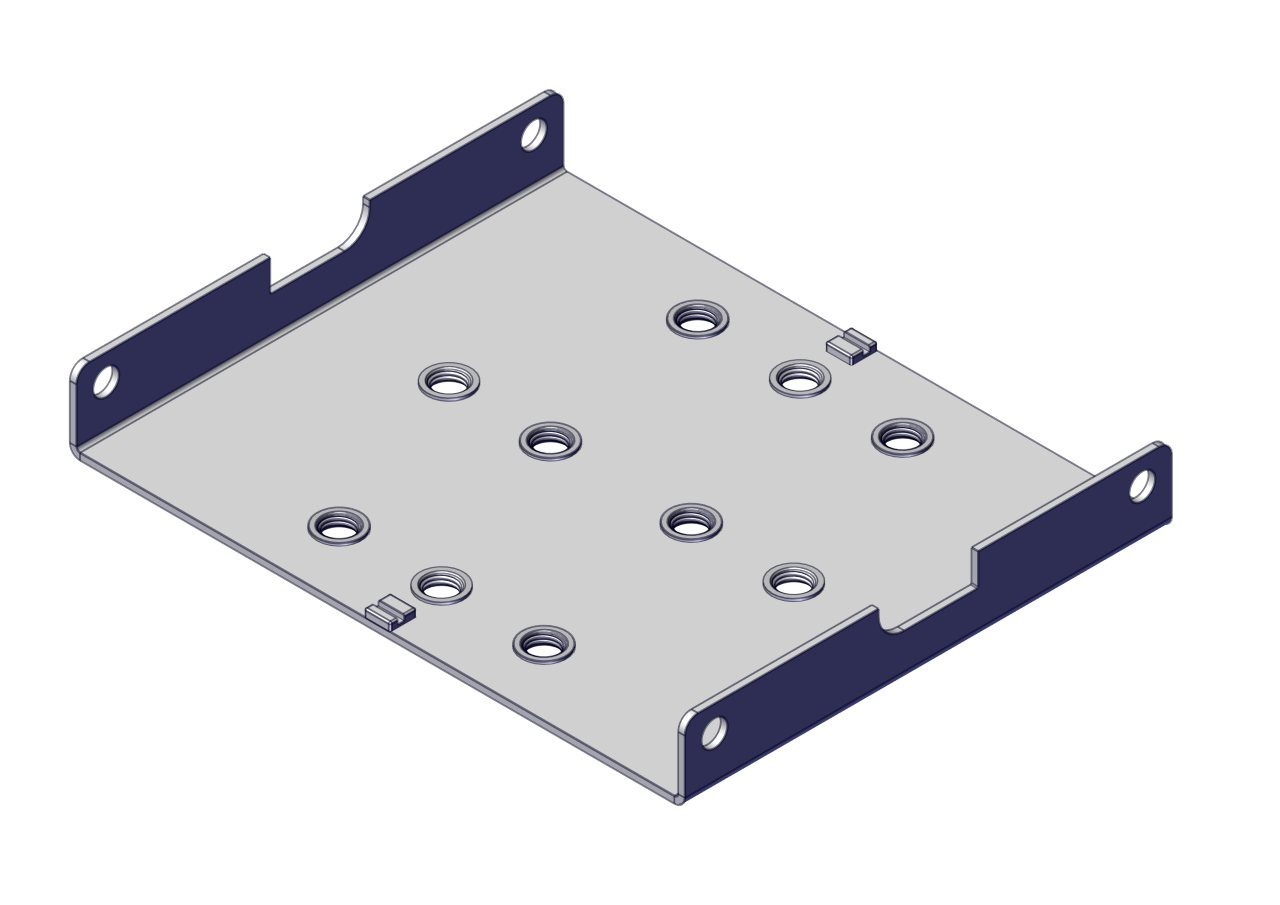
Step 1

Step 2

Position the front panel against the front edge of the base plate.
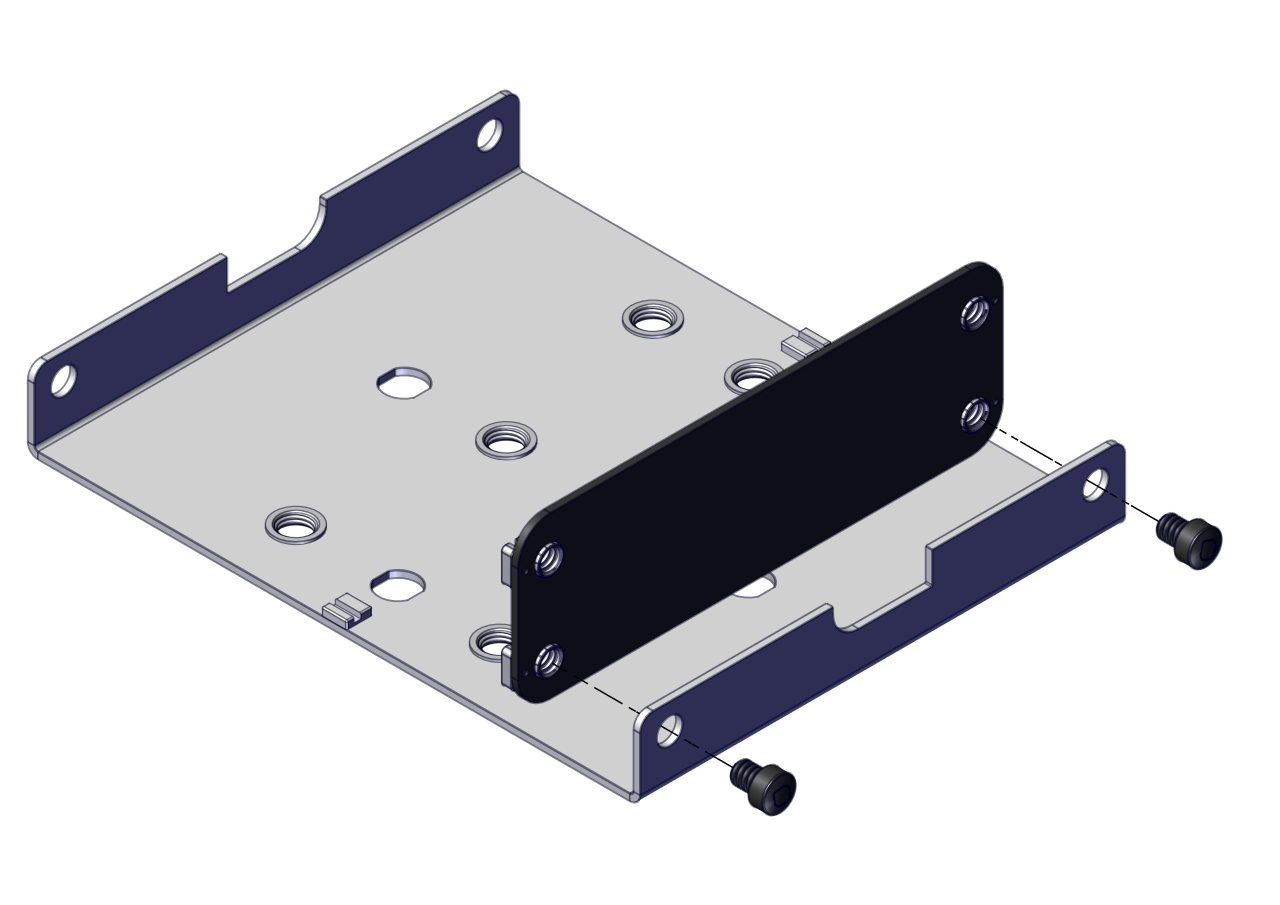
Step 2

Step 3

Position the rear panel at the back of the base plate.
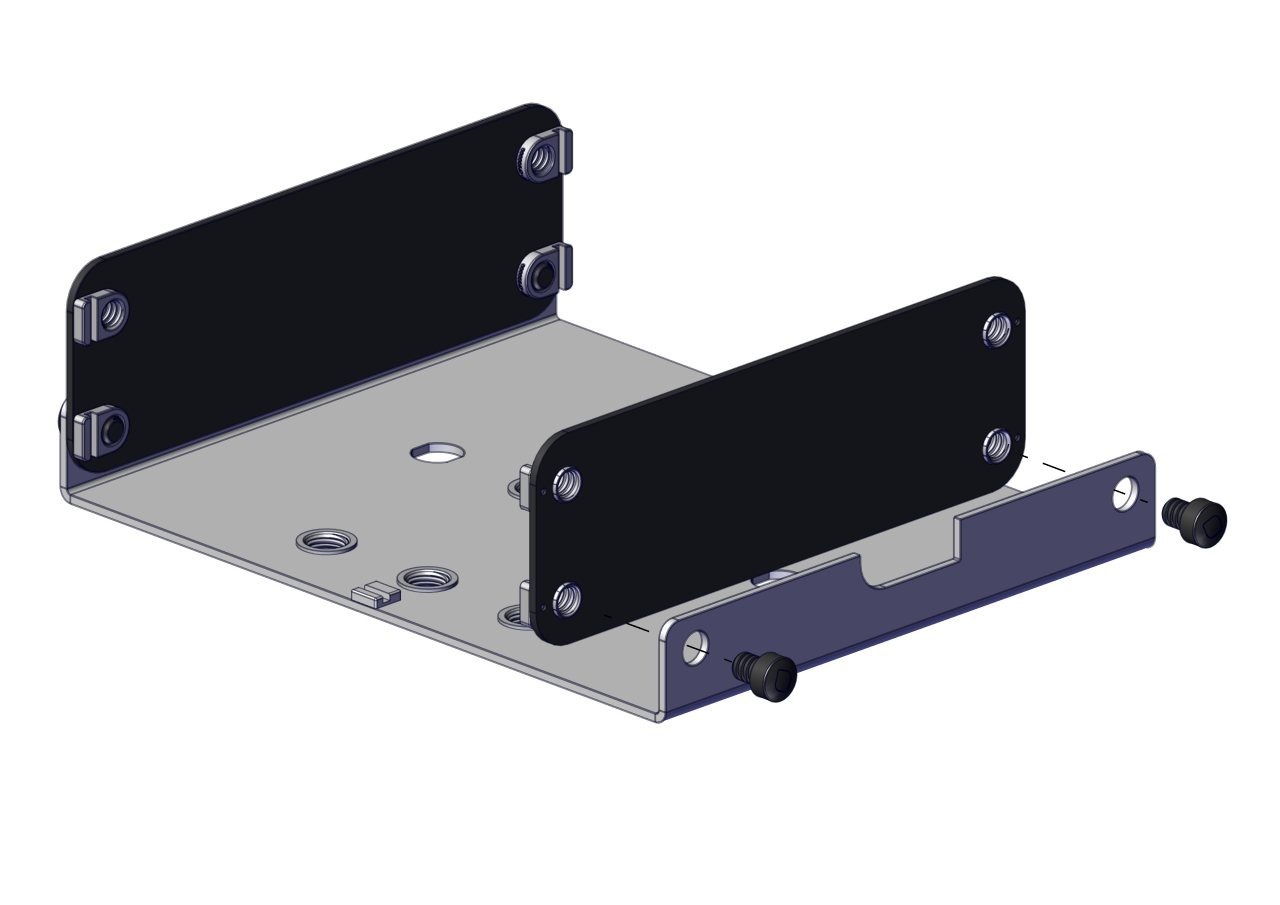
Step 3

Step 4

Insert the pillars into the designated mounting holes on the base plate.
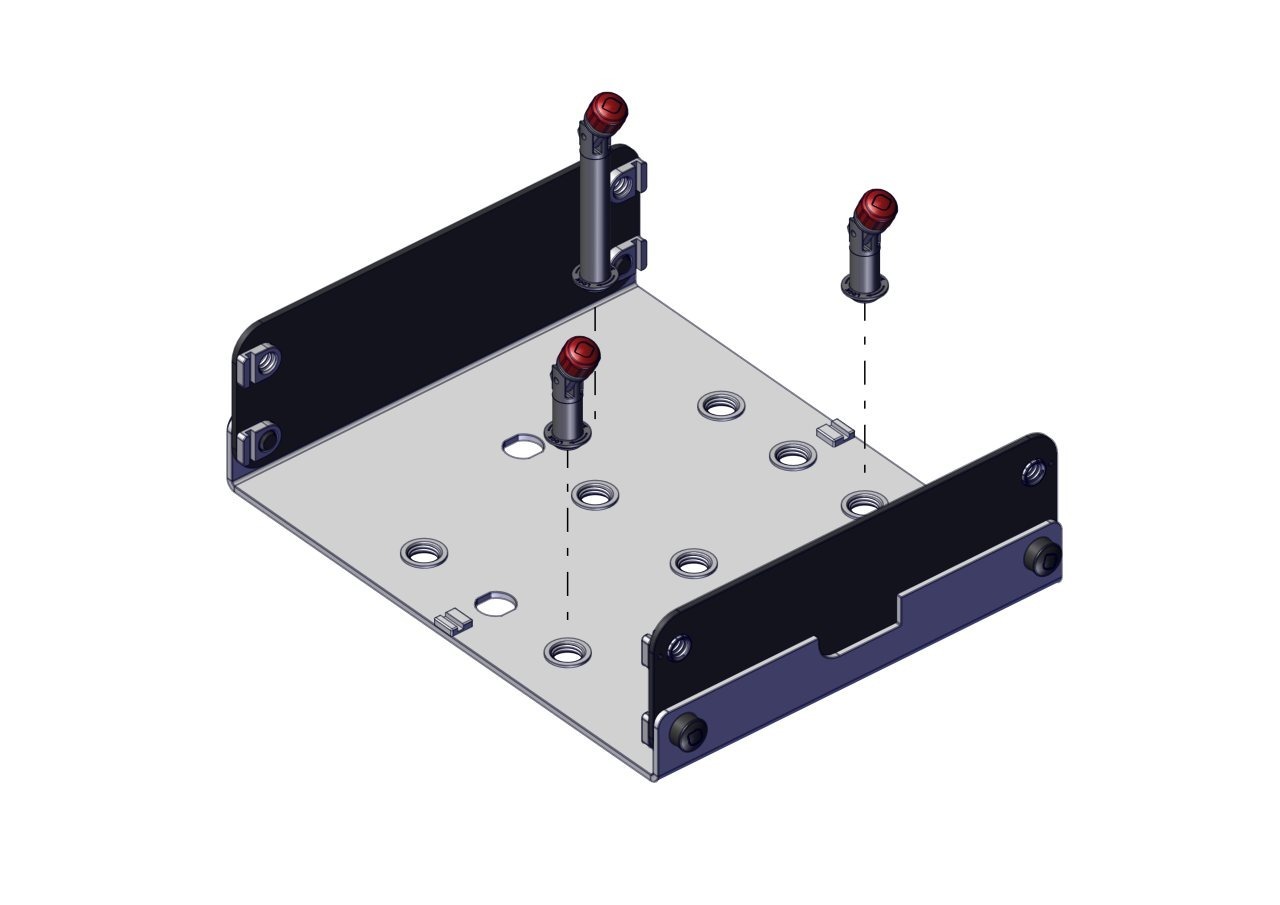
Step 4

Step 5

Slide the left and right side panels into the locating tabs on the base plate.
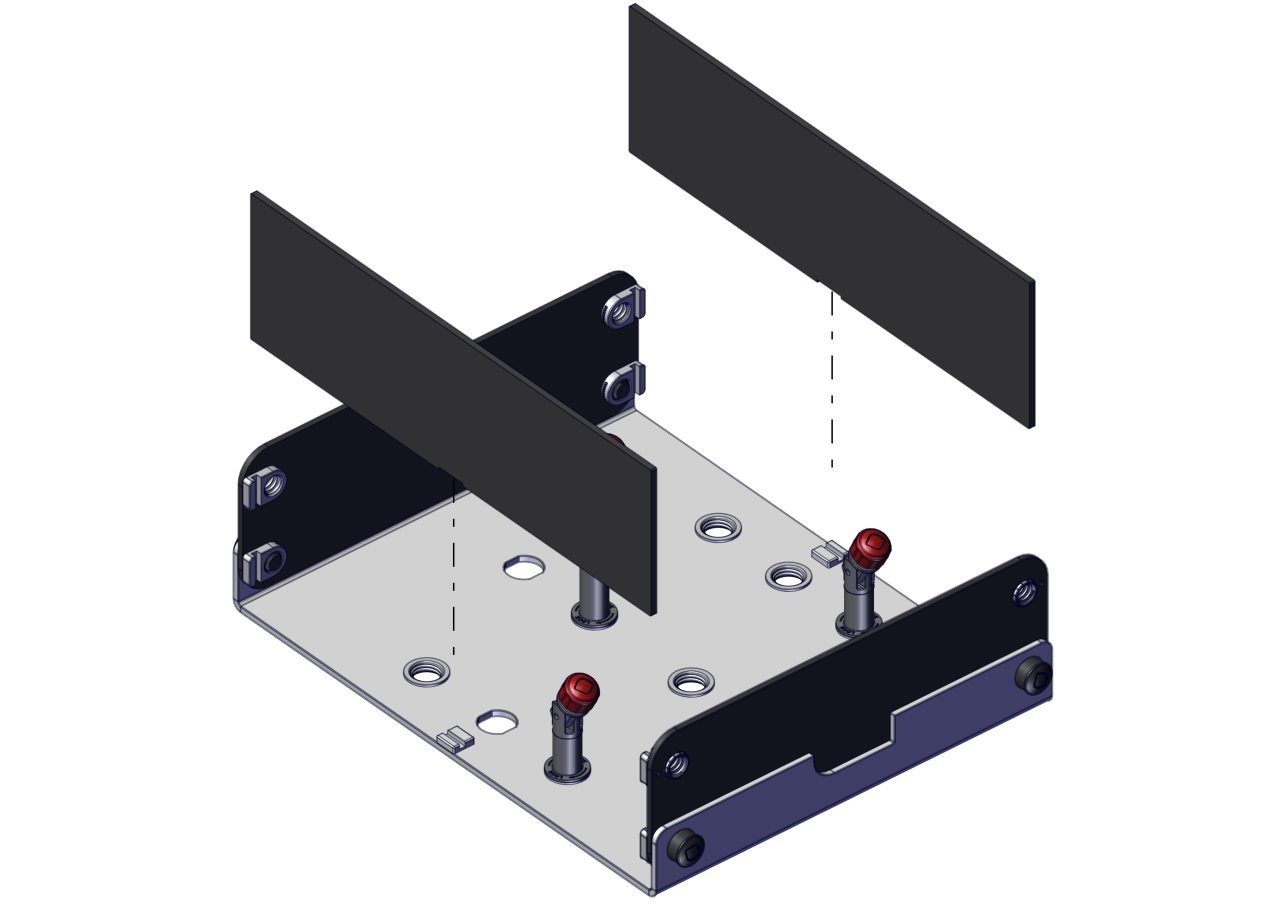
Step 5

Step 6

Position the model mounting jig (MMJ) onto the central post.
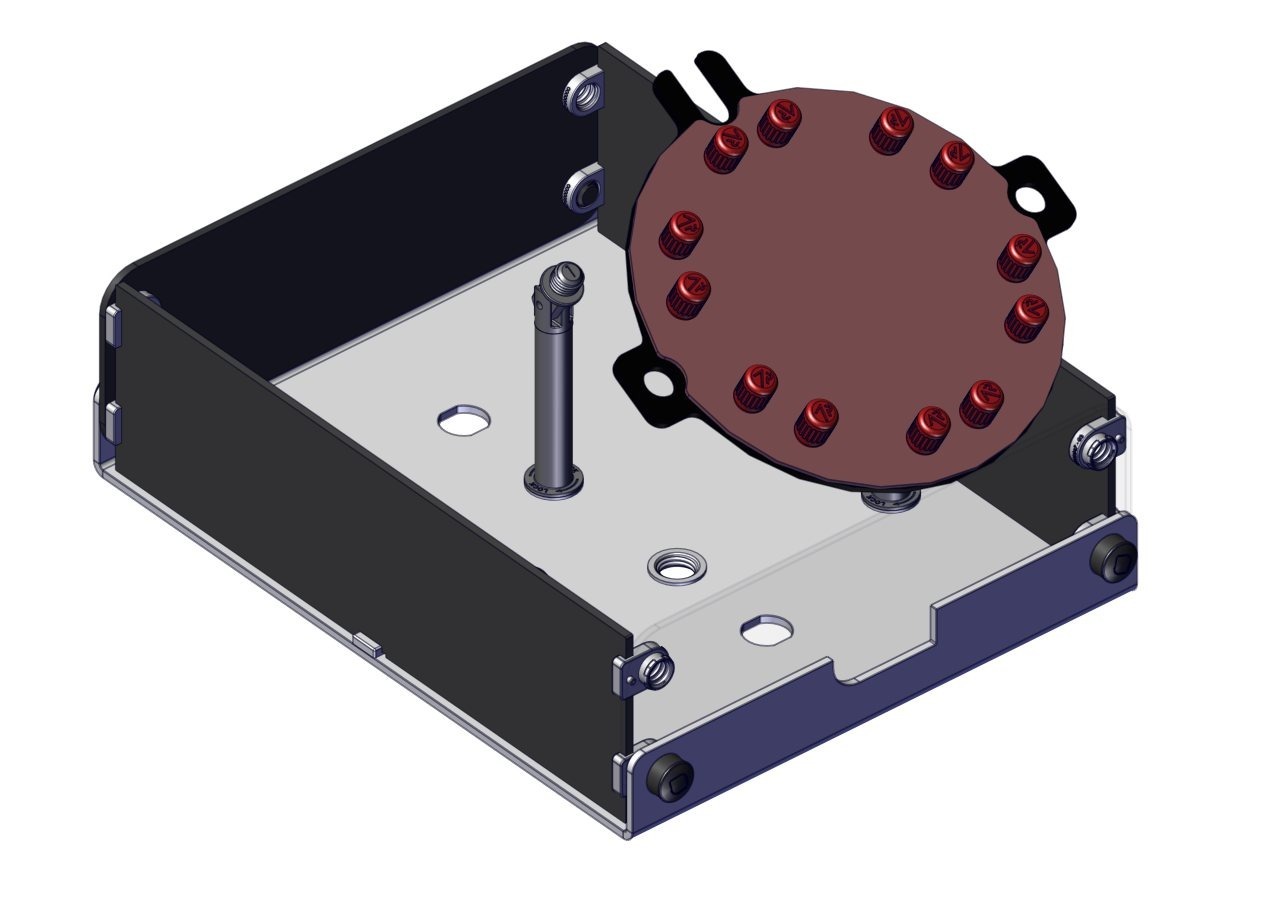
Step 6

Step 7

Secure the model mounting jig with the red pillar caps.
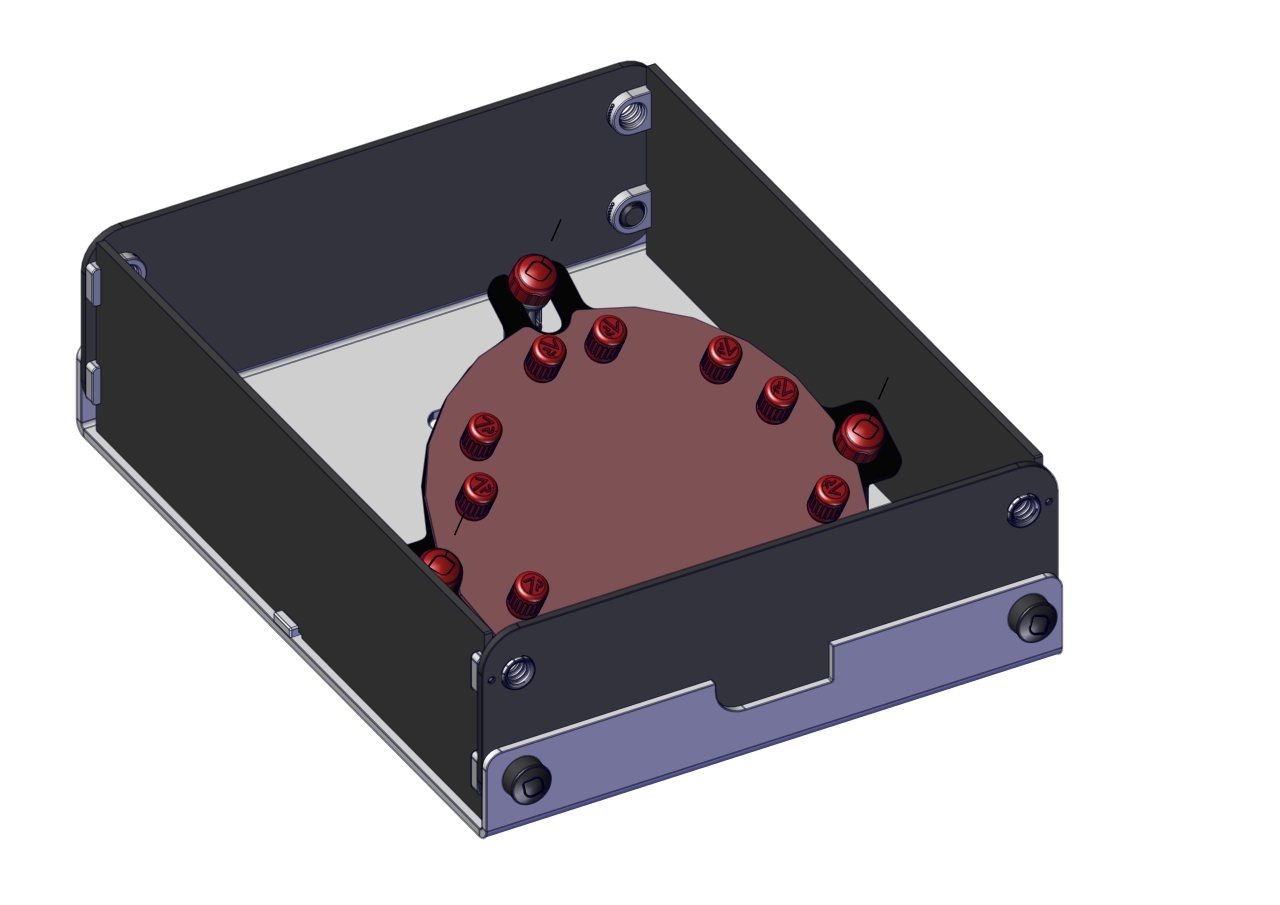
Step 7

Step 8

Alternative model mounting jig configuration.
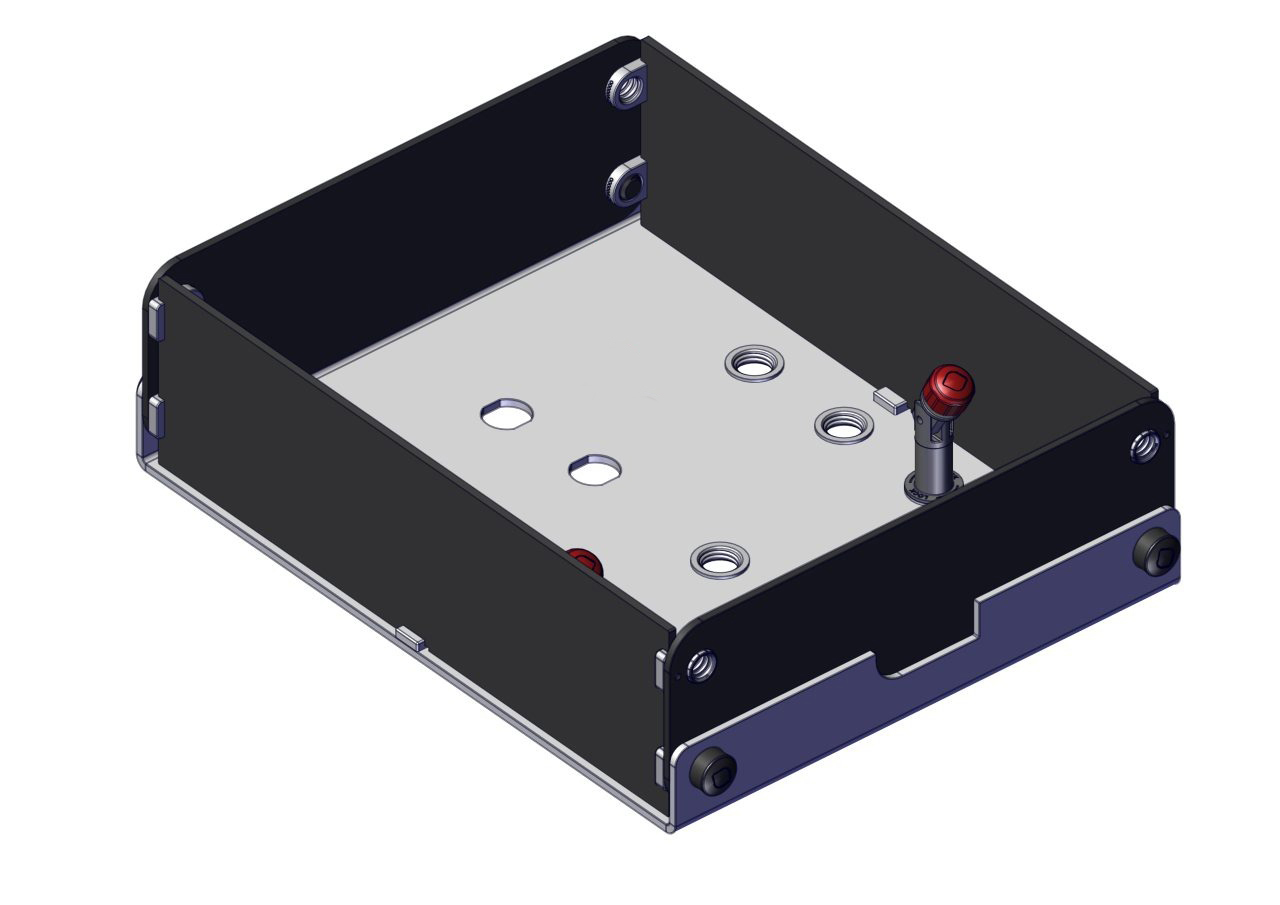
Step 8

Step 9

Insert the short pillar in the rear slot previously taken up by the tall pillar.
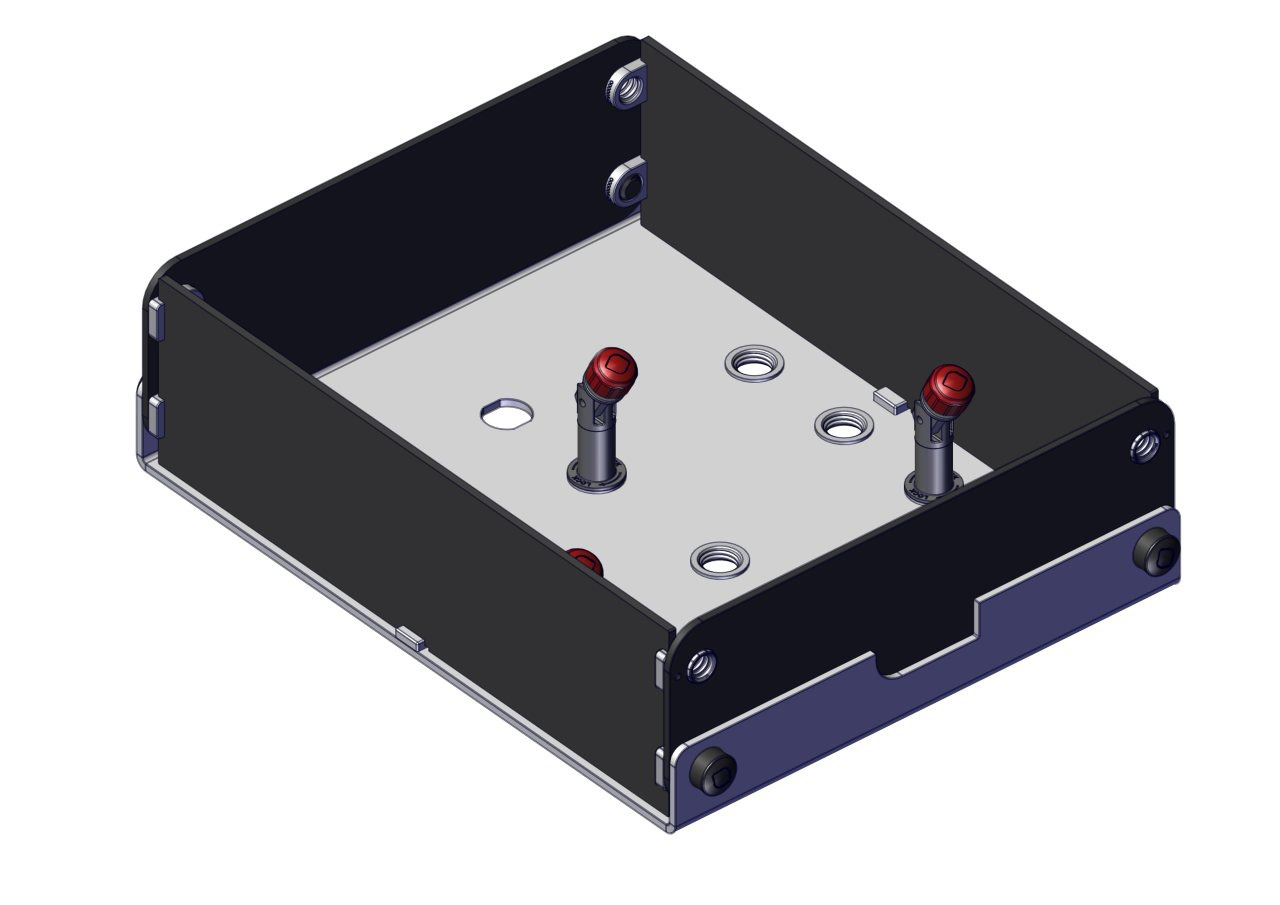
Step 9

Step 10

Position the model mounting jig onto the central post and secure it using the red pillar caps.
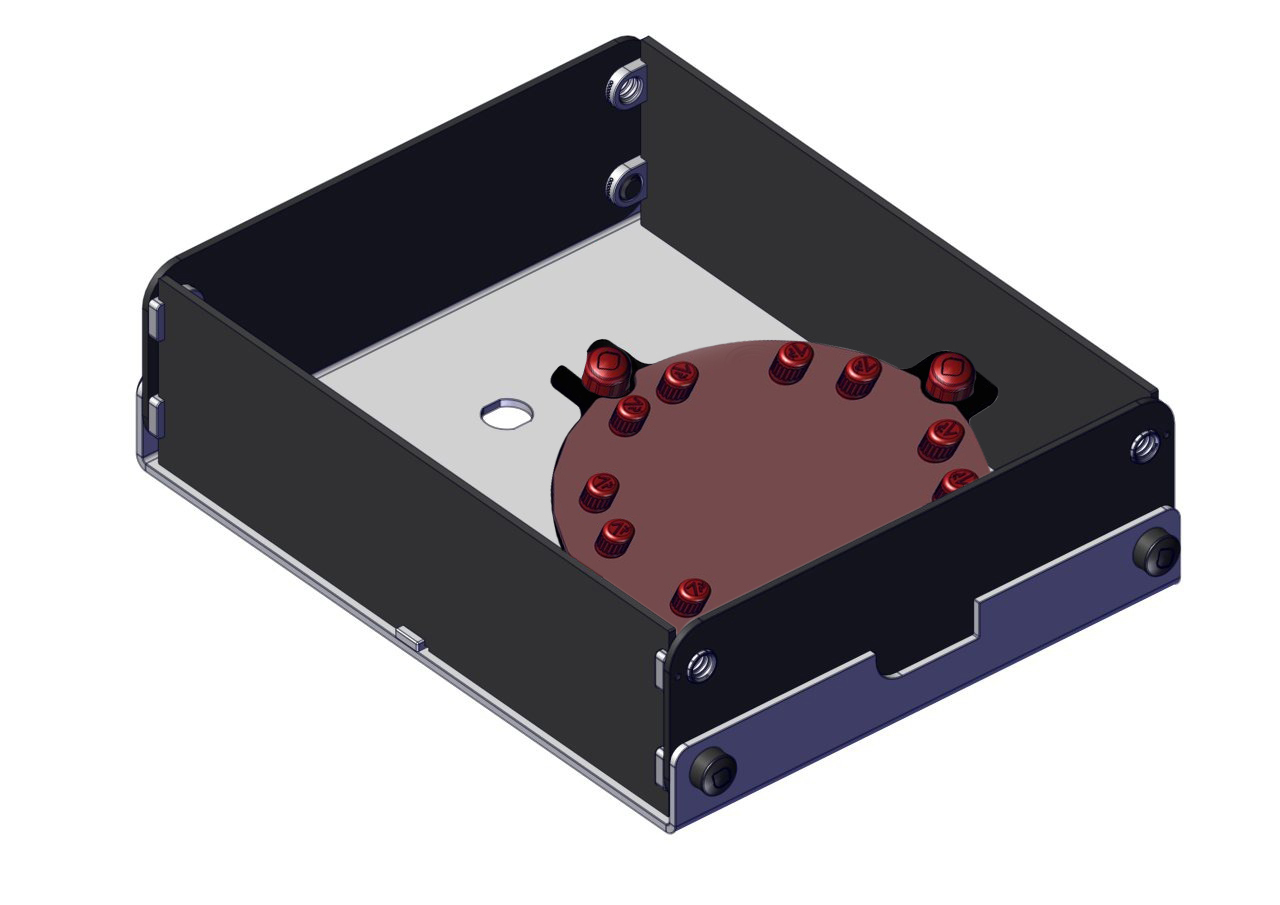
Step 10

Step 11

Place the top cover onto the trainer body.
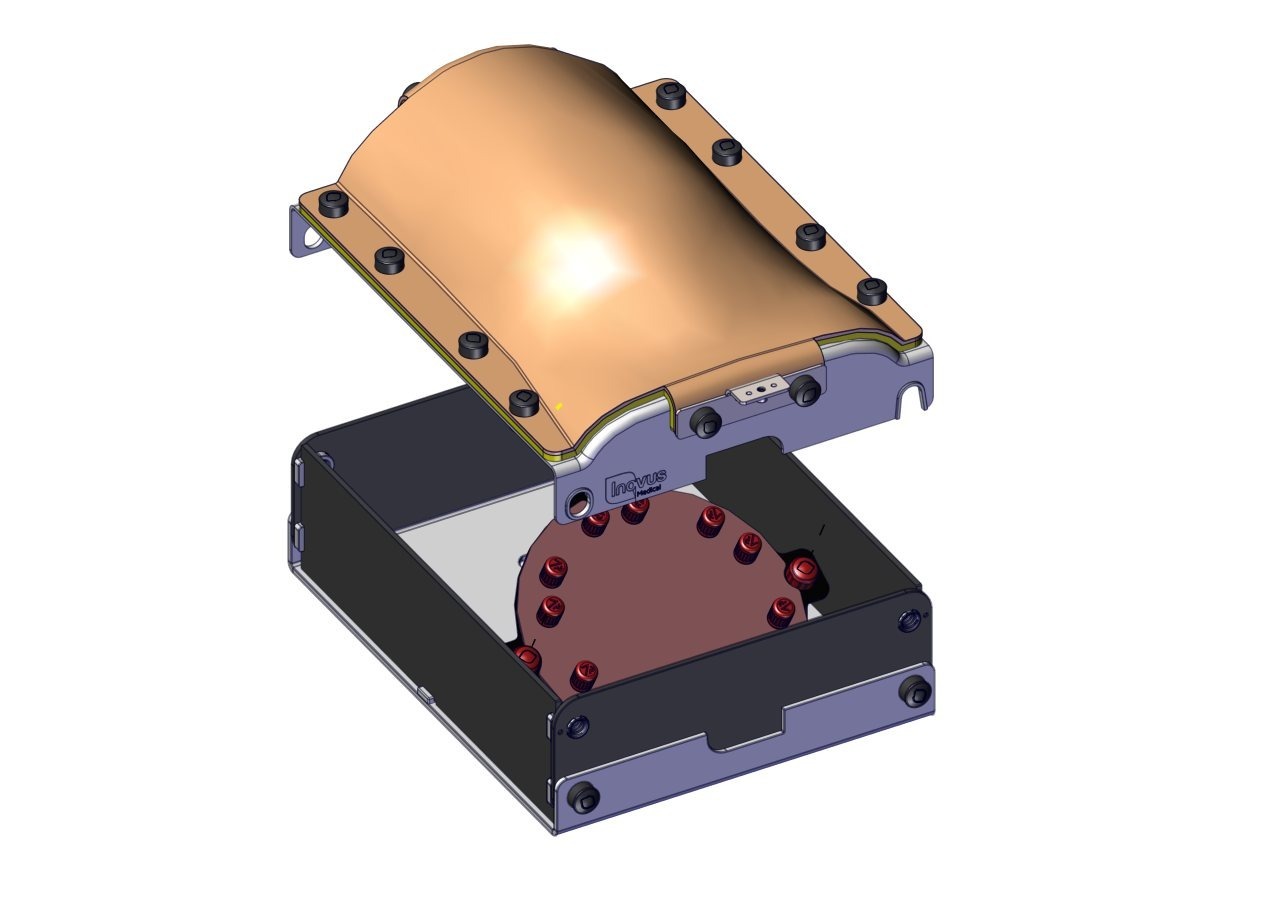
Step 11

Step 12

Using the lock nuts included with the kit, insert and tighten the lock nuts on both the front and rear side of the cover.
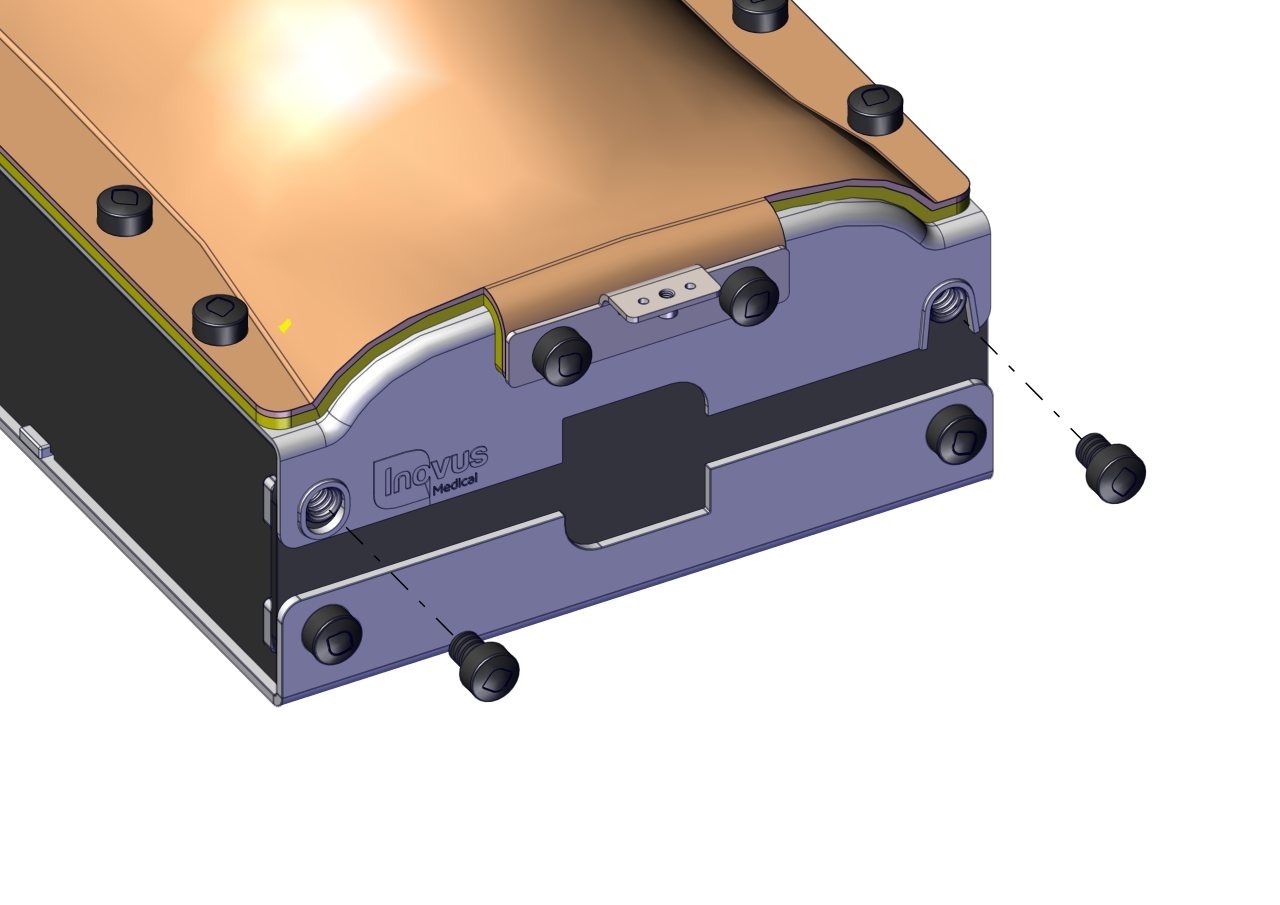
Step 12

Community Discussions (0)

Real-world experiences from other users around this article.

Explore Community Discussions→·Ask a Question

Did this solve your problem?

Contents

  • Step 1
  • Step 2
  • Step 3
  • Step 4
  • Step 5
  • Step 6
  • Step 7
  • Step 8
  • Step 9
  • Step 10
  • Step 11
  • Step 12