

Pyxus HD Move Setup Manual
Assemble the Pyxus HD Move trainer and connect the camera via USB.
Welcome to the step-by-step assembly guide for the Pyxus HD Move. Whether you prefer step-by-step instructions or a video demonstration, this guide will walk you through the assembly process.
Before you begin, take a moment to review the package's contents and acquaint yourself with the included components. The following content has been crafted to provide you with all the insights required to transform individual parts into a functional and invaluable tool for honing your surgical skills.
Step 1
Begin the assembly by taking out parts 00000917 and 00000328. Using 2 x 00000640 bolts and 2 x 00001159 nuts, screw the 00000328 panel into position as shown.
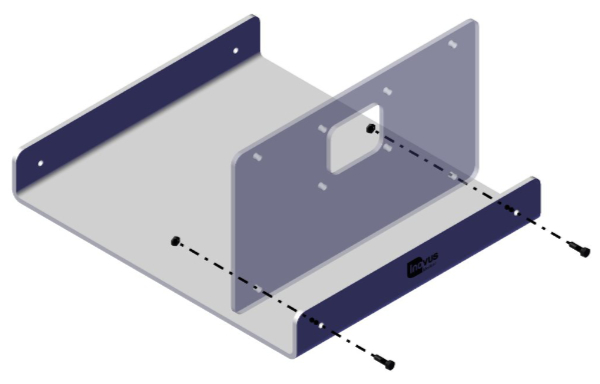
Step 2
You will now need the following parts:
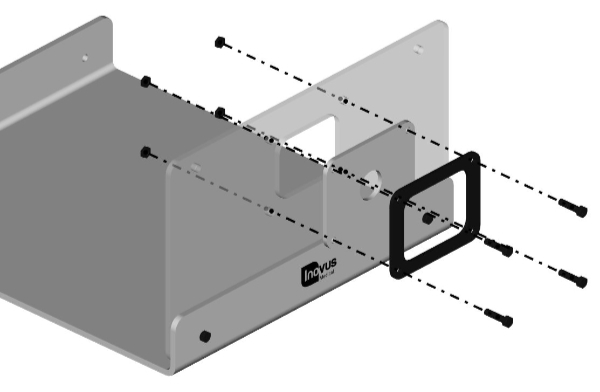
Step 3
Using 2 x 00000640 bolts and 2 x 00001159 nuts, secure the rear panel 00001457.
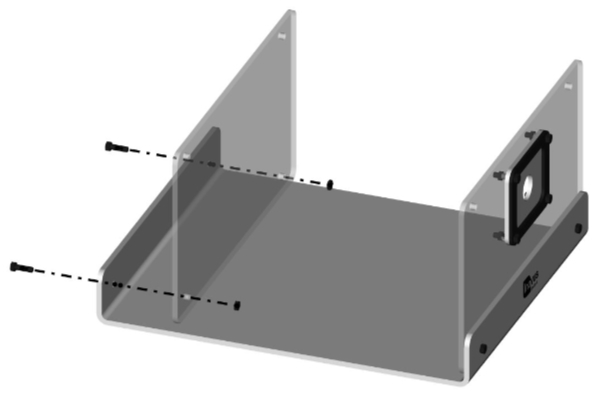
Step 4
Your simulator should now look like this, with both upright panels securely in position.
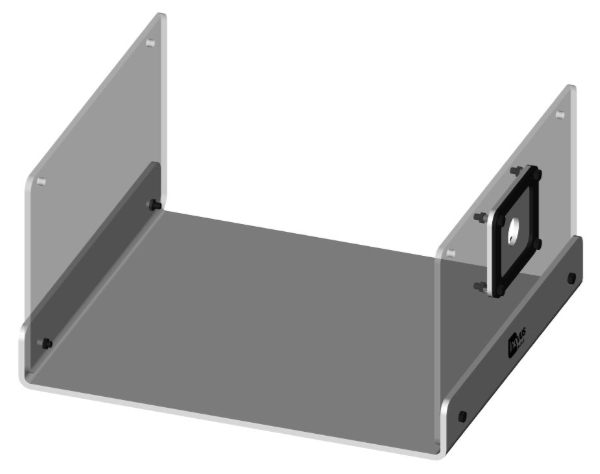
Step 5
You may now start the top panel sub-assembly. Taking 00001201, 00000170 and 00000171, secure as shown using 5 x 00000640 bolts and 5 x 00001159 nuts.
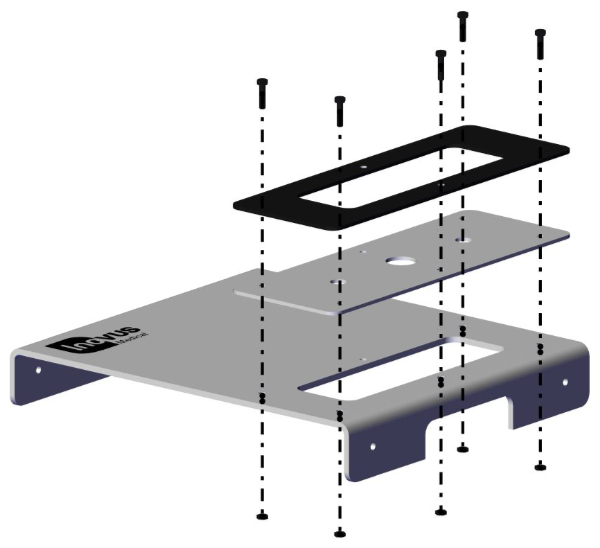
Step 6
You have now completed the top panel sub-assembly.
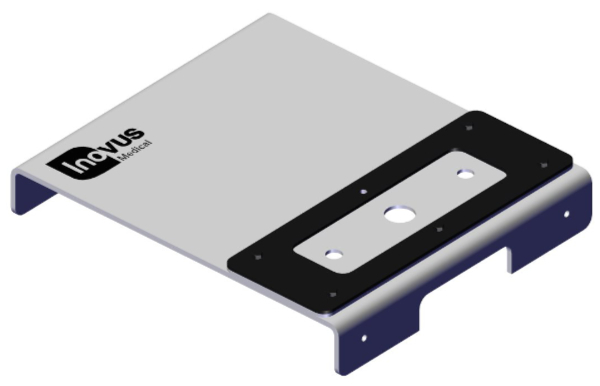
Step 7
Use the remaining 00000640 bolt and 1 x 00001159 nut to position the camera bracket (00000338).
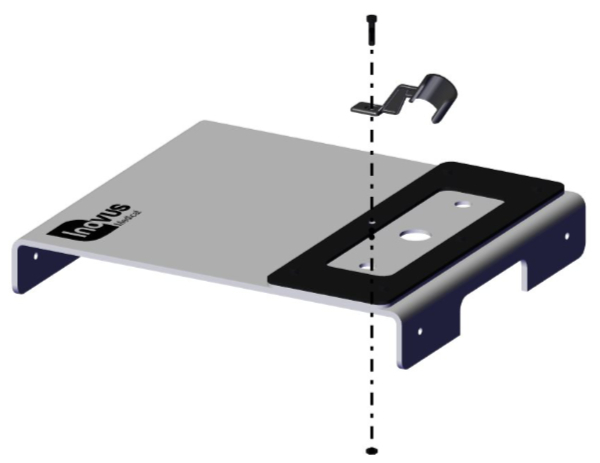
Step 8
Having already completed the top panel sub-assembly, you may now position it over the pre-assembled base unit.
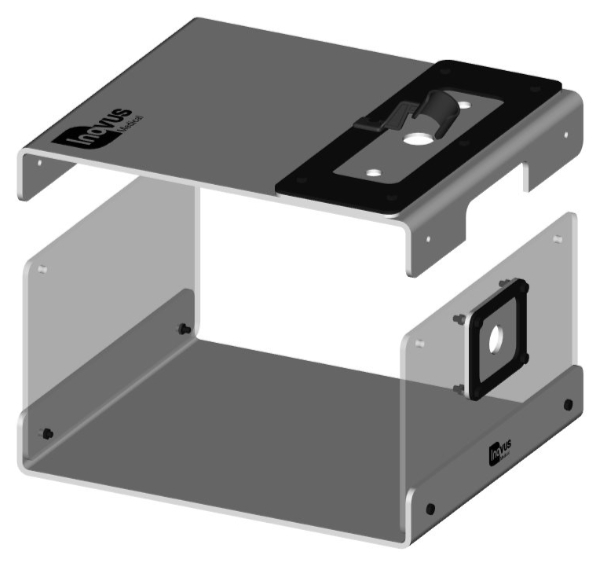
Step 9
Using 2 x 00000640 bolts & 2 x 00001159 nuts, secure it to the upright panels.
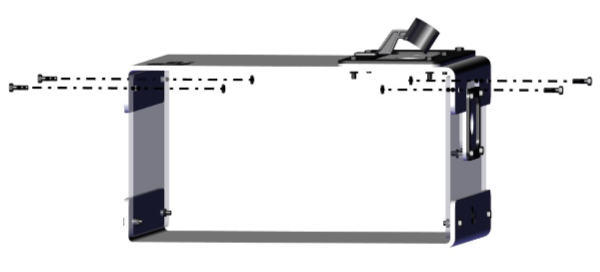
Step 10
Your simulator should now look like this and be structurally sound.
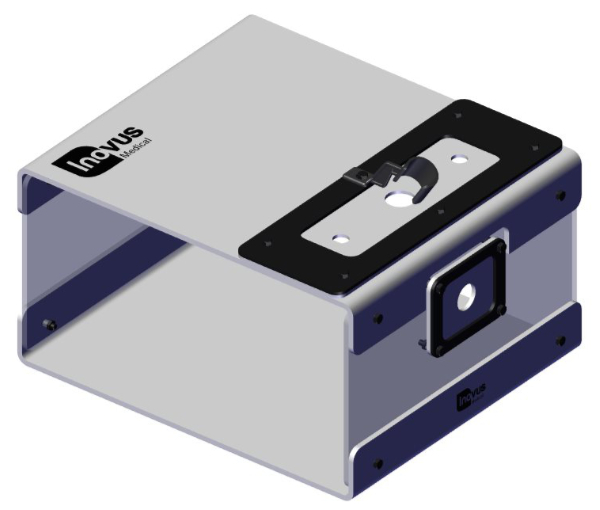
Step 11
You may now position the scope to begin training. The scope must be placed backwards through the ports, as illustrated. Positioning the scope in this way reduces the risk of skin tearing.
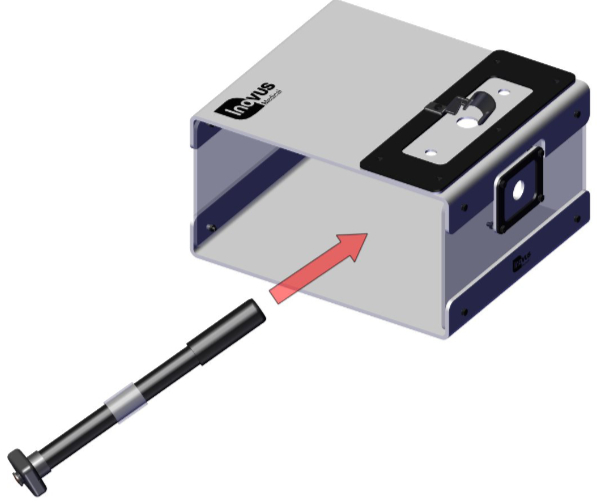
Step 12
You may wish to rotate the camera bracket to one side so that the scope has room to slide into position.
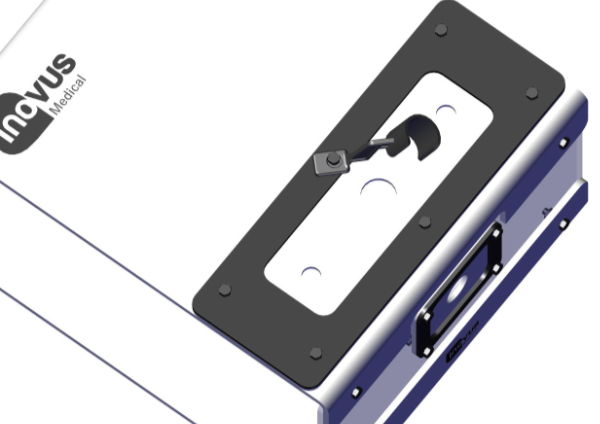
Step 13
You may now rotate the camera bracket back into position to hold the scope in place.
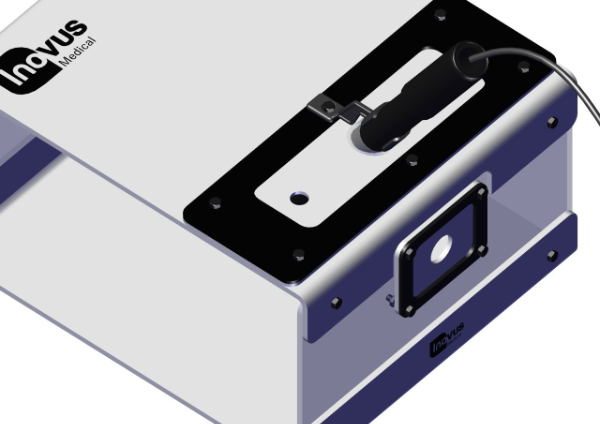
Step 14
Insert the two trocars provided into the openings in the SK04 skin. Using the trocars will reduce the likelihood of the skin tearing.
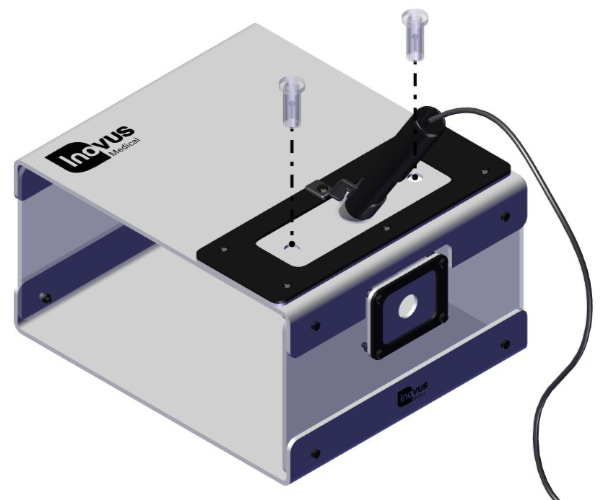
Step 15
Please note that the scope may be placed in the front port also.
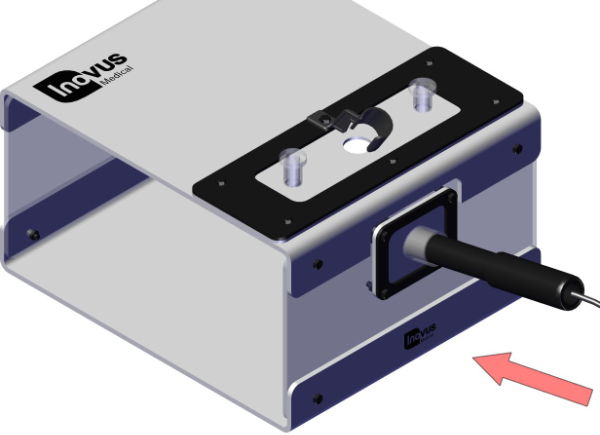
Step 16
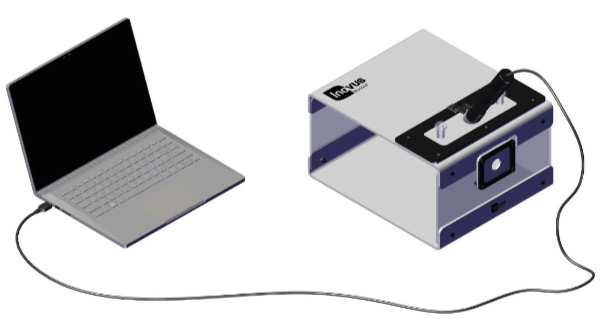
Connect the USB cable provided to your laptop or PC. (Laptop not included)
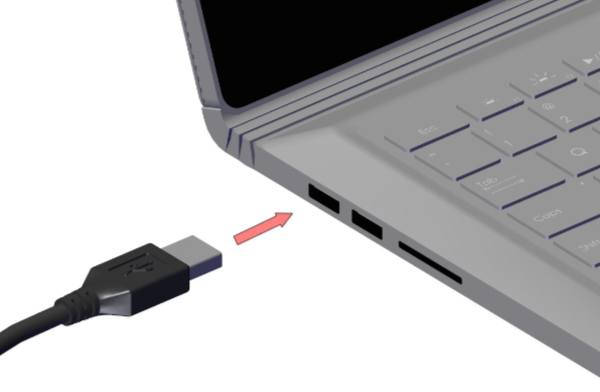
Step 17
The setup should now look similar to this image.
Related articles
I've purchased a Pyxus HD or Pyxus HD Move simulator but can't access or log on to LapSkills, what should I do?
LapSkills has been discontinued — how to operate your simulator without it.
I've purchased a Pyxus HD or Pyxus HD Move simulator and cannot get the camera to work (Mac and Windows users)
Fix a non-working camera on your Pyxus HD or Pyxus HD Move using your computer's built-in camera app (Windows or Mac).
Community Discussions (0)
Real-world experiences from other users around this article.
Did this solve your problem?