

LapAR Setup Manual
Assemble the second-generation LapAR box trainer and connect the camera.
Welcome to the step-by-step assembly guide for the second generation LapAR. Whether you prefer step by step instructions or a video demonstration, this guide will walk you through the assembly process.
Before you begin, take a moment to review the package's contents and acquaint yourself with the included components. The following content has been crafted to provide you with all the insights required to transform individual parts into a functional and invaluable tool for honing your surgical skills.
Looking for the 1st Generation LapAR setup manual?
If you purchased a LapAR before 1st May 2024 you can access the LapAR (1st Generation) setup manual here or in the Downloads section below.
Step 1
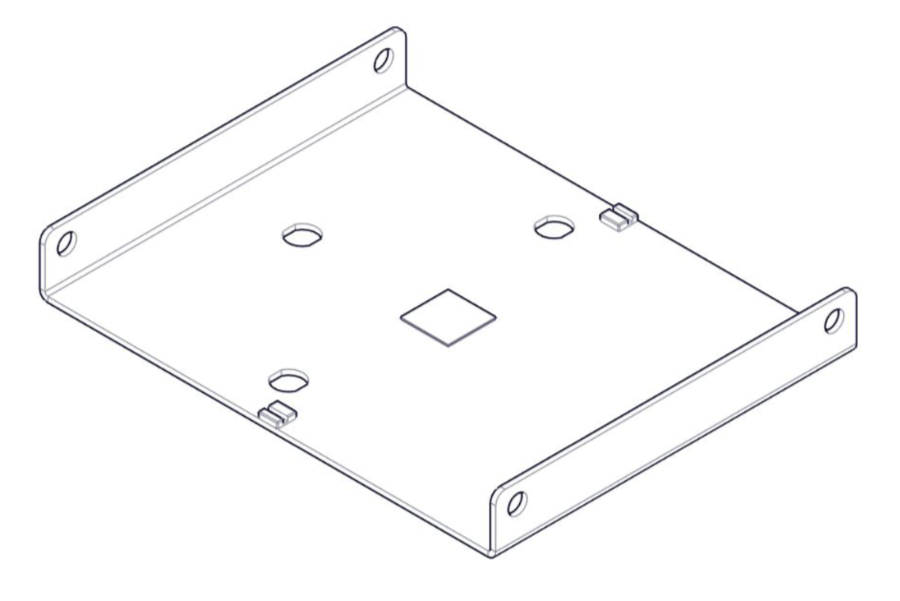
When opening your simulator it is recommended that you unpack all package contents and arrange them before starting assembly. Once you have done this, take the base part as shown in the diagram and lay it on a secure flat surface.
Step 2
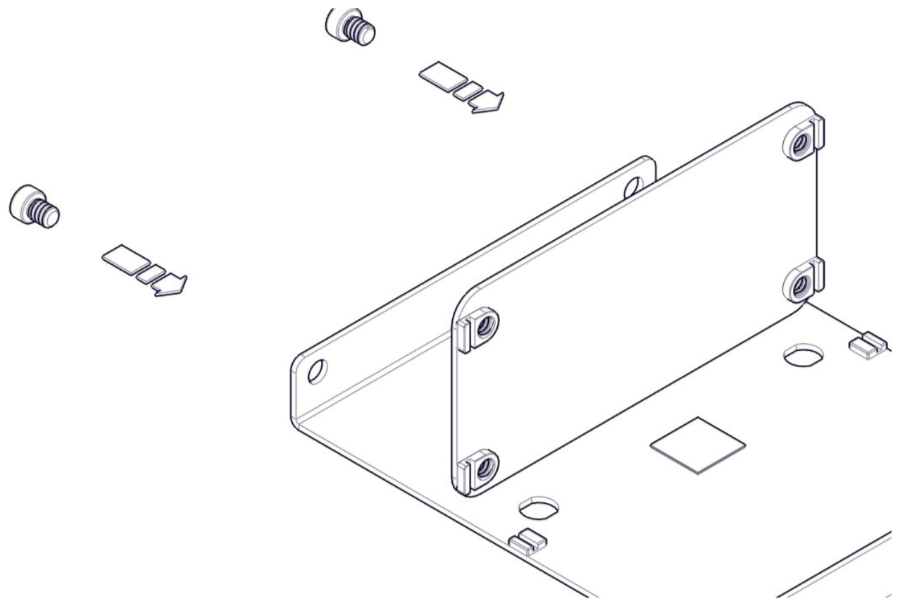
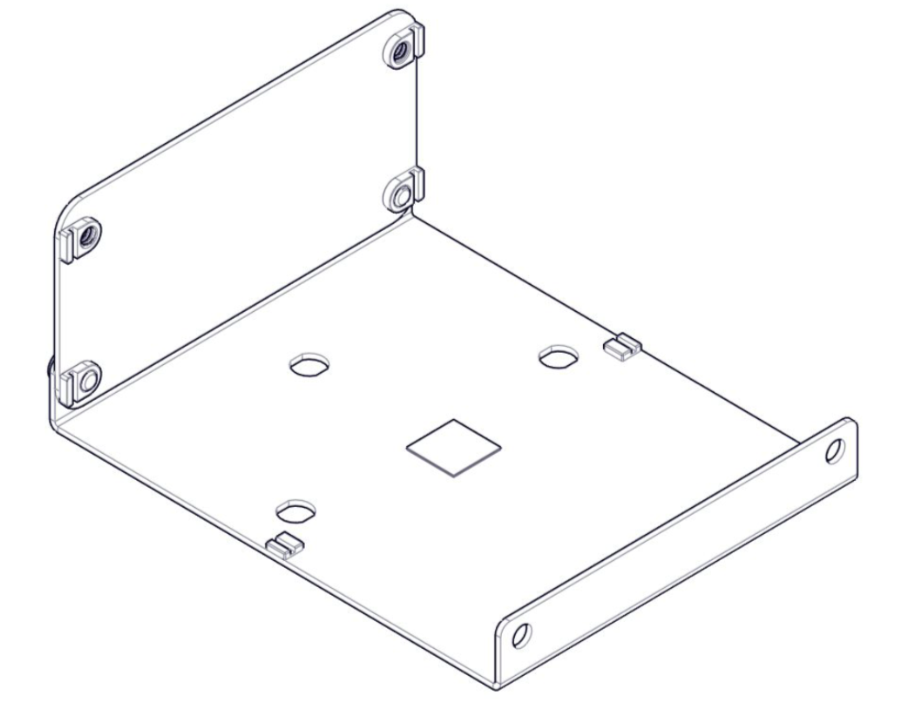
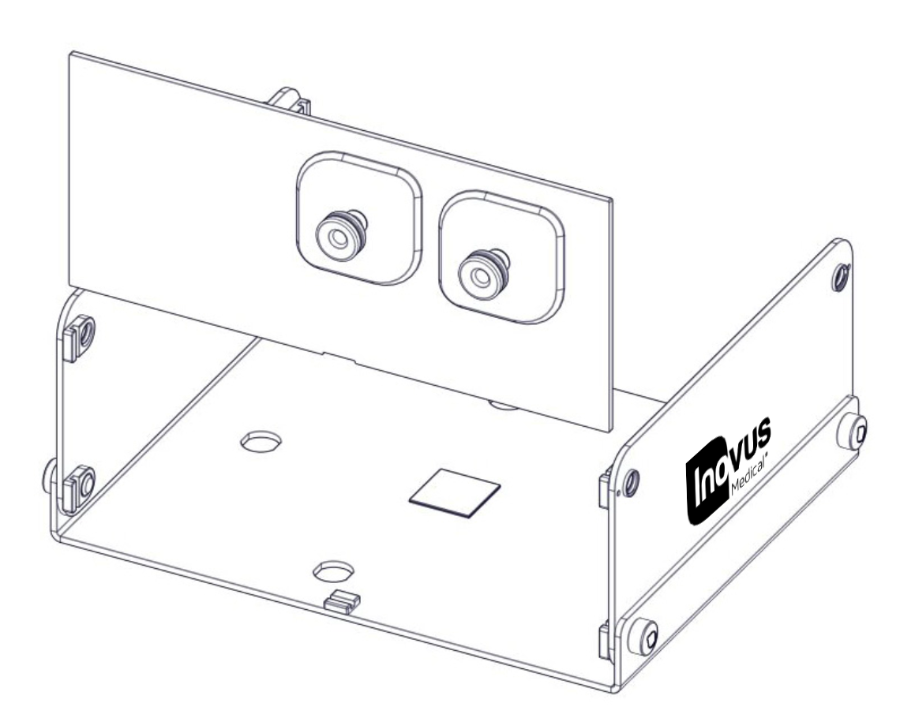
Using the image as a guide, attach the rear panel ensuring the fixtures are oriented as shown.
Step 3
Ensure the fixtures are hand-tightened.
Step 4
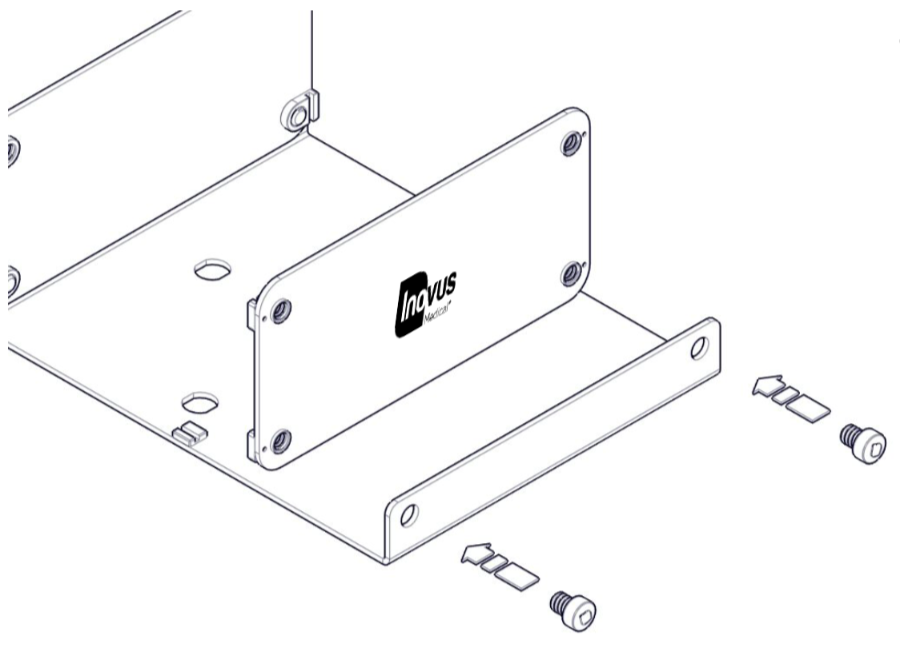
Repeat the last two steps with the front panel as shown in the image. Ensure the logo is facing outwards.
Step 5
Once the bottom elements are secure move onto the side panels.
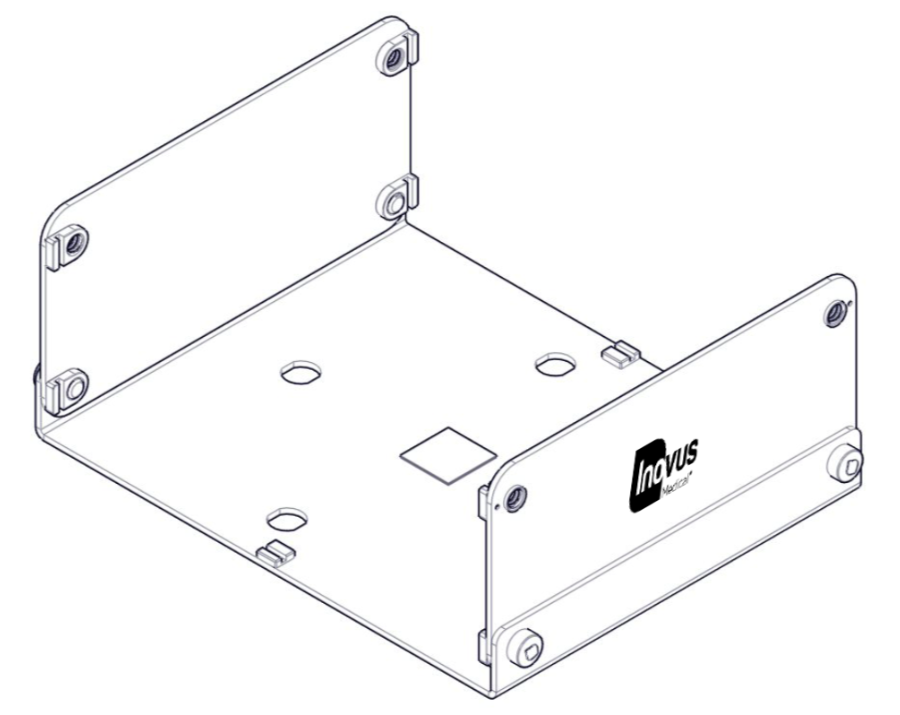
Step 6
Slot the first side panel in place.
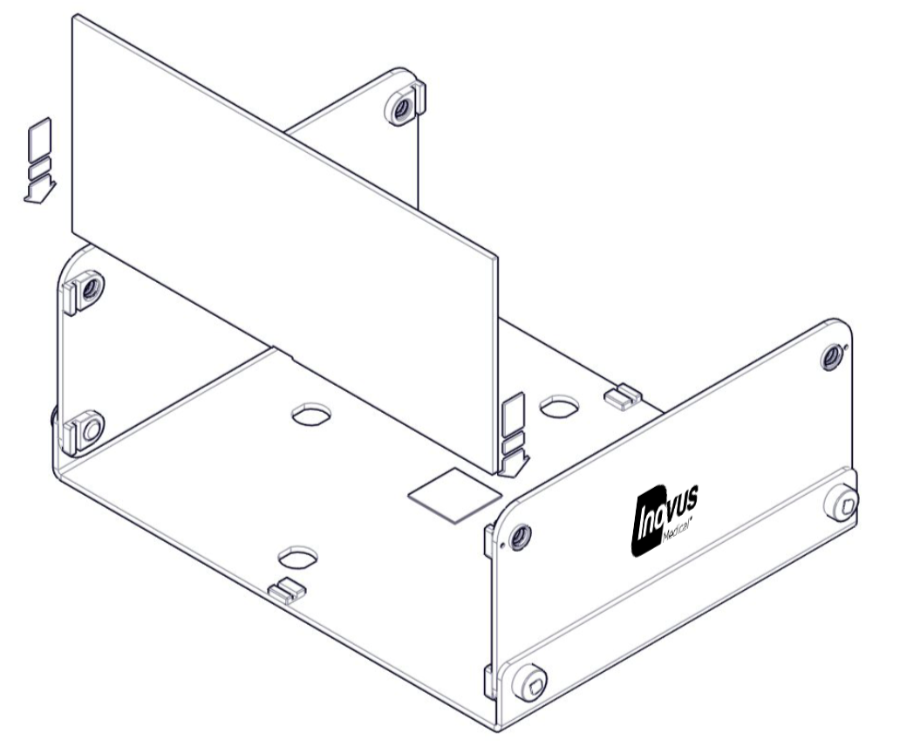
Step 7
The side panels do not require any screws or bolts.
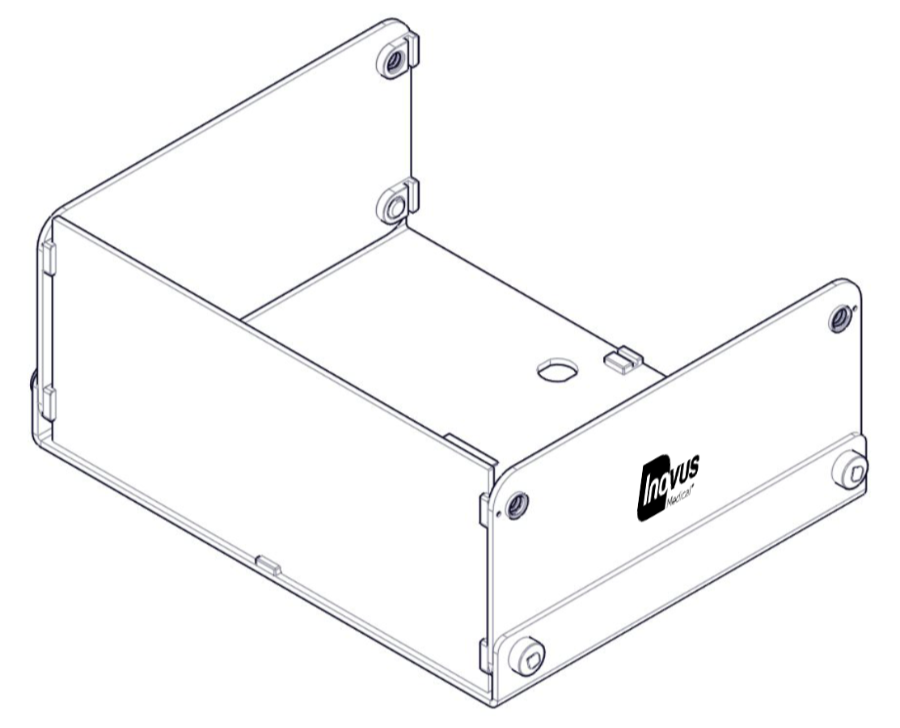
Step 8
Repeat the process with the second side panel.
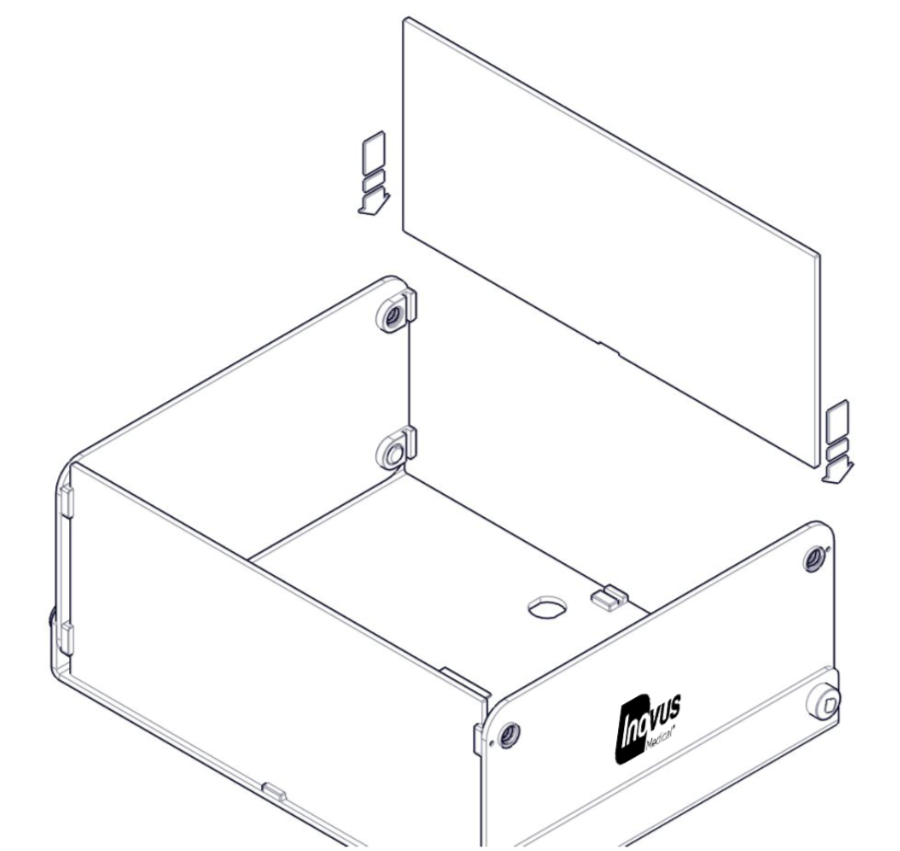
Step 9
Now place the top panel into position.
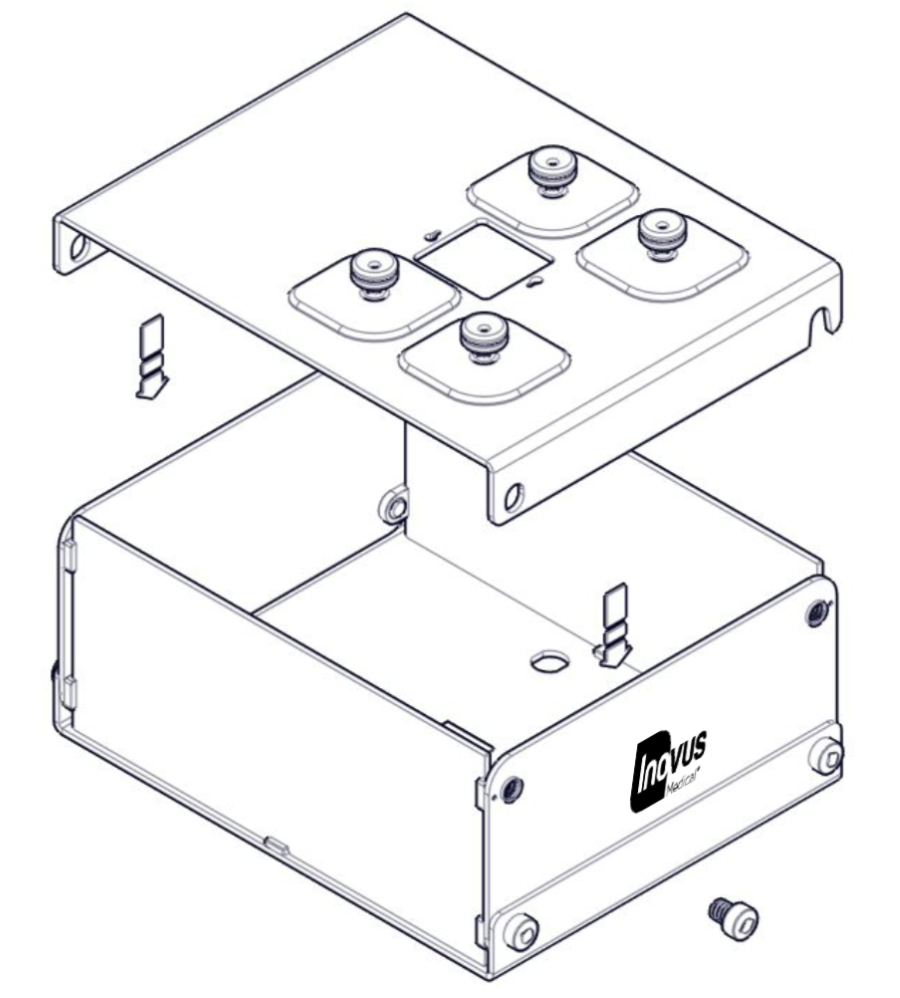
Step 10
Secure in place using the plastic bolts on the one side.
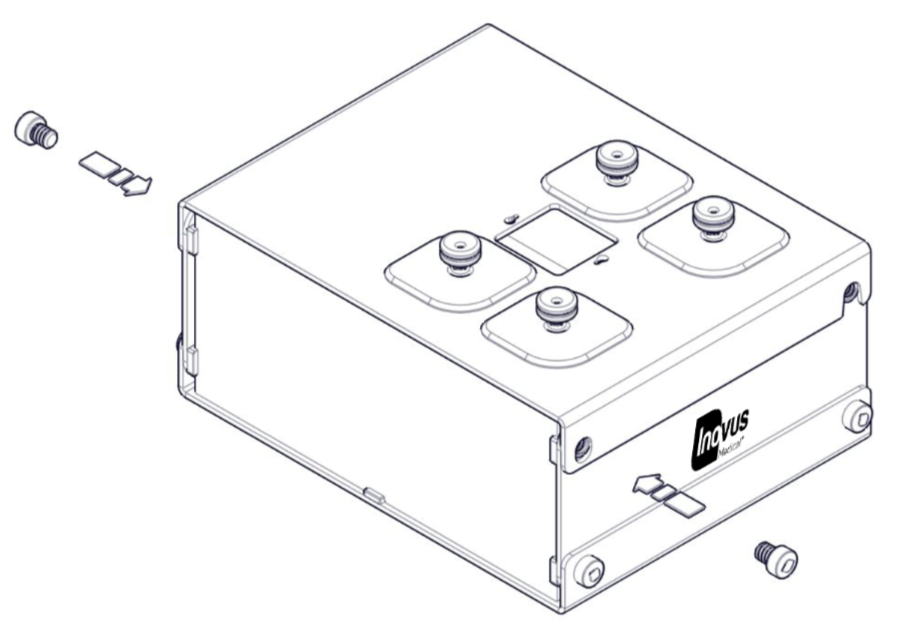
Step 11
Repeat this process on the second side.
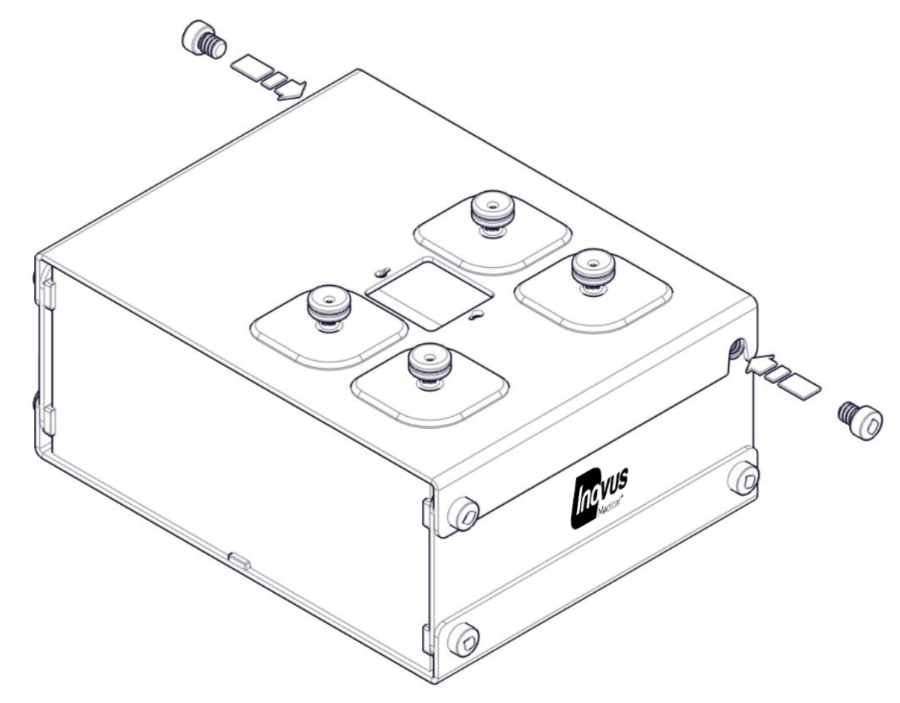
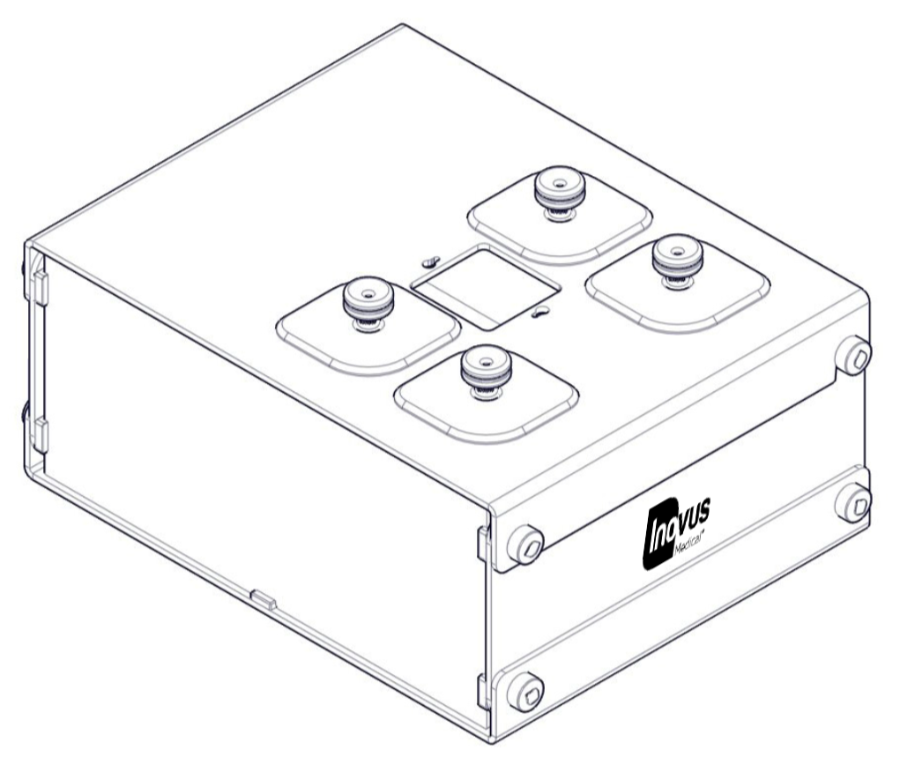
Step 12
The box trainer is now ready to attach and connect the camera.
Step 13
Align the screws on the underside of the camera with the slots positioned on the top of the simulator.
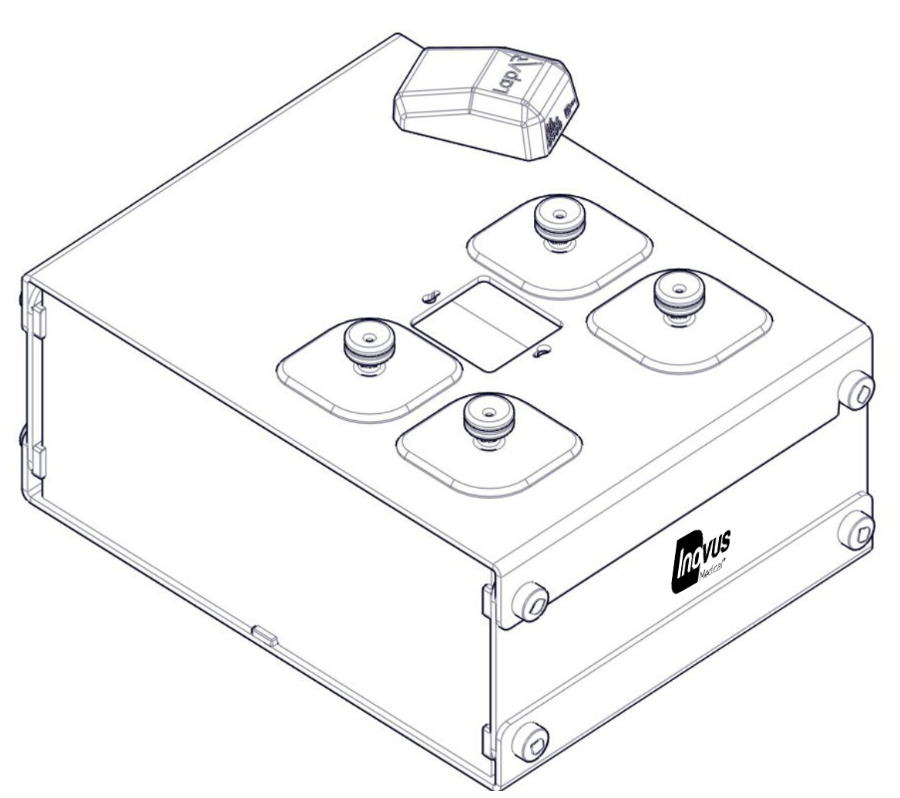
Step 14
Twist the camera into the correct position, ensuring that the lead connections are facing the back of the simulator.
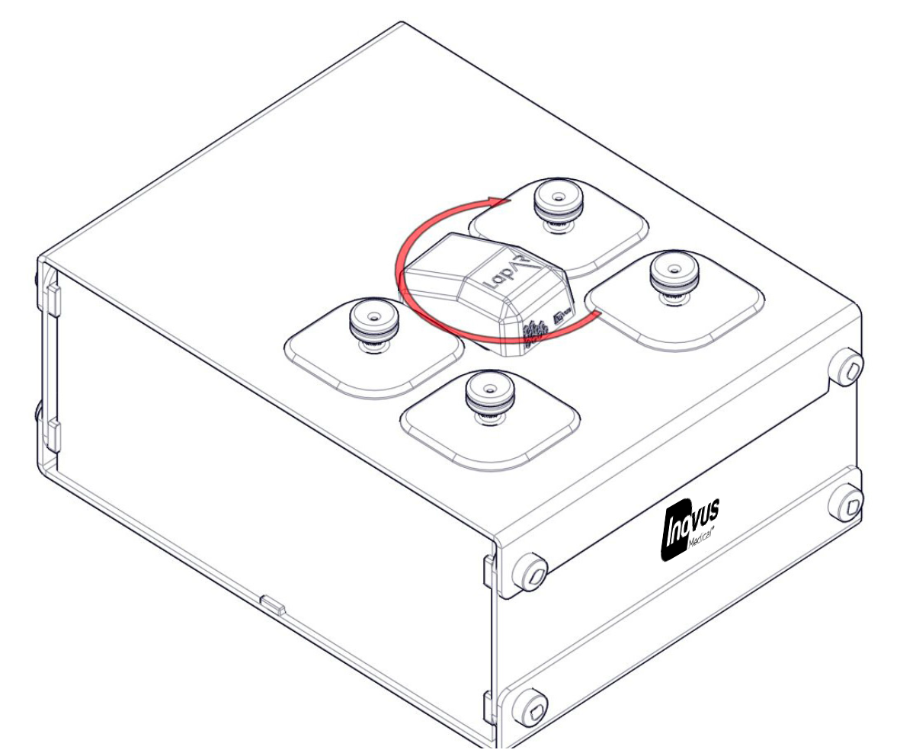
Step 15
Once assembly is complete the lid of the box trainer has been designed to open and close as shown. This allows easy access to the inside of the box trainer.
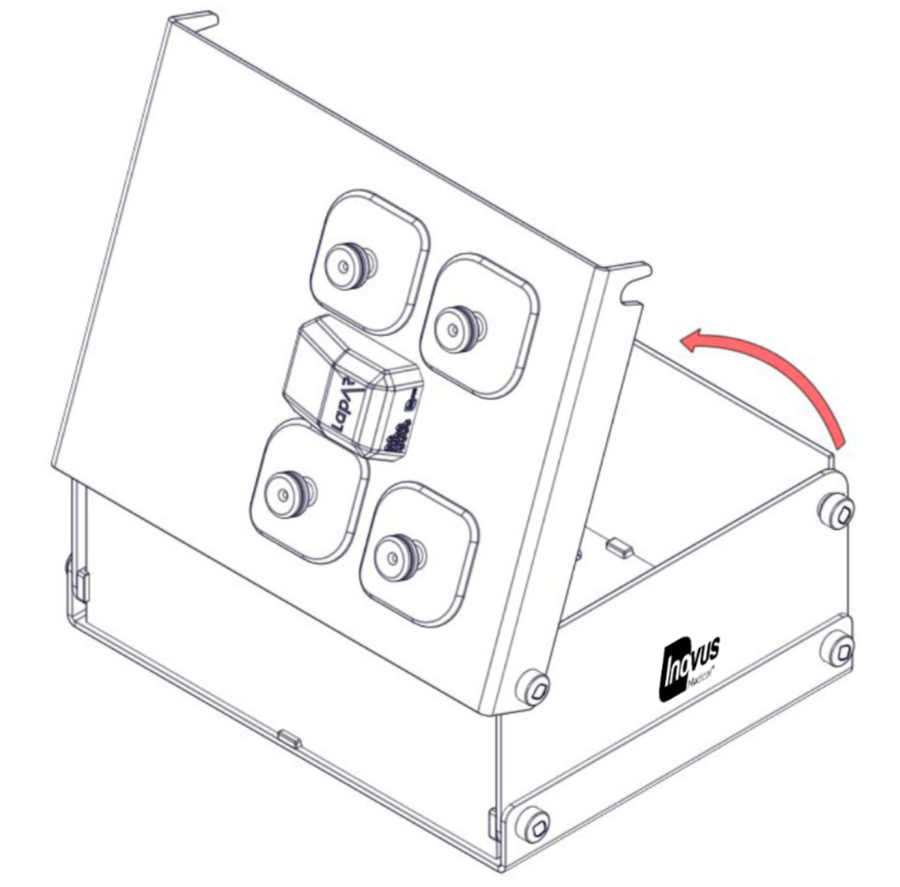
Step 16
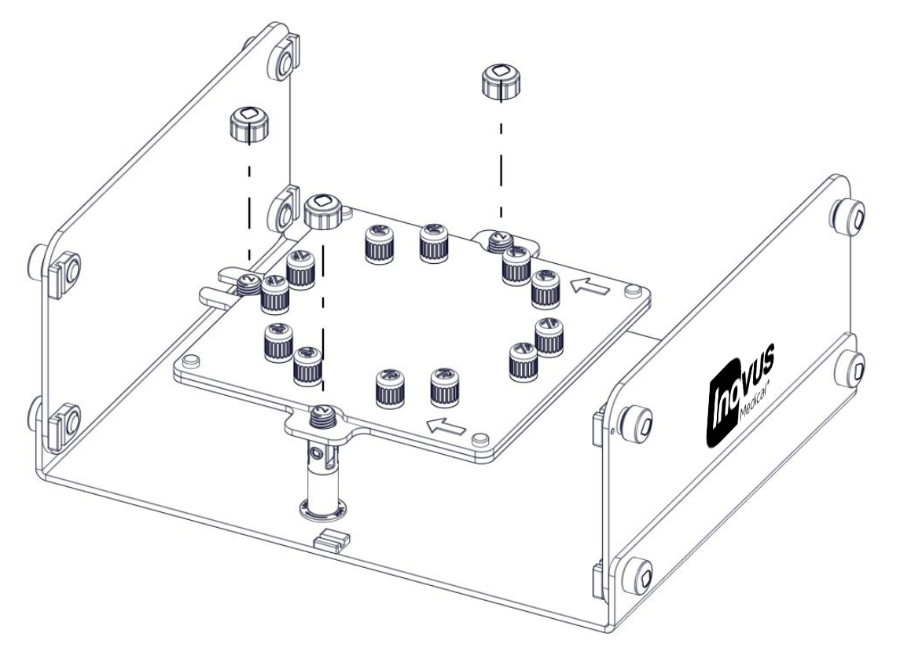
To install the model mounting jig horizontally, insert the three small columns and lock in place as shown. (The LapAR has a variety of uses; the following instructions take you through the options available.)
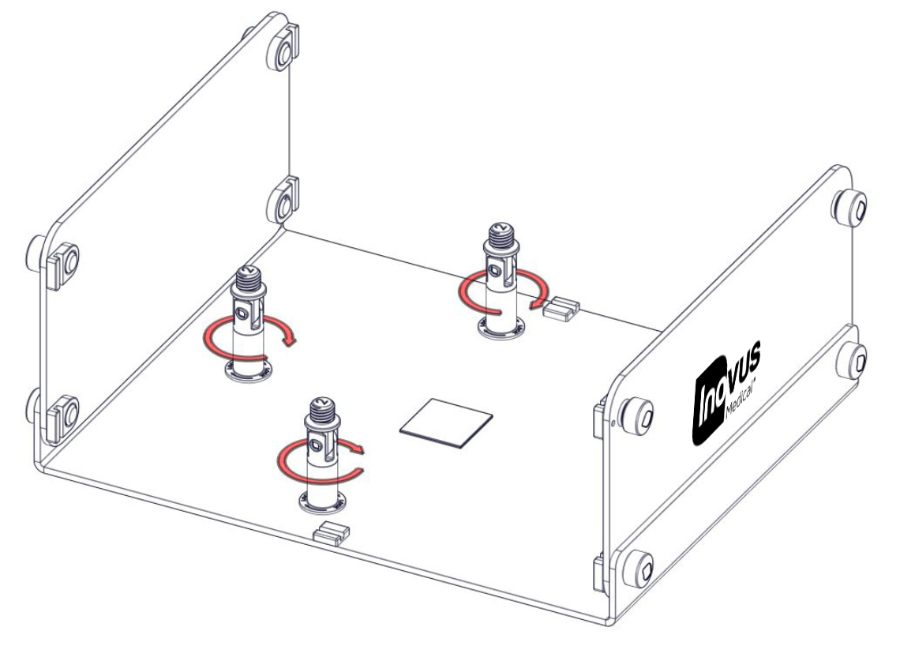
Step 17
Place the model mounting jig over the three columns as shown, screwing the top caps onto the columns.
Step 18
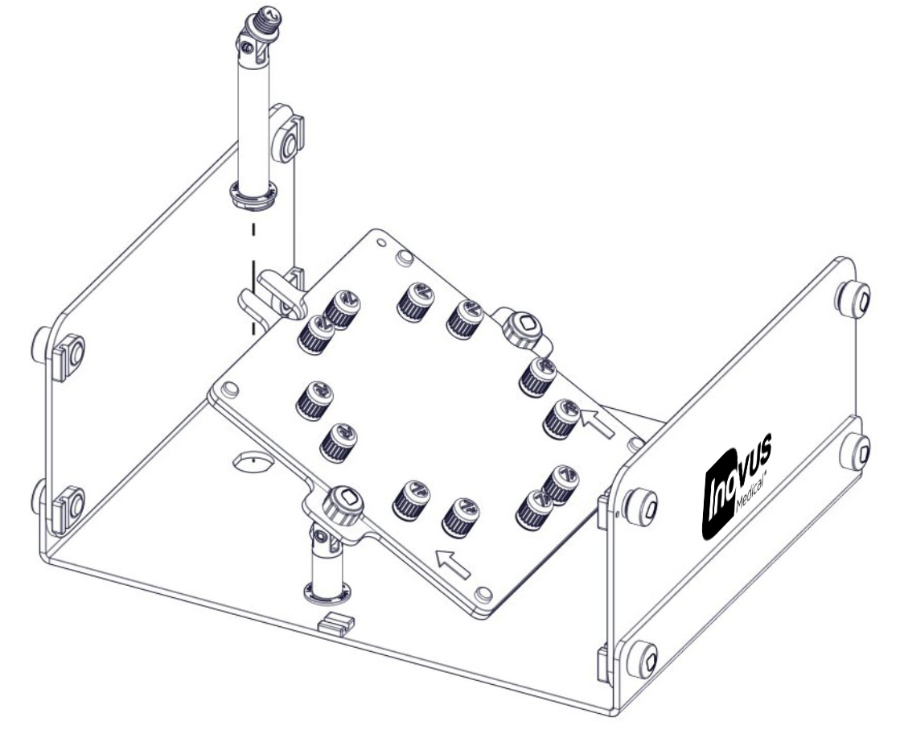
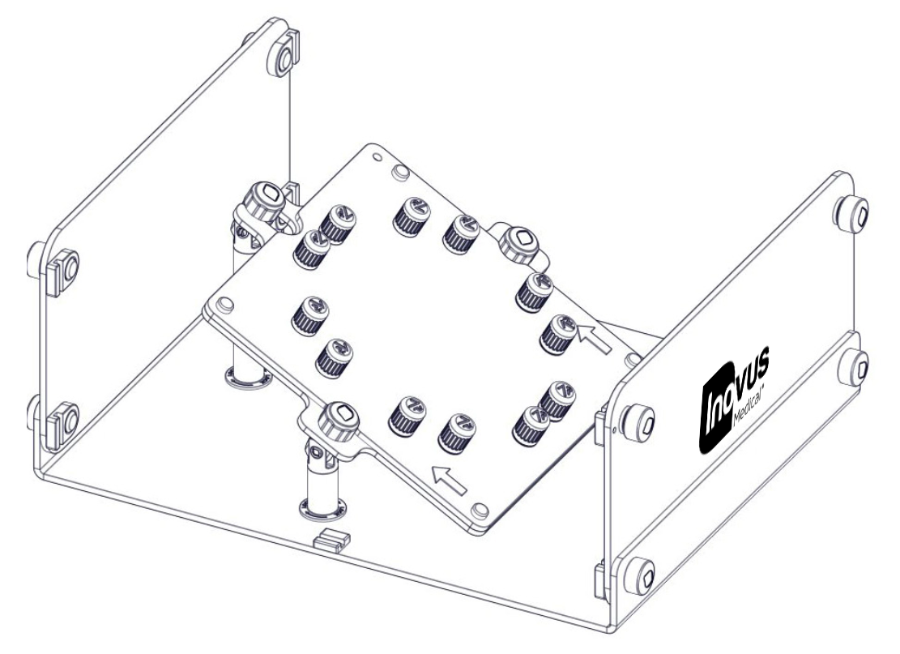
To install the model mounting jig at a 45-degree angle replace the rear column with the larger one as shown.
Step 19
The model mounting jig is now ready to be used with your medical models.
Step 20
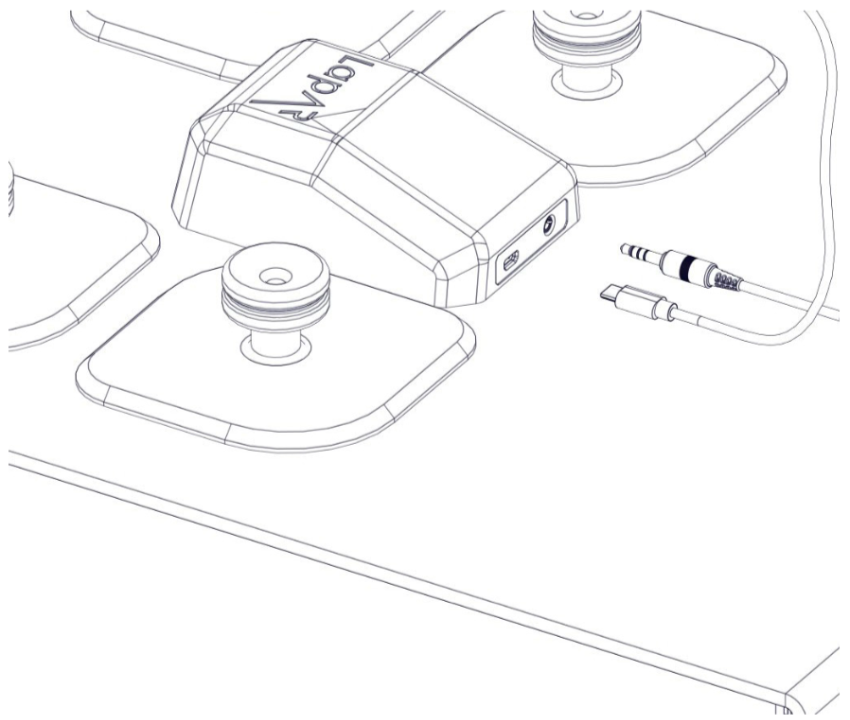
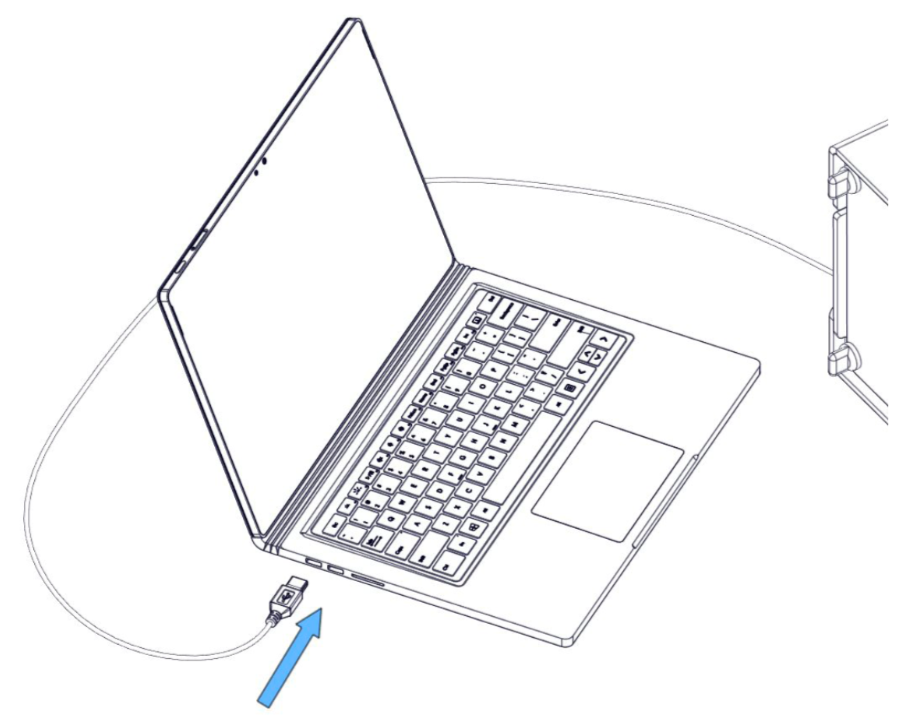
Insert the camera leads (USB/USC) and model connector cable into the back of the camera.
Step 21
Connect the ends of the cable into your Laptop. Software instructions: you will have received a link from us shortly after purchase. Follow the link to download the software platform that is required to run the LapAR. This email also contains user account information such as an activation code and a link to your online portfolio. If you have not received a link please contact your Inovus Medical representative or email info@inovus.org.
Step 22
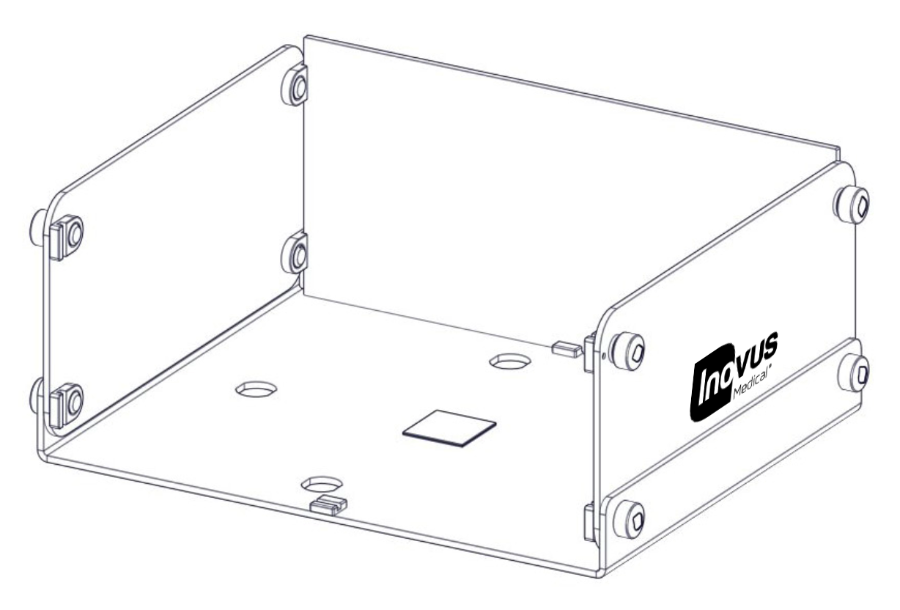
Supporting products: if you have purchased a LaparoBowl kit please follow the instructions below for securing it inside the box trainer. You will notice a velcro pad at the base of the box trainer.
Step 23
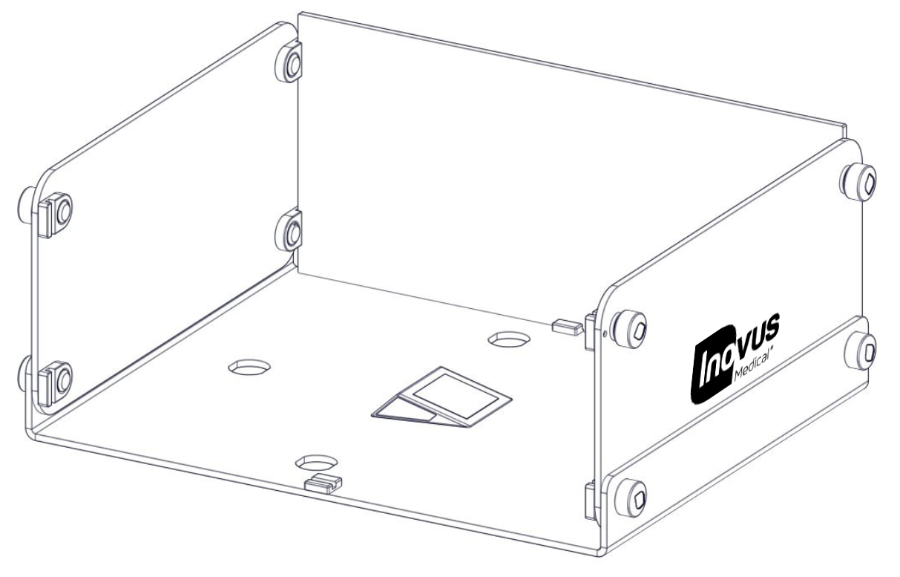
Attach the wedge provided with your EMIGS LaparoBowl kit.
Step 24
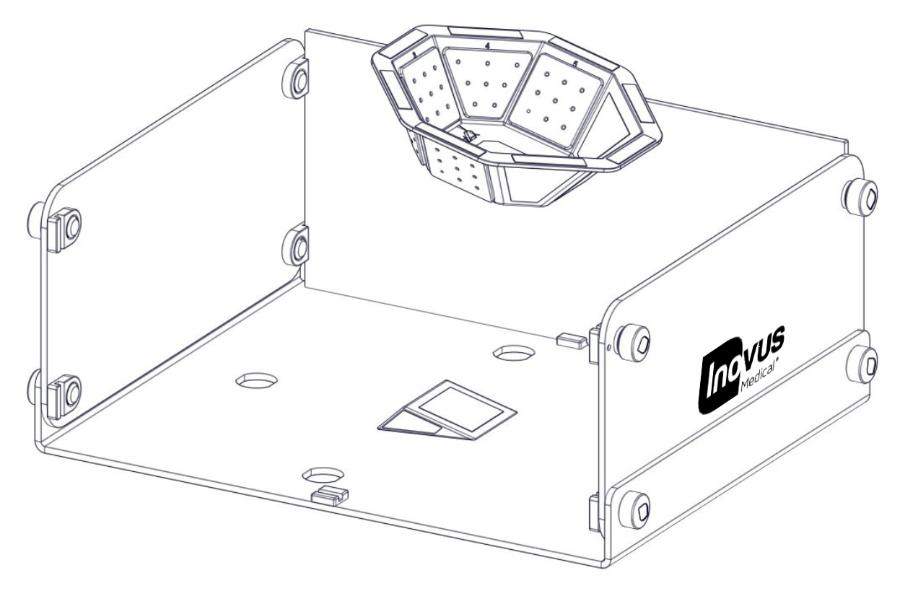
Attach the LaparoBowl to the wedge secured on the base of the box trainer.
Step 25
The model mounting jig can also be installed upside down to act as a platform for the LapPass kit.
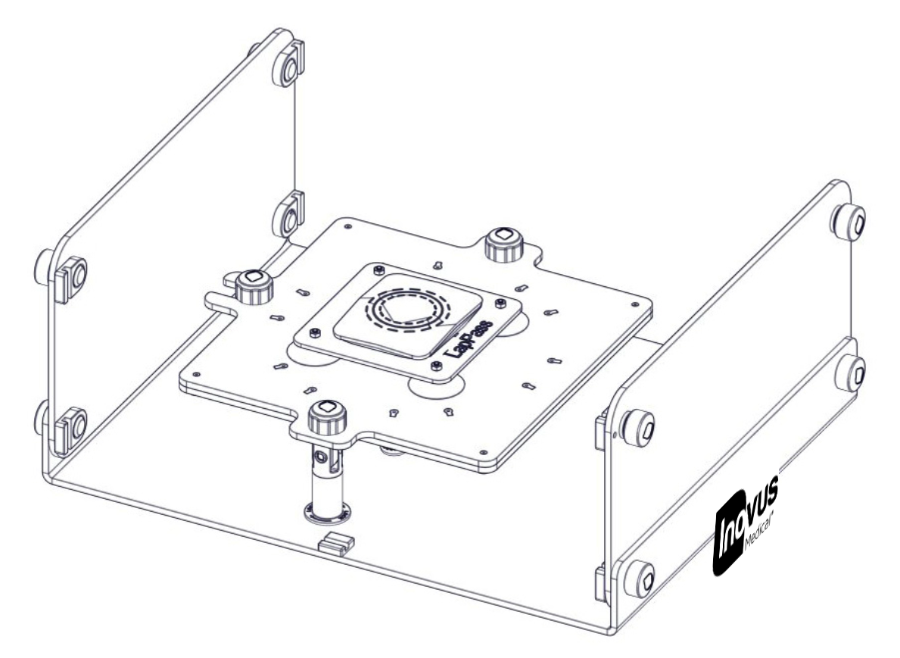
Step 26
Optional extras: optional side panels are available for purchase, should you wish to practice ipsilateral port suturing. To change the side panels see steps 6 - 8. Once you have chosen the best solution for the procedural training you want to practice be sure that all the side panels and top of the box trainer are secured in place.
Related articles
LapAR Setup manual (1st Generation)
Assemble the 1st-generation LapAR box trainer and connect the camera.
EMIGS Manual Skills — task videos & instructions
AAGL's official EMIGS Manual Skills task videos and printable instructions, embedded here for quick reference on your certified LapAR trainer.
Community Discussions (0)
Real-world experiences from other users around this article.
Did this solve your problem?