

Lab Range Cholecystectomy
Assemble the LABrange cholecystectomy model for laparoscopic or robotic training.
Step 1
Laparoscopic assembly - Assembly instructions for the fluorescence-enabled, energy compatible 'synthetic cadaver' for laparoscopic cholecystectomy training.
Step 2
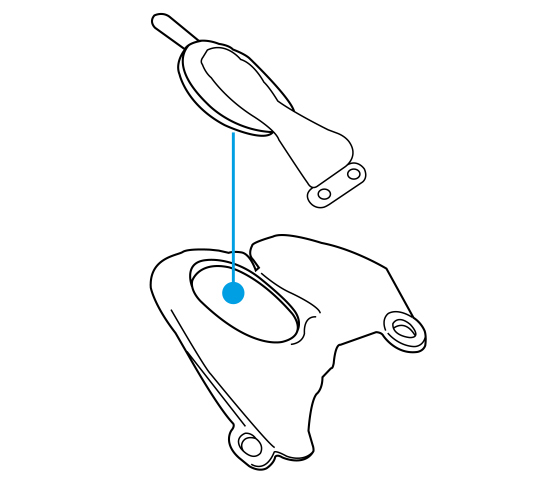
Insert the model and puck. Take the cholecystectomy model and puck. Insert both into the recess within the liver model, ensuring the spine pierces the liver model. Make sure the tab on the puck is facing upward, away from the liver model.
Step 3
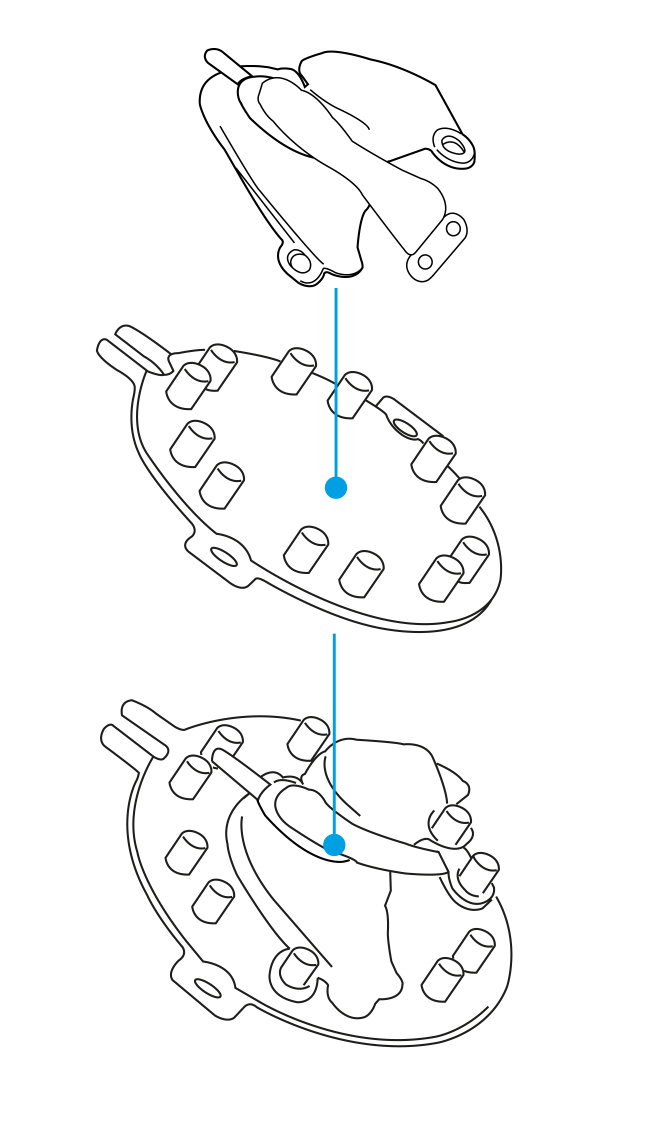
Mount the assembly. Place the cholecystectomy model, puck, and liver model onto the Model Mounting Jig (MMJ) as shown.
Step 4
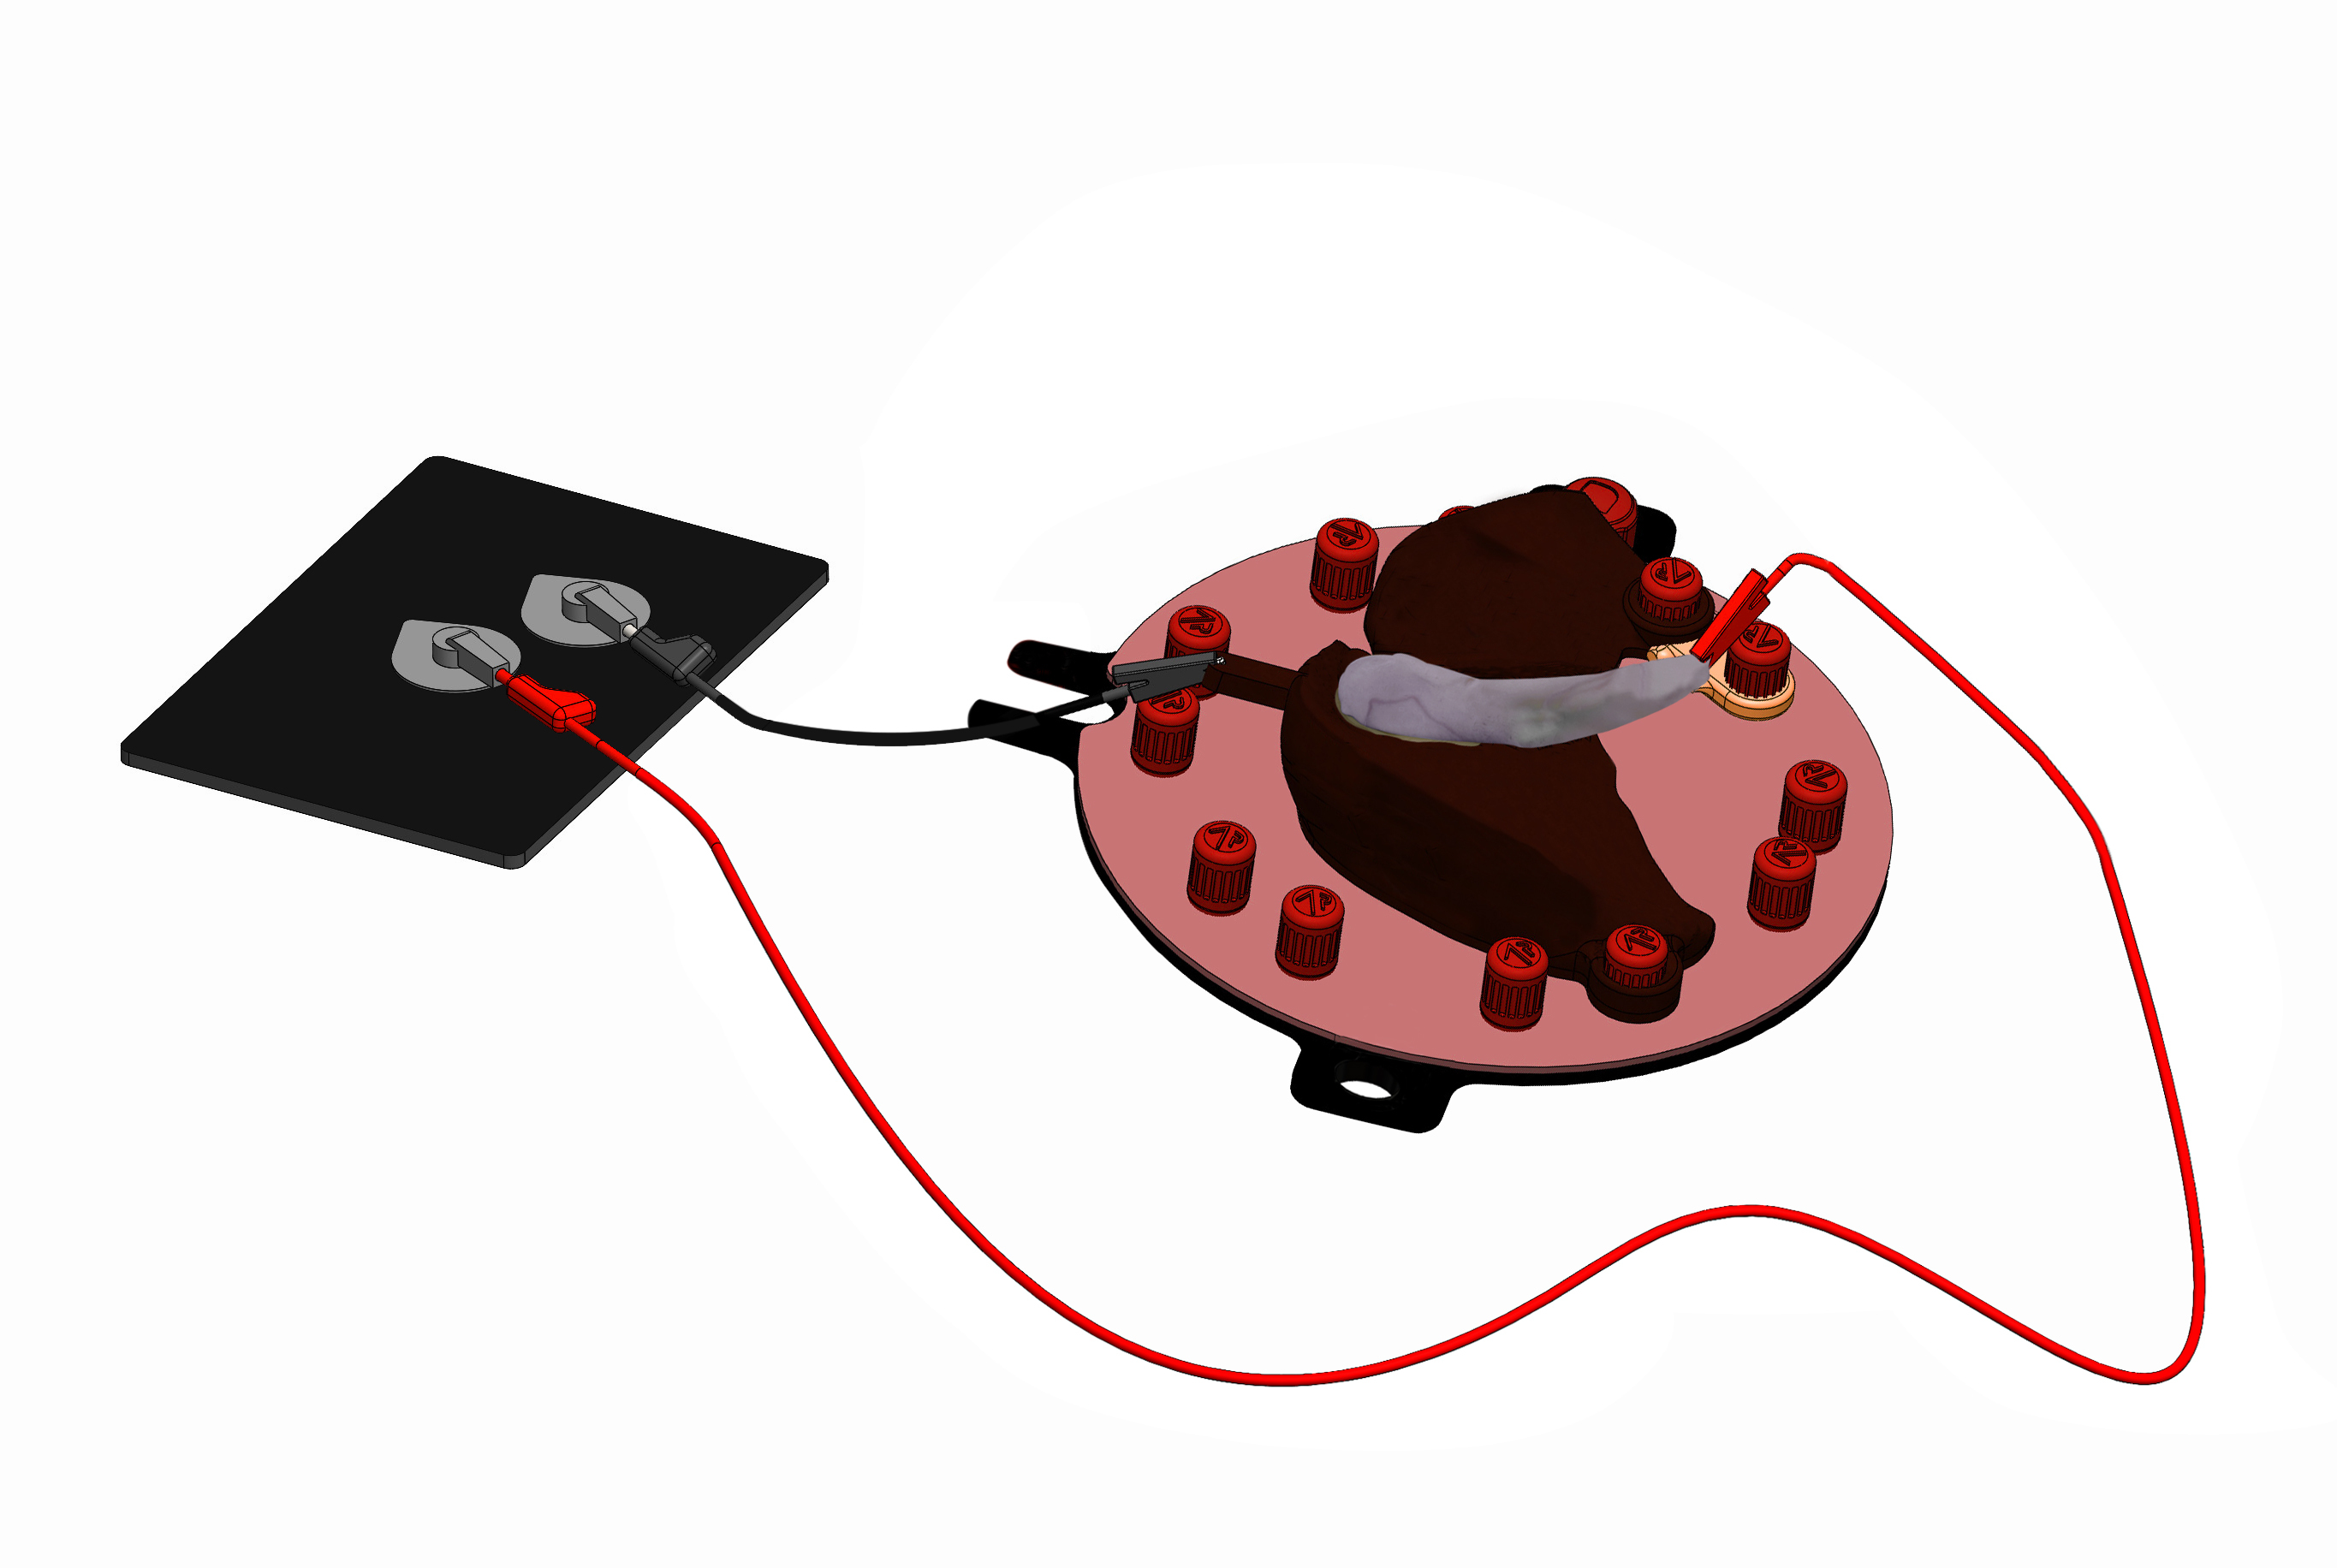
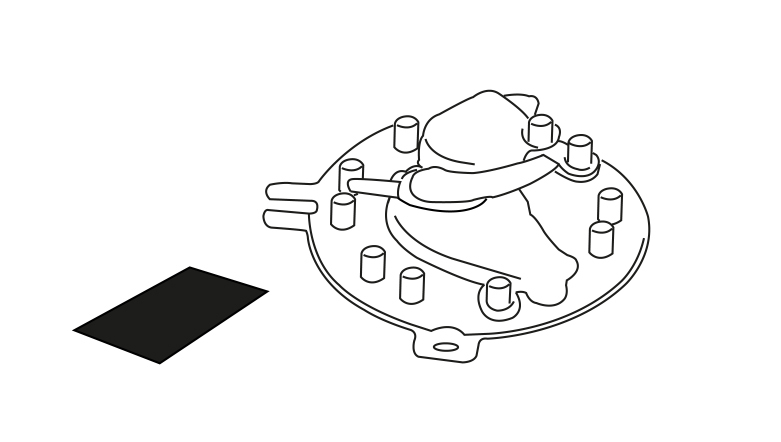
Prepare the workspace. Lay the assembled model and MMJ flat on the desktop. Position the LABrange Monopolar grounding pad next to the assembled MMJ.
Step 5
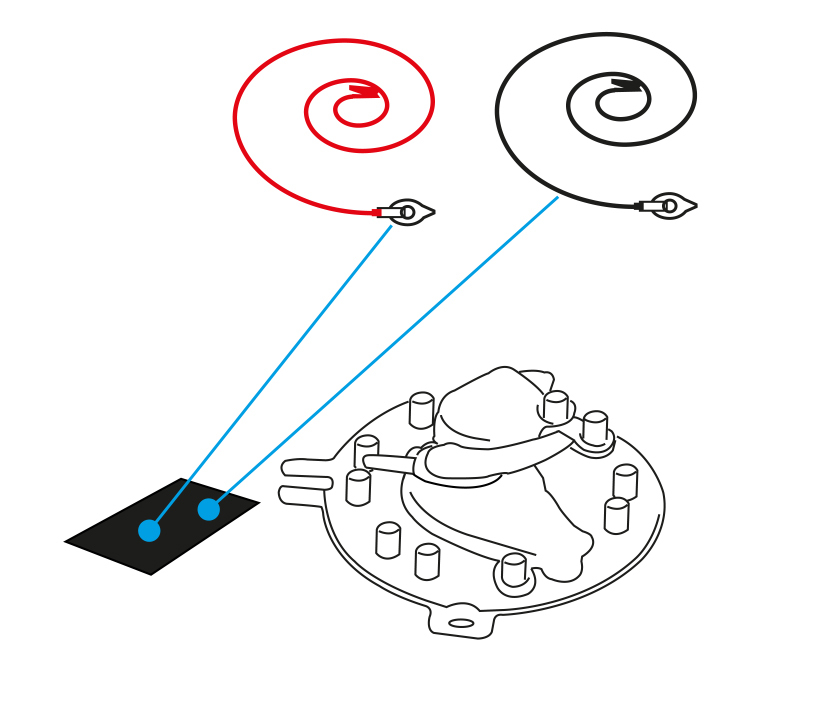
Connect the energy pads. Connect the LABrange energy pads to the grounding pad as shown in the diagram.
Step 6
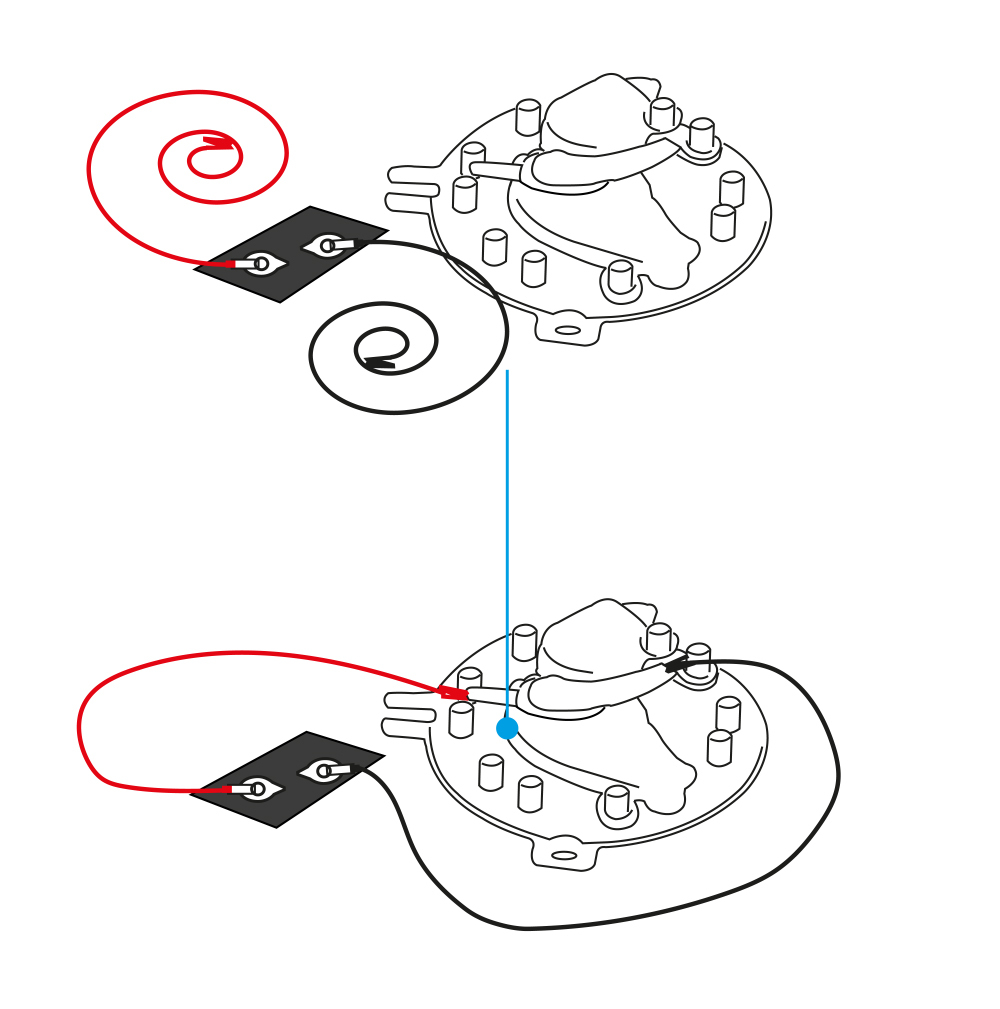
Attach the crocodile clips. Attach the red crocodile clip to the tab at the top of the cholecystectomy model. Attach the black crocodile clip to the bottom of the cholecystectomy model onto the hydrogel tissue.
Step 7
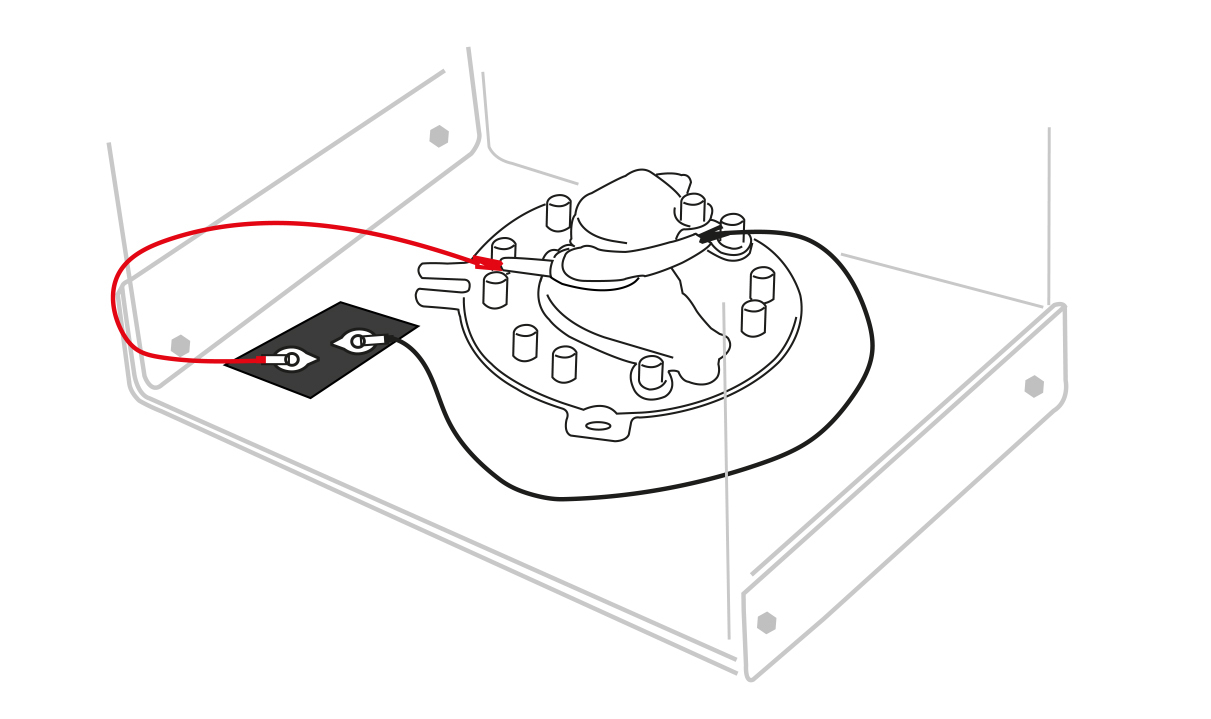
Final placement. Once assembled, place the complete system either on a desktop or on the base of your box trainer.
Step 8 - Angled Base Plate Setup
Robotic assembly - Assembly instructions for the fluorescence-enabled, energy compatible 'synthetic cadaver' for robotic cholecystectomy training.
Step 9
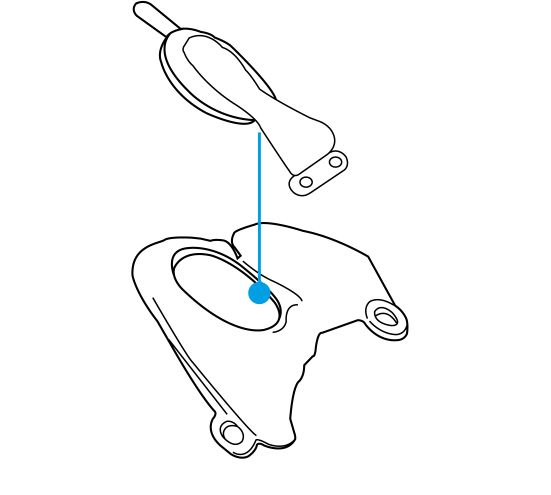
Insert the model and puck. Take the cholecystectomy model and puck. Insert both into the recess within the liver model, ensuring the spine pierces the liver model. Ensure the tab on the puck is facing upward, away from the liver model.
Step 10
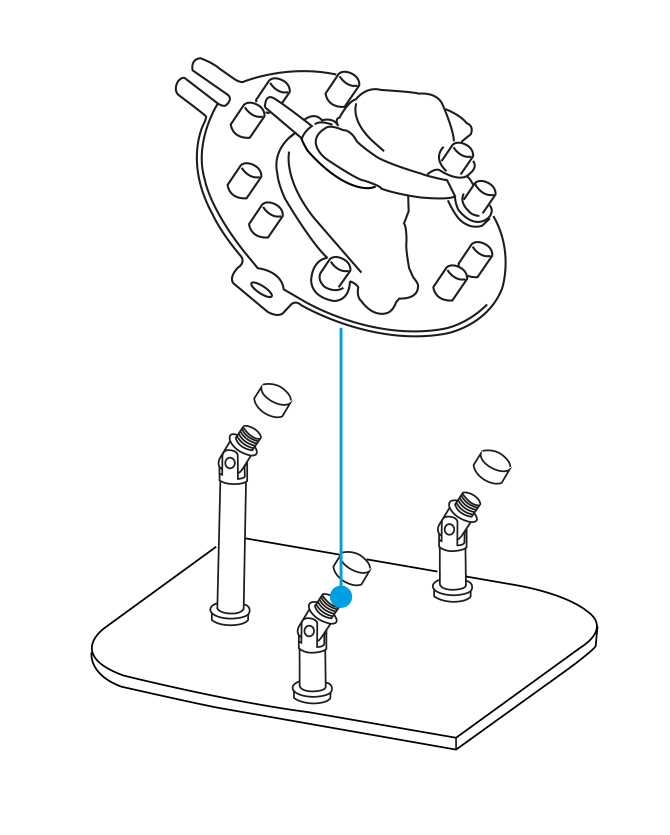
Mount the assembly. Place the cholecystectomy model, puck, and liver model onto the Model Mounting Jig (MMJ) as shown. Lay the assembled unit to the side on a desktop.
Step 11
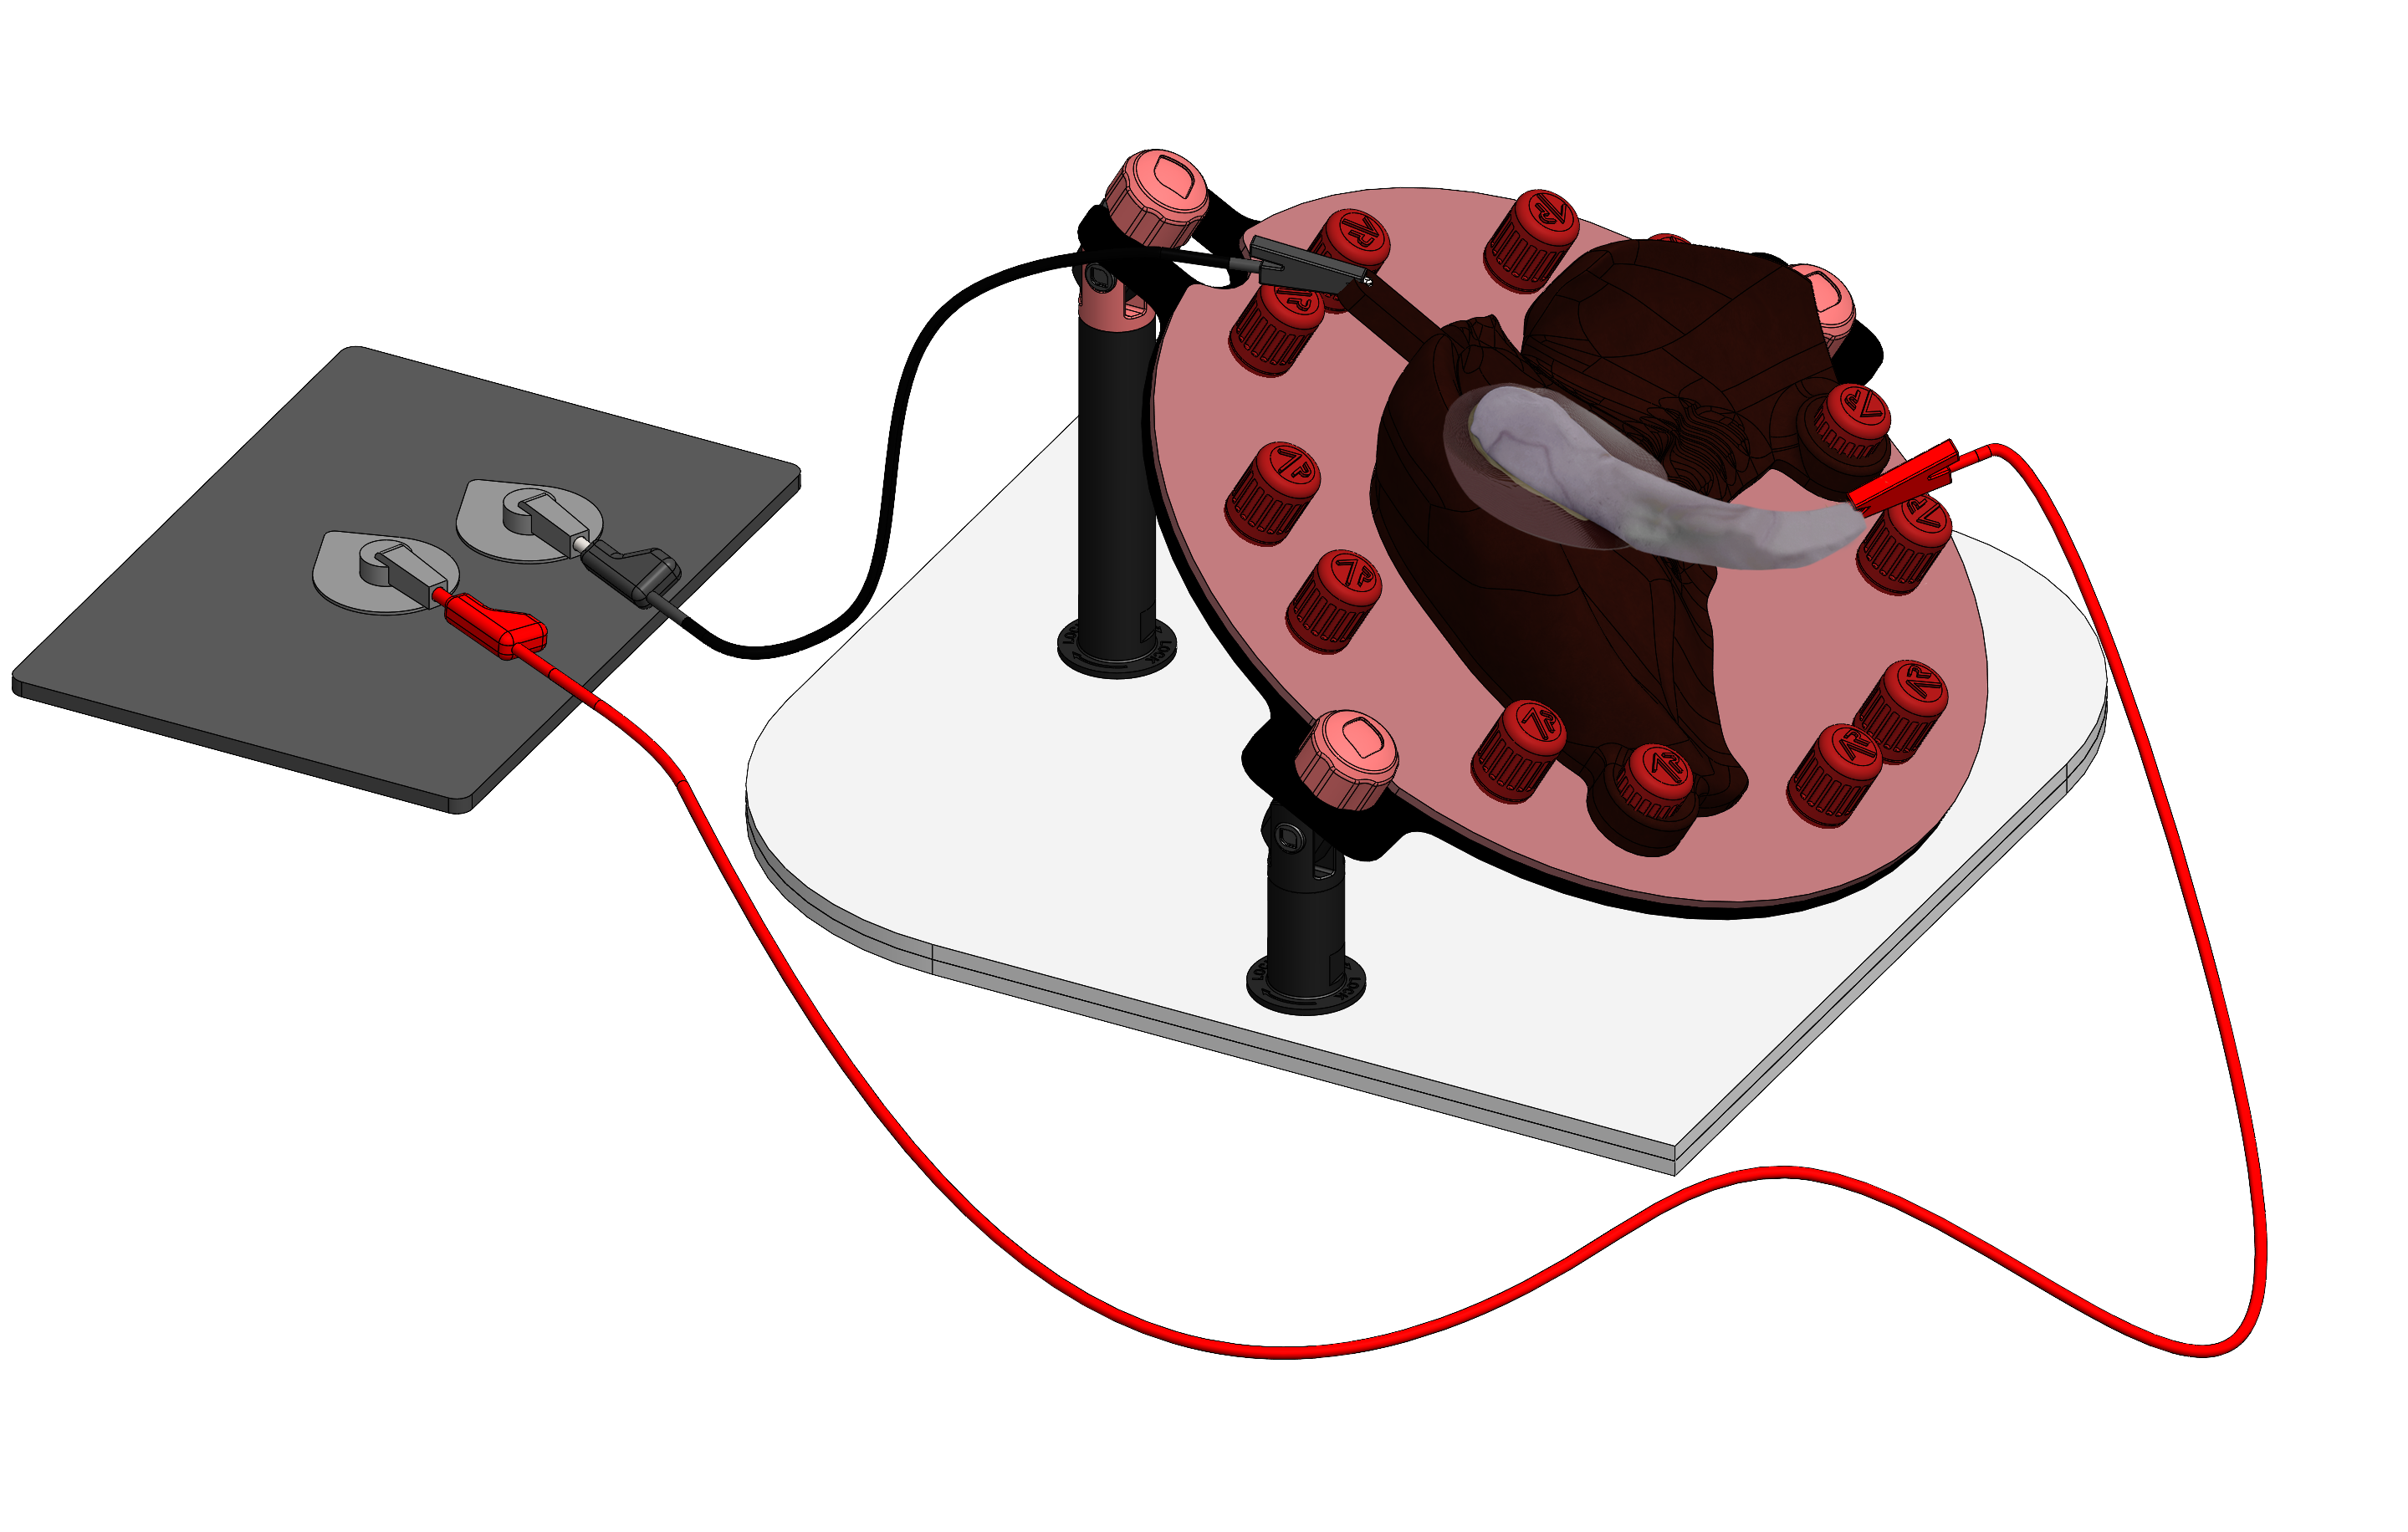
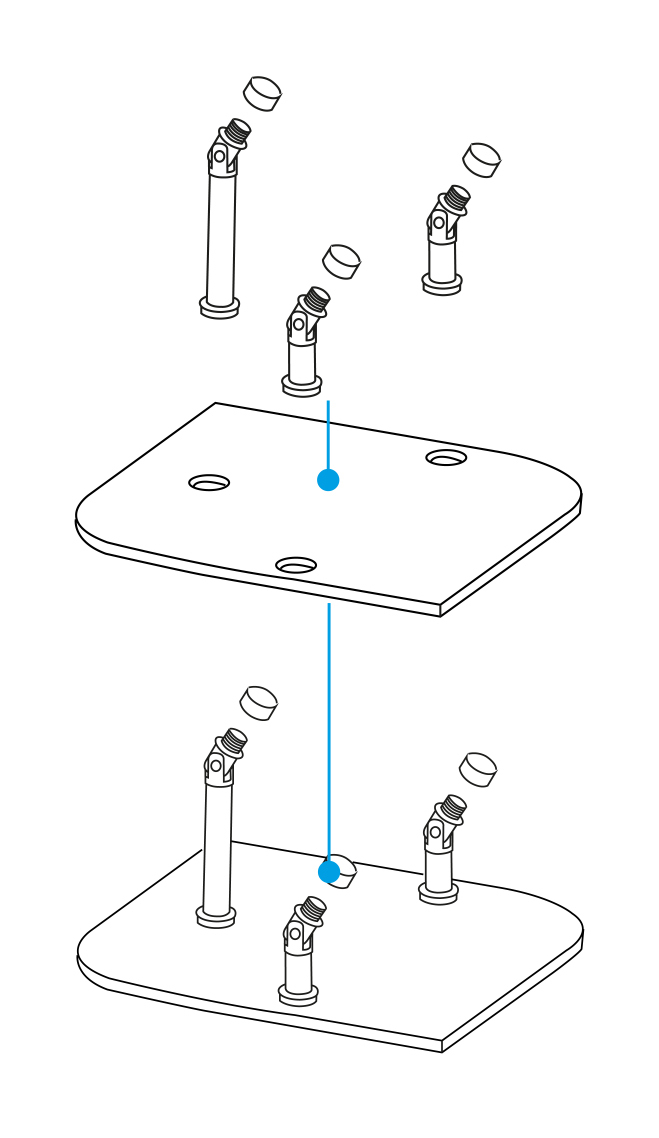
Construct the model positioning system (MPS). Take the three pillars and insert them into the base plate as shown. Remove the three red caps from the tops of the pillars.
Step 12
Combine both MMJ and MPS. Place the assembled MMJ and model onto the pillars as shown. Screw the red caps back on securely, ensuring the MMJ slopes downward, with the tallest pillar positioned at the back of the MPS.
Step 13
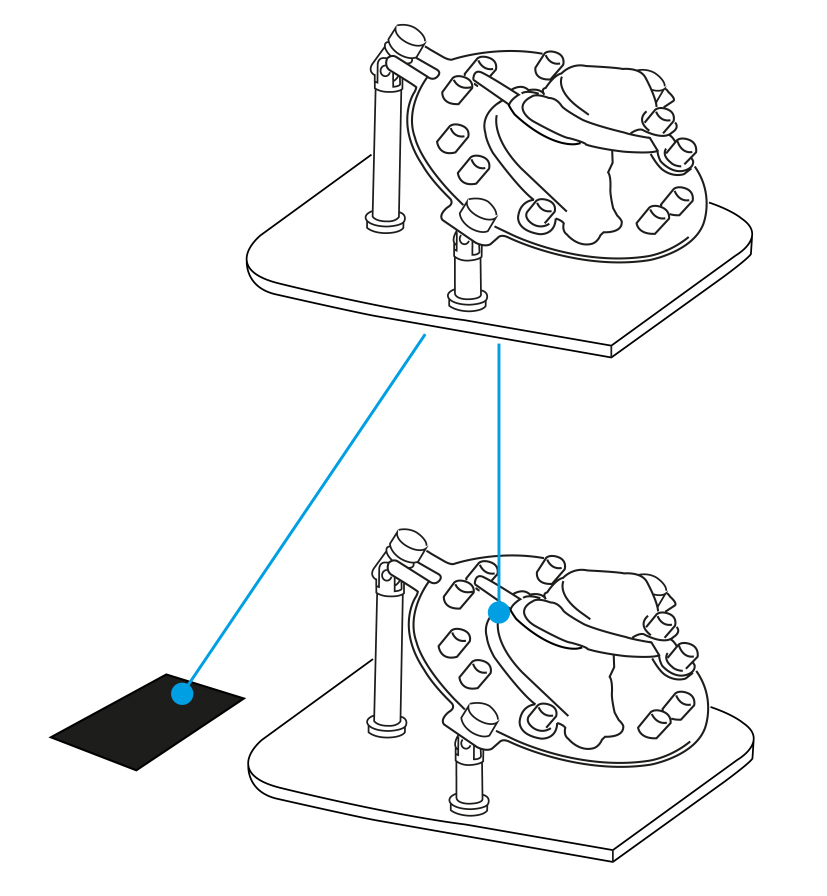
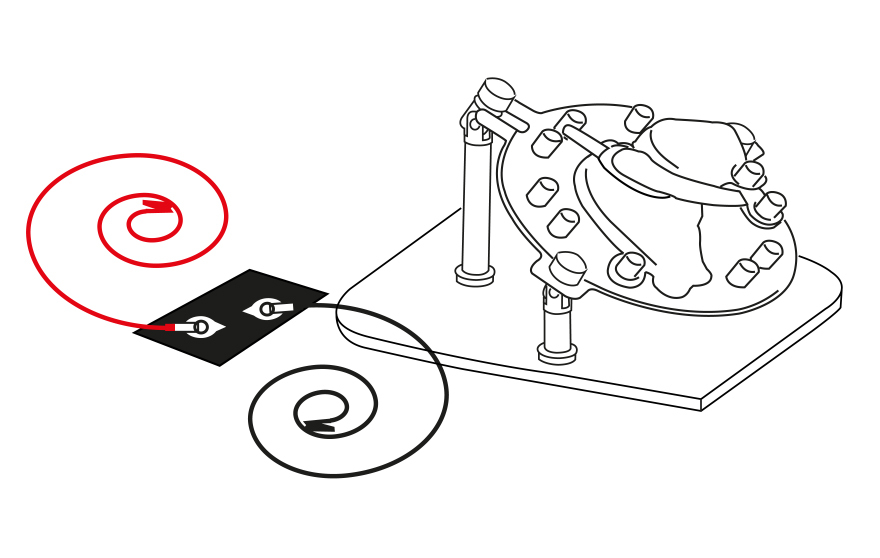
Prepare the workspace. Lay the assembled model and MMJ flat on the desktop. Position the LABrange Monopolar grounding pad next to the assembled MMJ.
Step 14
Connect the energy pads. Connect the LABrange energy pads to the grounding pad as shown in the diagram.
Step 15
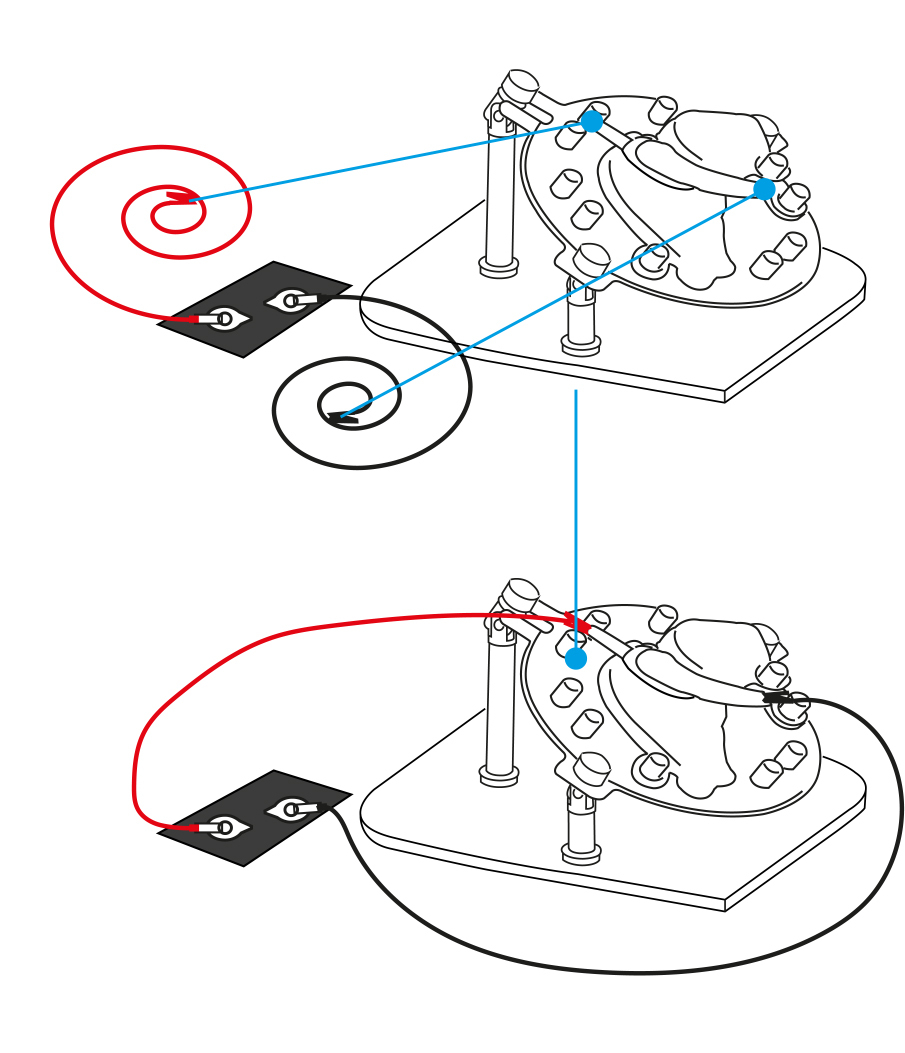
Attach the crocodile clips. Attach the red crocodile clip to the tab at the top of the cholecystectomy model. Attach the black crocodile clip to the bottom of the cholecystectomy hydrogel tissue.
Community Discussions (0)
Real-world experiences from other users around this article.
Did this solve your problem?