

HystAR Pro Setup Manual
Assemble the second-generation HystAR Pro sim station and monitor.
Welcome to the step-by-step assembly guide for the second generation HystAR Pro. Whether you prefer step by step instructions or a video demonstration, this guide will walk you through the assembly process.
Before you begin, take a moment to review the package's contents and acquaint yourself with the included components. The following content has been crafted to provide you with all the insights required to transform individual parts into a functional and invaluable tool for honing your surgical skills.
Looking for the 1st Generation HystAR Pro setup manual?
If you purchased a HystAR Pro before 1st May 2024 you can access the HystAR Pro (1st Generation) setup manual here or in the Downloads section below.
Step 1
When opening your simulator it is recommended that you unpack all package contents and arrange them before starting construction.
Step 2
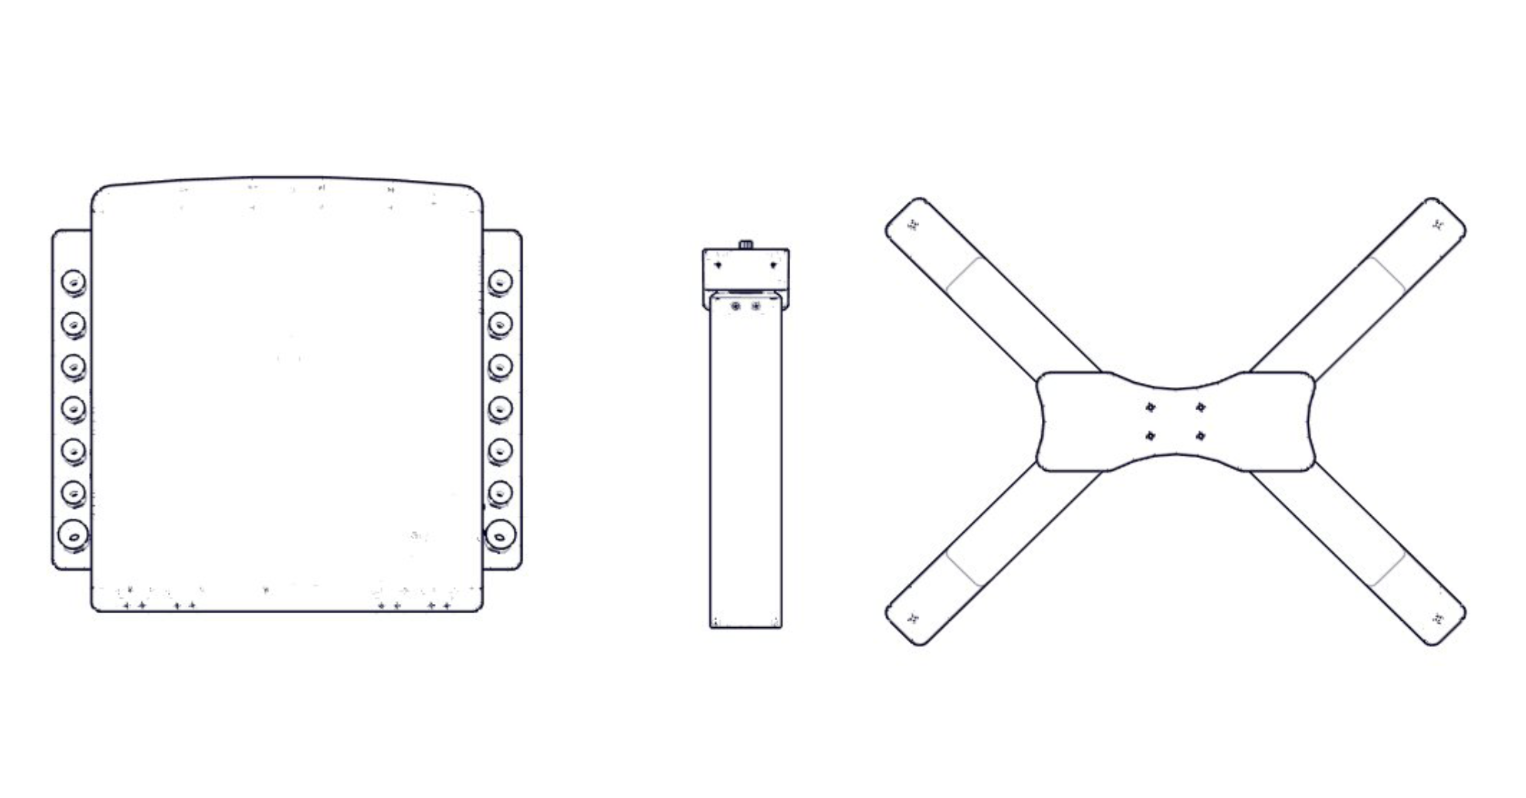
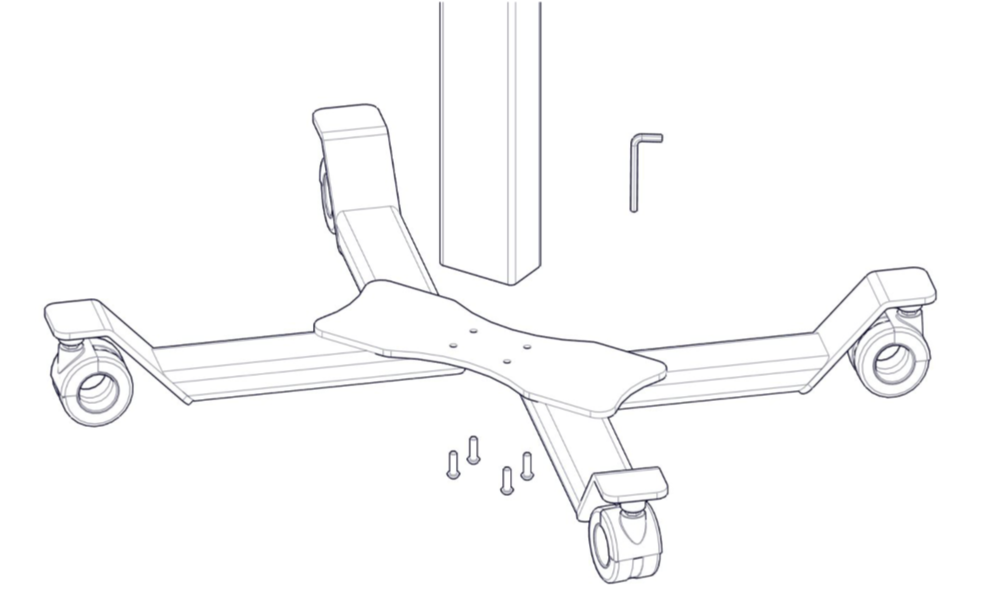
Start the assembly of your sim station by screwing the 4x bolts into the underside of the base. You can do this using the allen key provided.
Step 3
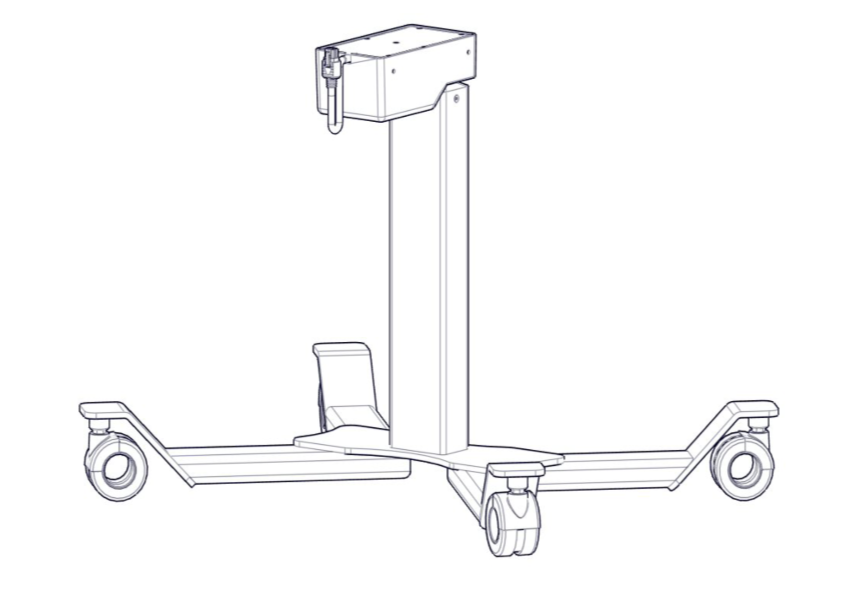
Now the base is attached to the main column you are ready to attach the top box.
Step 4
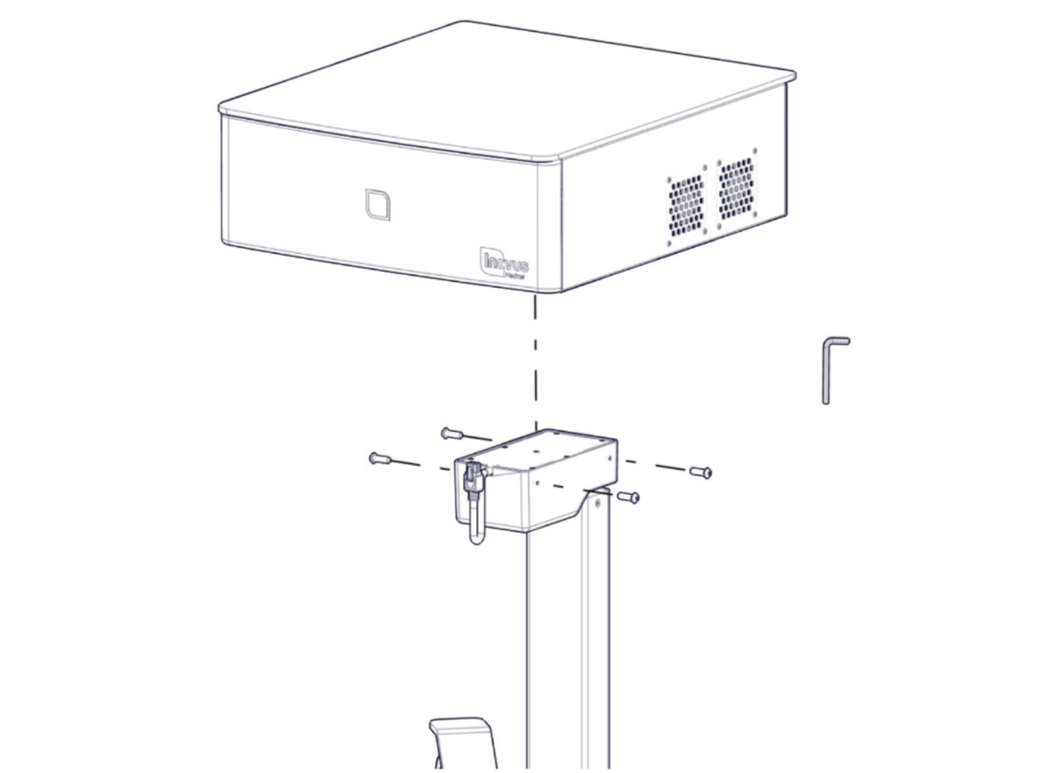
Locate the 4x bolts provided to attach the top box.
Step 5
Insert two bolts into the side of the sim station main column and top box, screwing in place with the allen key provided.
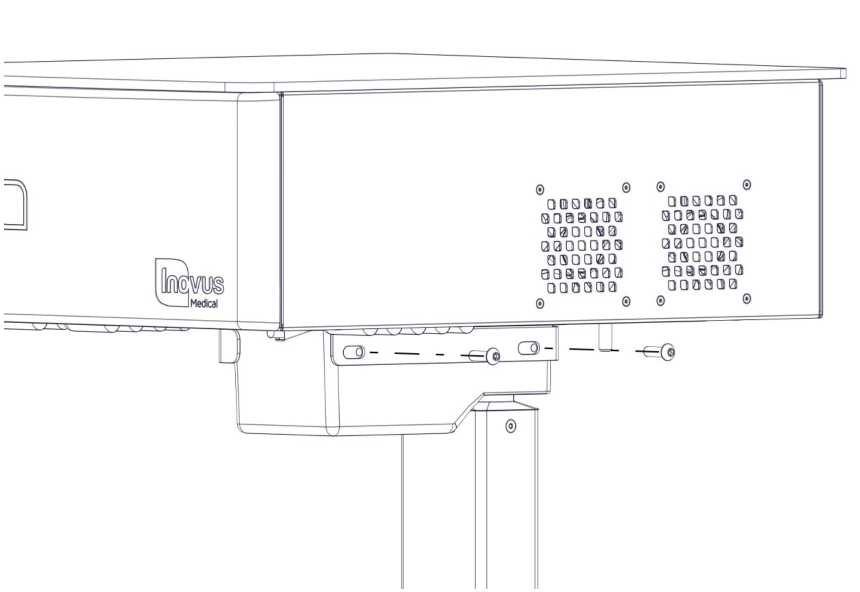
Step 6
Ensure the bolts are finger tightened initially while you move onto the next step.
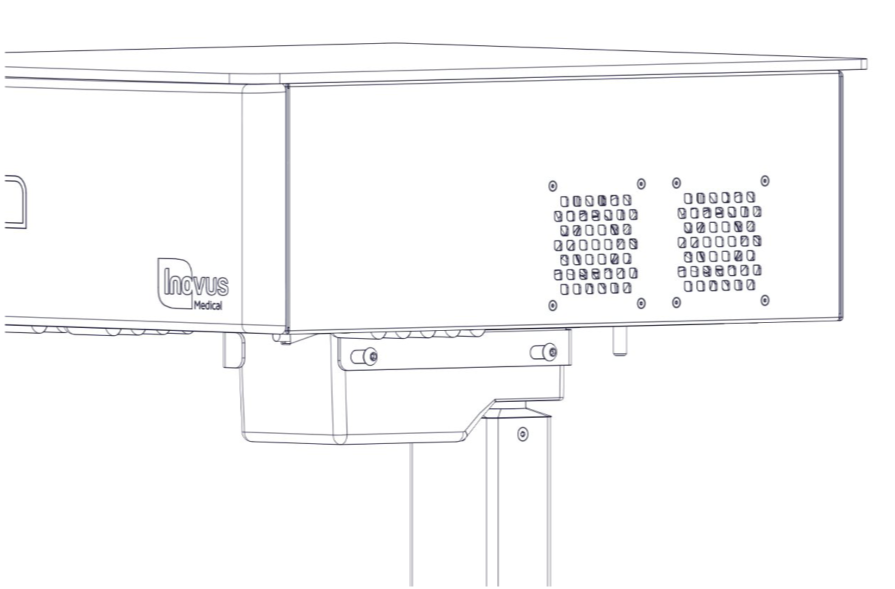
Step 7
Repeat this process on the other side of the sim station.
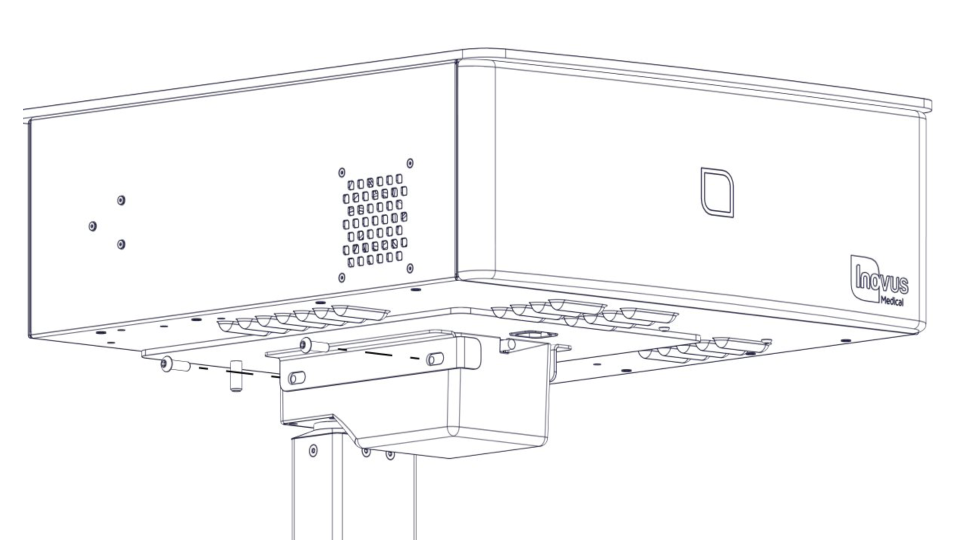
Step 8
Tighten all screws with allen key provided. The top box should now be securely attached to the main column.
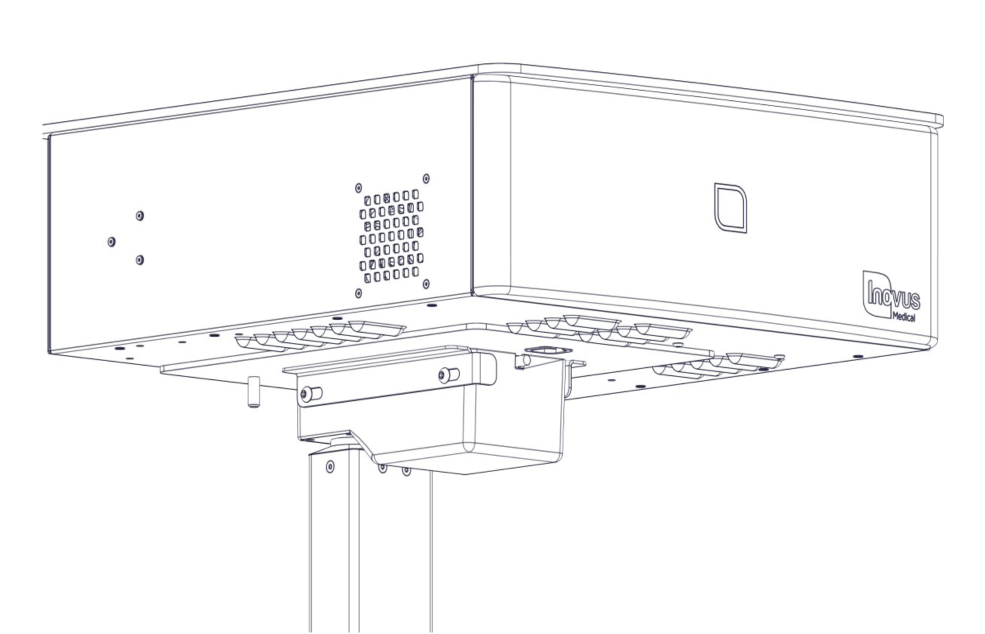
Step 9
Locate the main column lead on the underside of the sim station box.
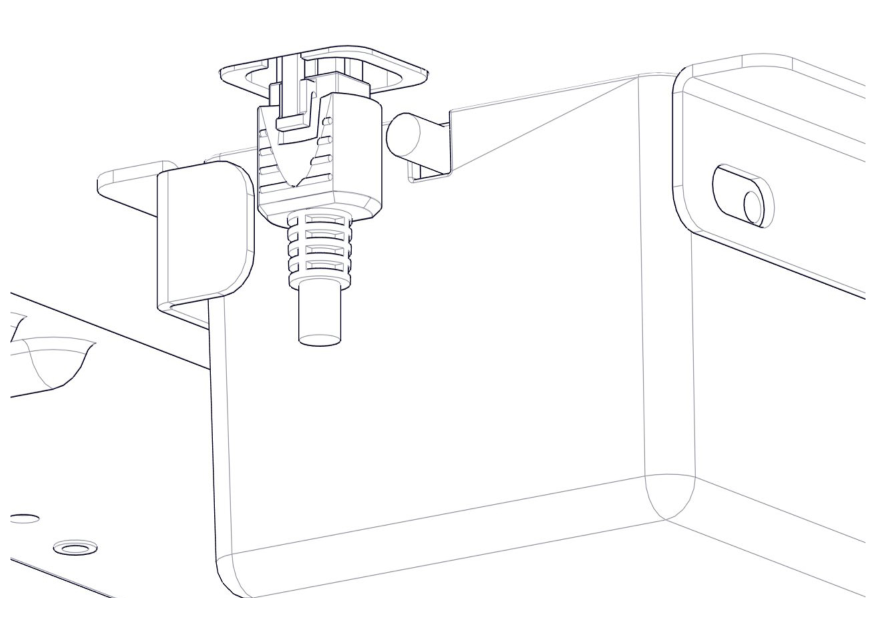
Step 10
Secure the lead in place with the connector as shown.
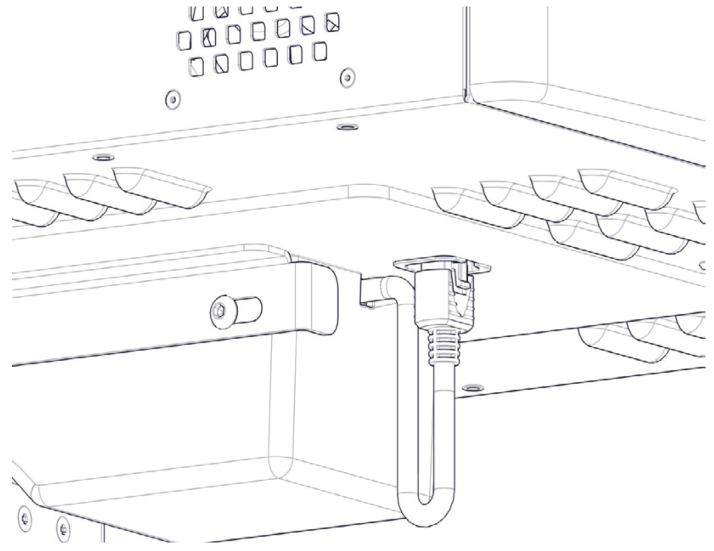
Step 11
Taking the Z-shaped monitor bracket attach to the underside of the top box of the sim station using the 2x nuts provided.
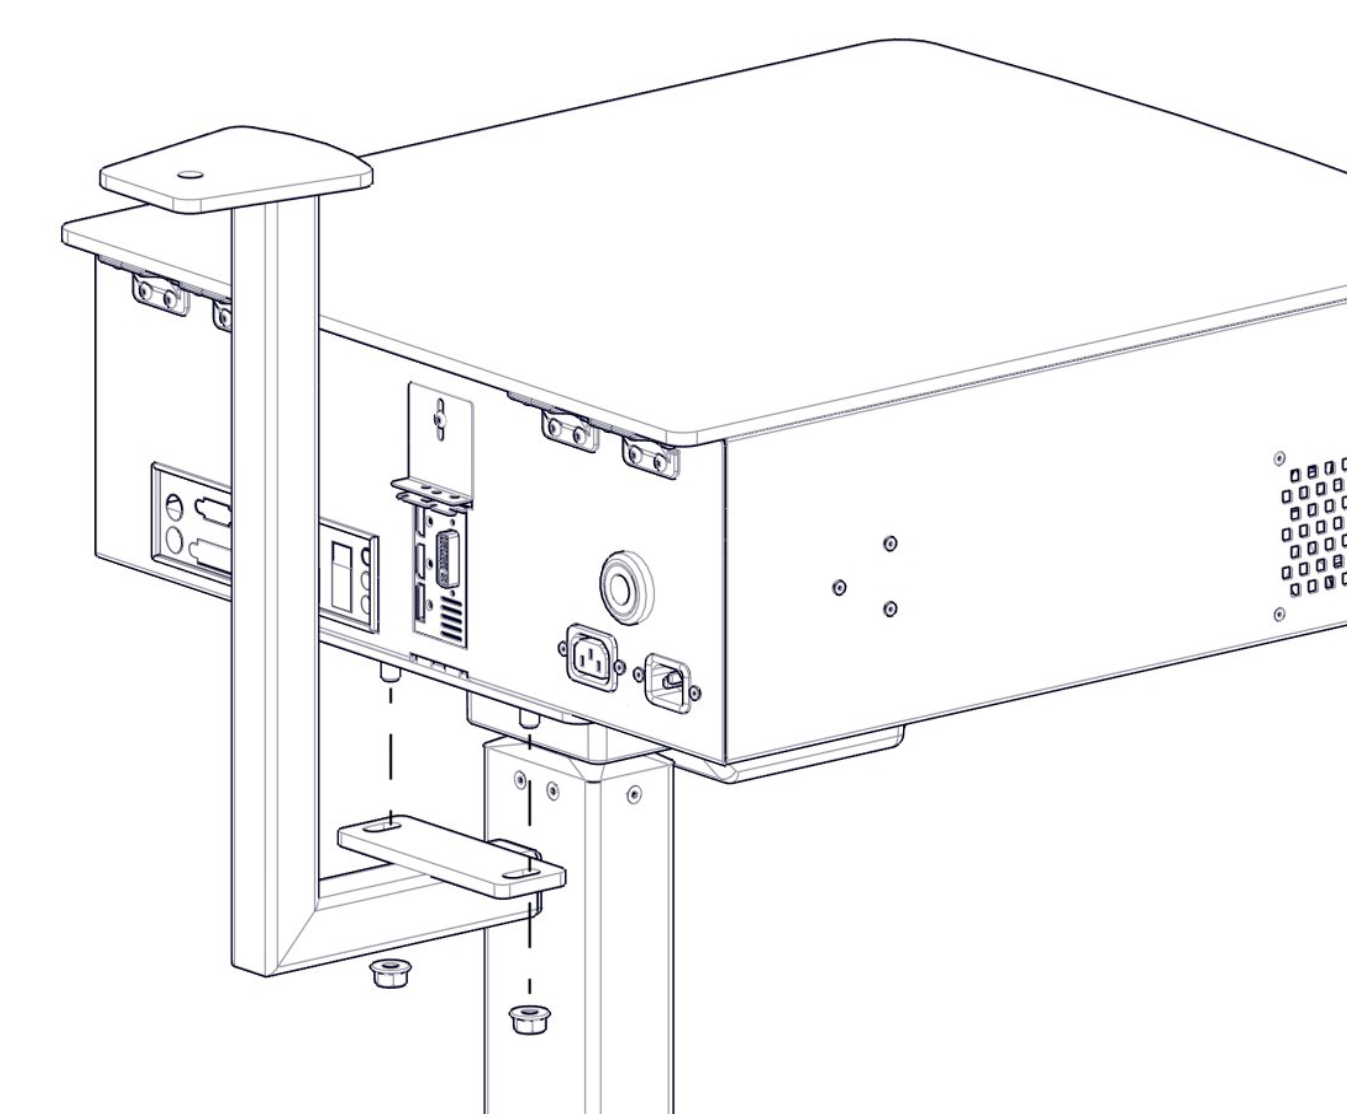
Step 12
Tighten the nuts to ensure the bracket is secured in place.
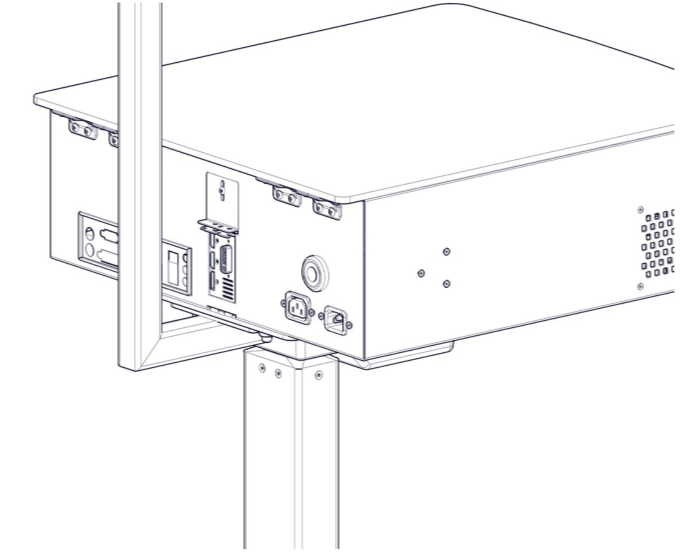
Step 13
Locate the angled tv bracket arm. (There are further instructions included with the monitor arm should you require them.)
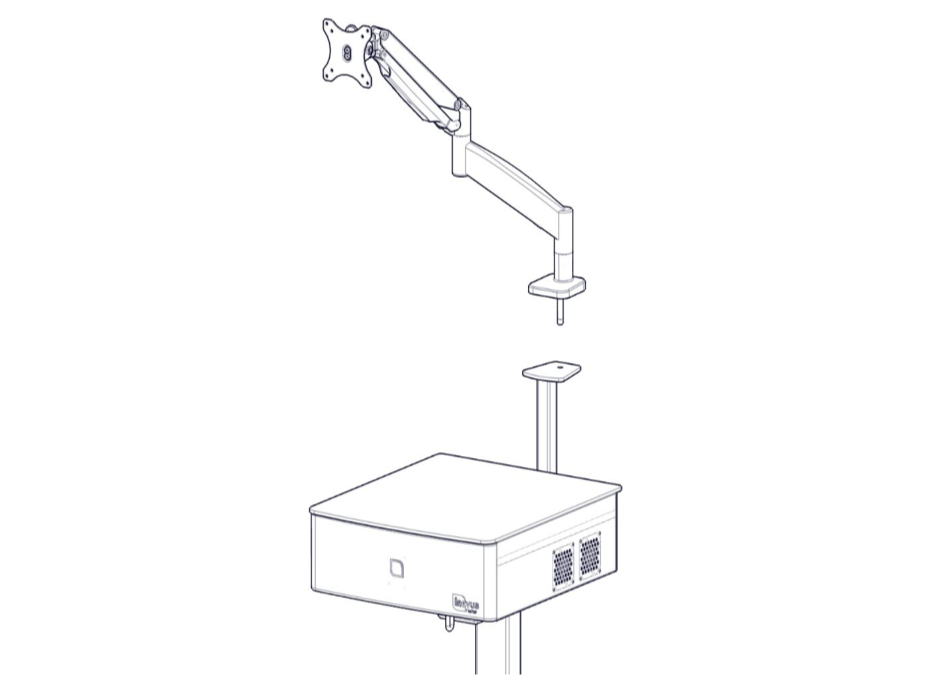
Step 14
Insert the bolt on the base of the monitor stand into the hole on the top of the Z-shaped bracket now attached to the sim station.
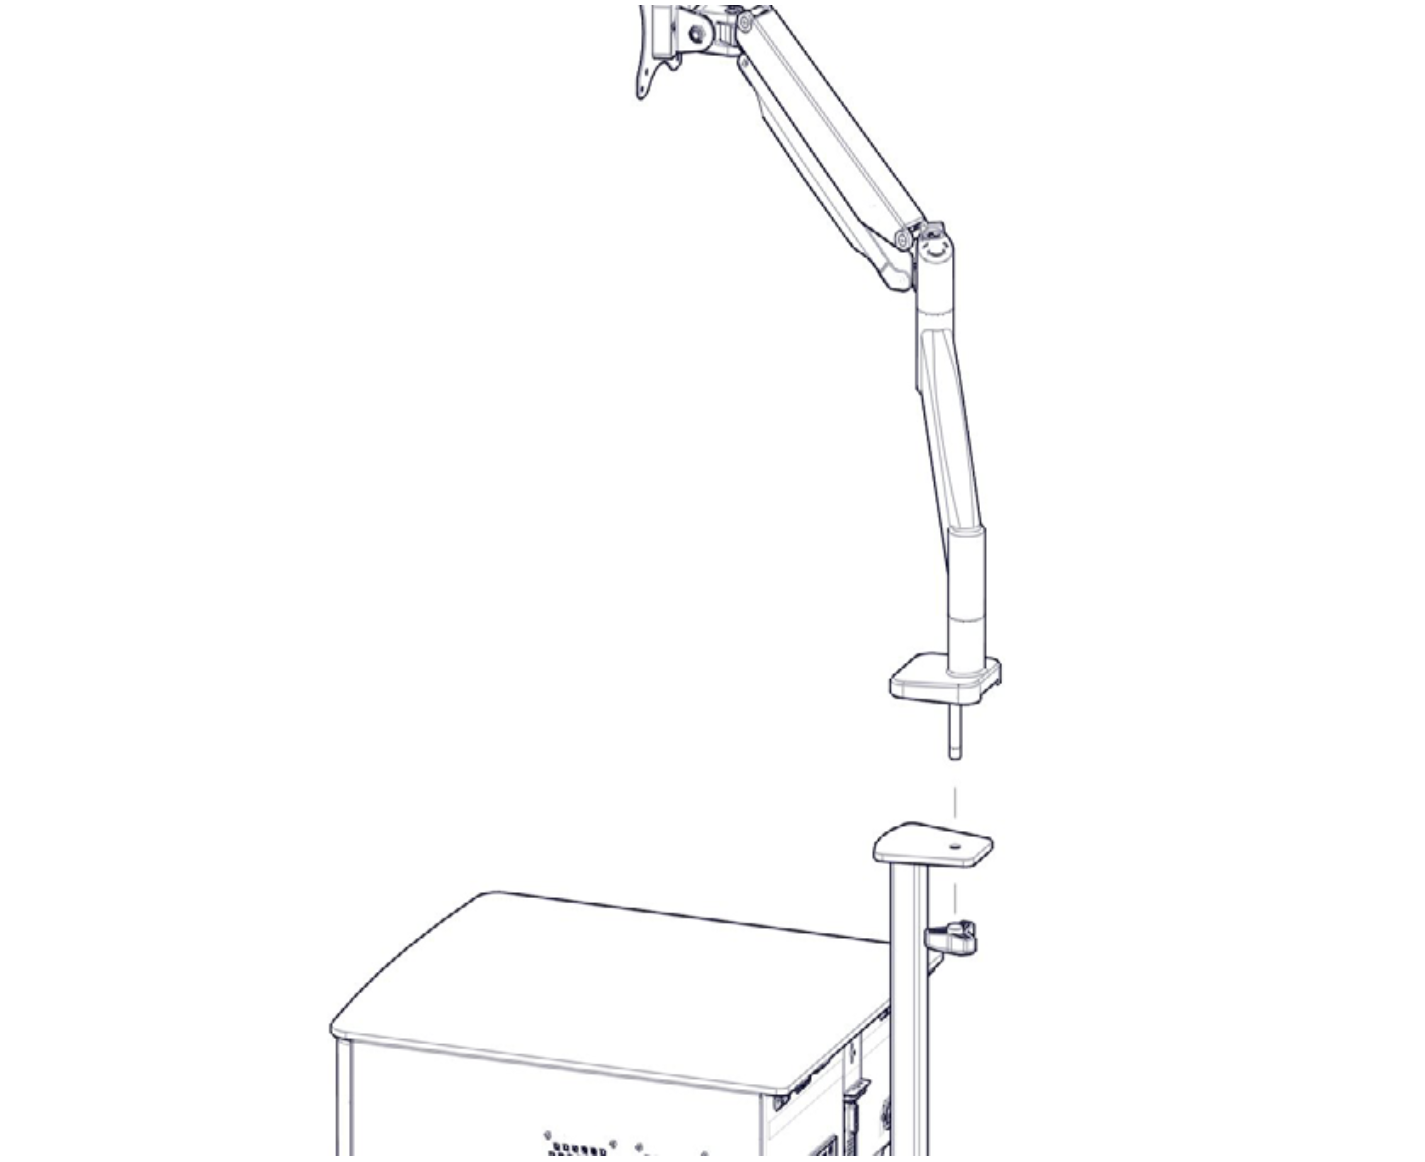
Step 15
Locate the handle and tighten onto the underside of the bolt as indicated.
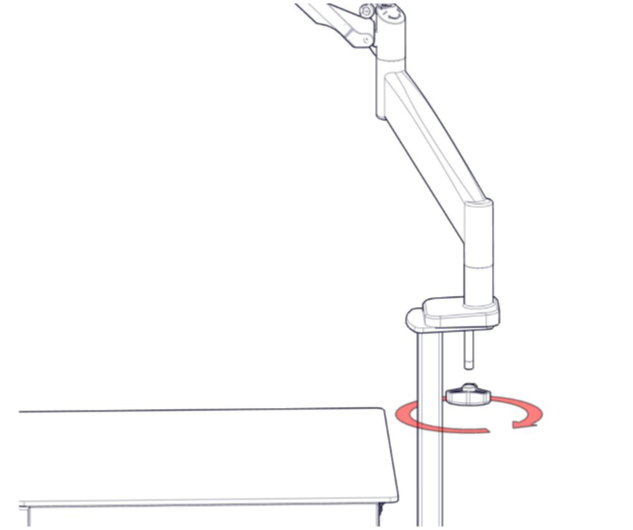
Step 16
Ensure the bolt is tightened.
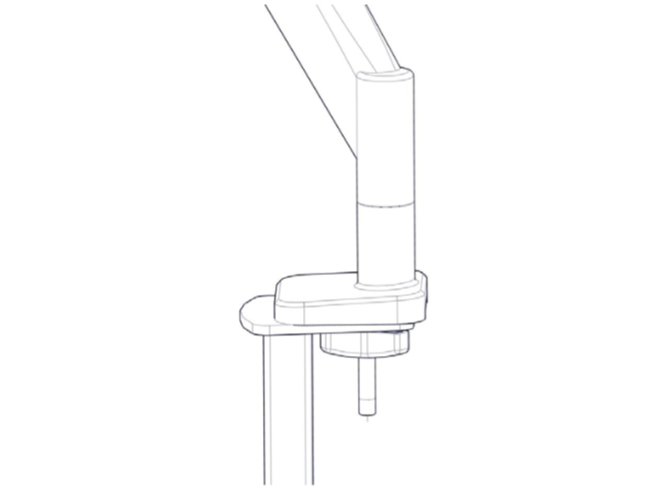
Step 17
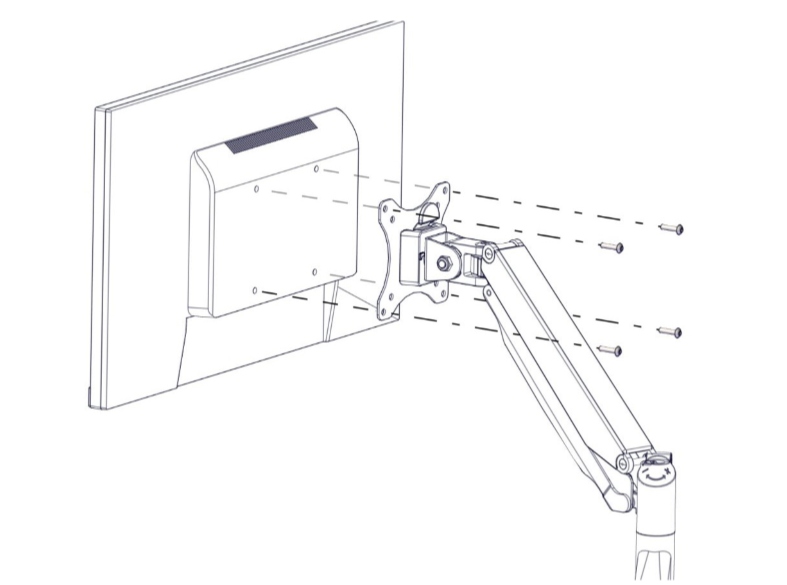
Locate 4x bolts and thread through the bracket and into the back of the monitor.
Step 18
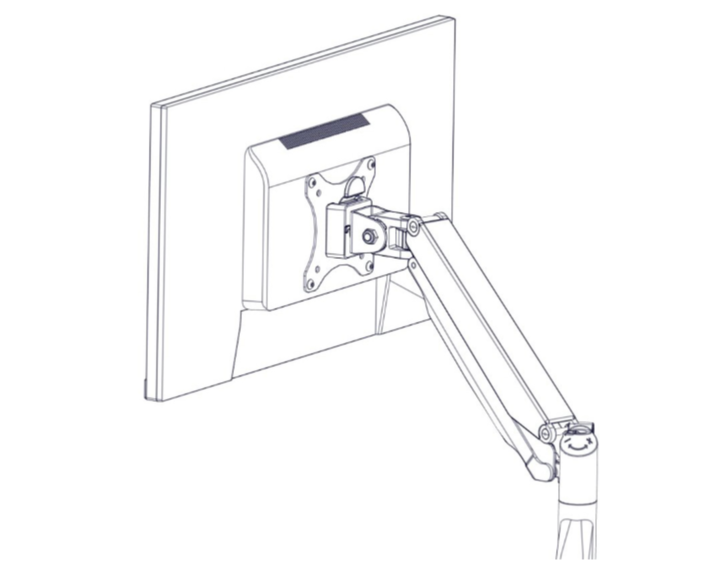
Ensure the bolts are securely tightened.
Step 19
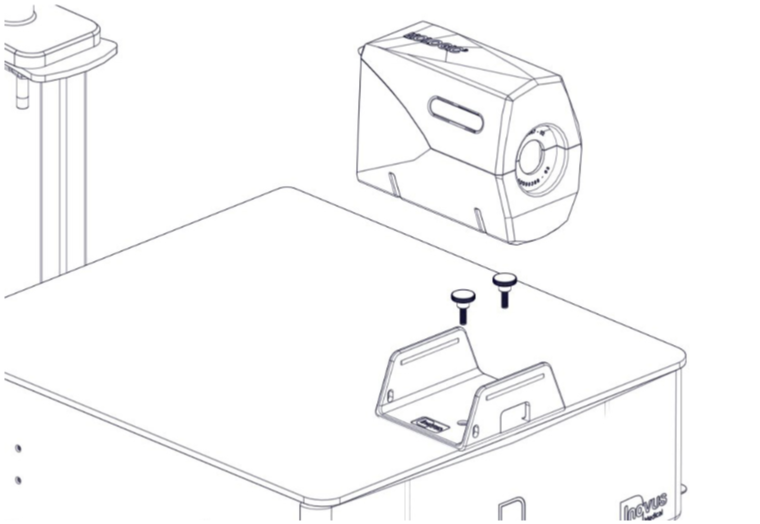
Align the U-shaped bracket with the bolt holes on the top of the sim station and secure using the thumb screws provided.
Step 20
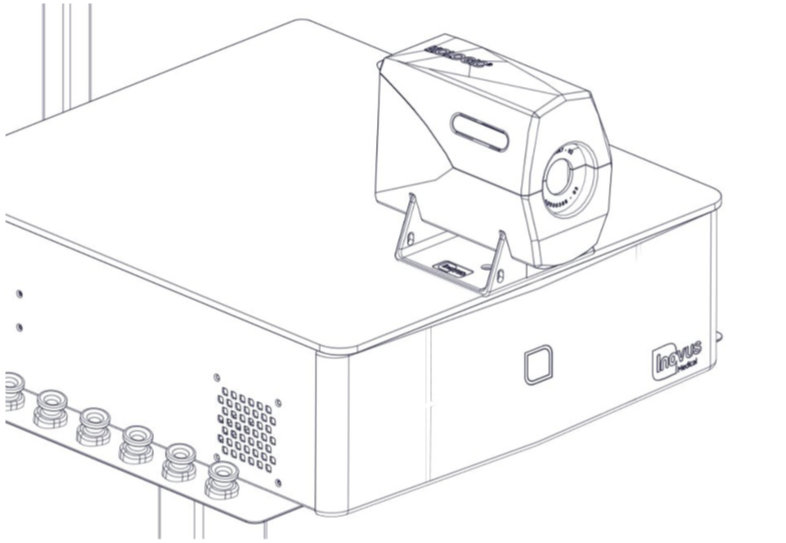
You may now place the uterus housing onto the U-shaped bracket. Please note this is a push fit fixture.
Step 21
Insert the scope into the introducer.
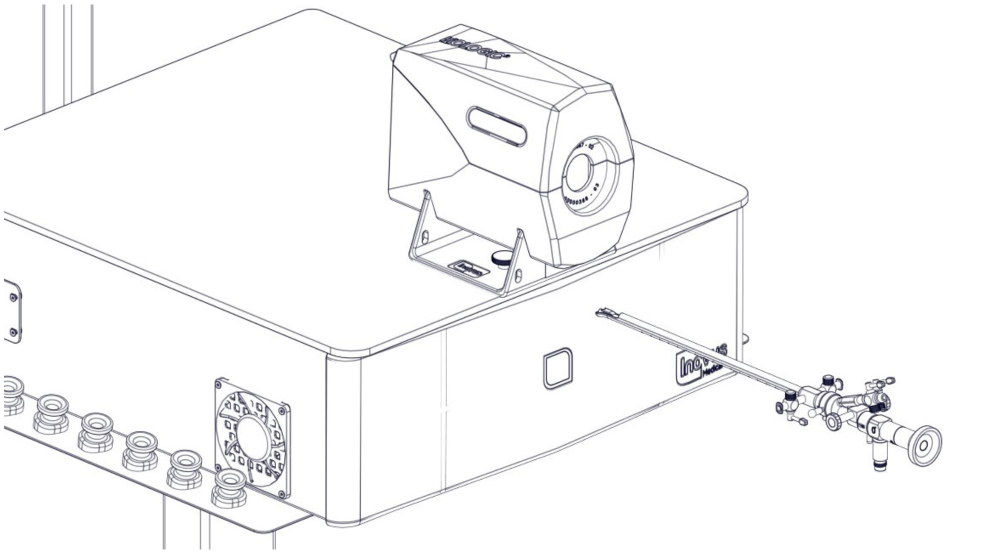
Step 22
Place the hysteroscope in the holes provided on the left hand side of the U-shaped bracket.
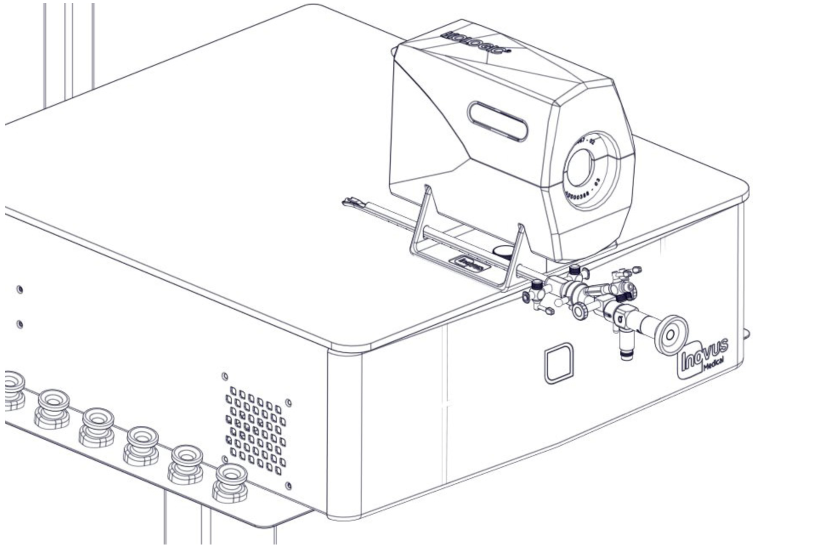
Step 23
Attach the camera to the scope.
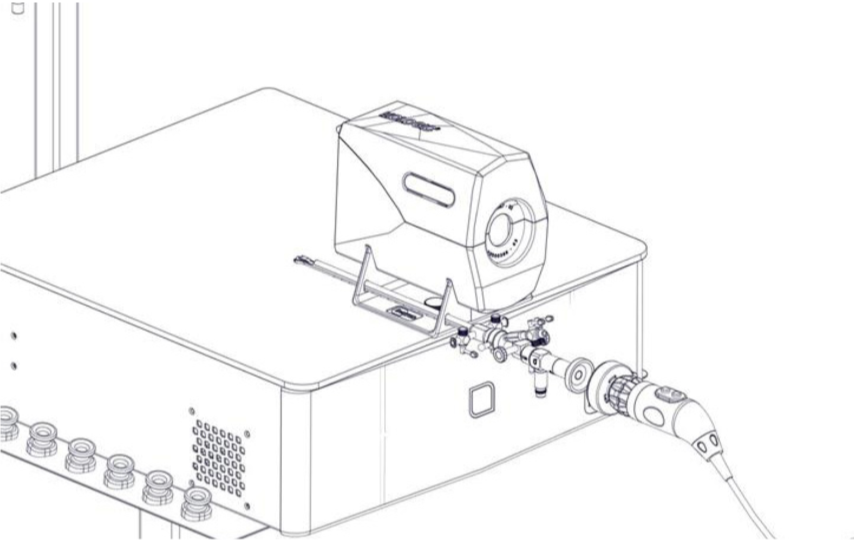
Step 24
Attach the fibre optic light lead to the scope.
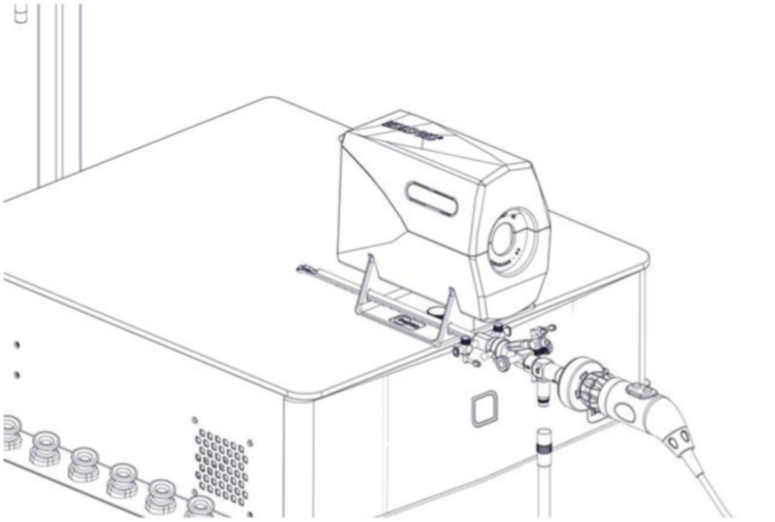
Step 25
Insert the fibre optic light lead into the back of the sim station.
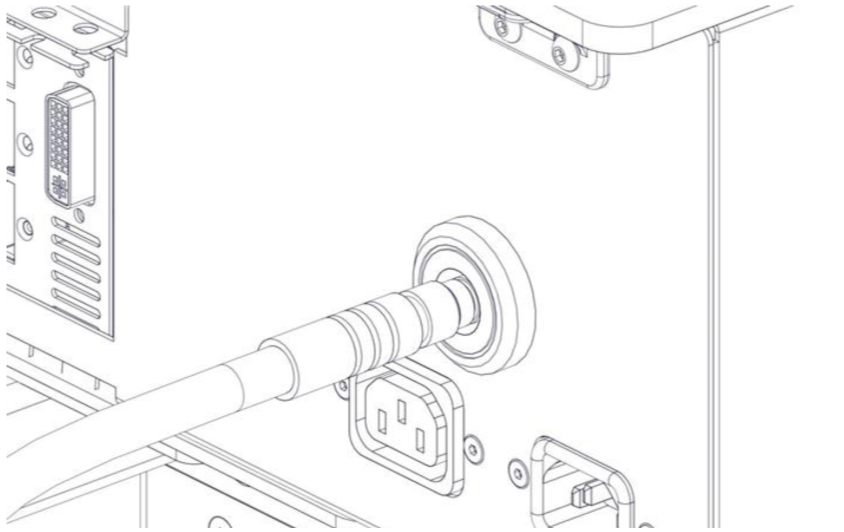
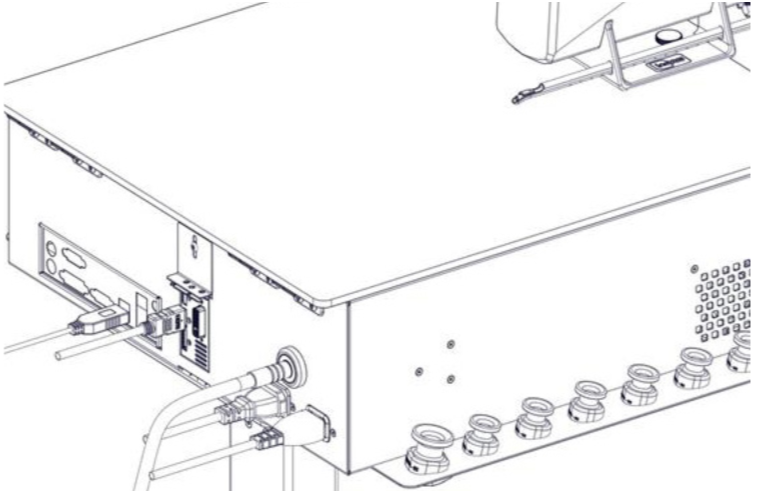
Step 26
Plug the power cables into the relevant ports at the back of the sim station as shown. (Please note the monitor stand is not shown here just for clarity of plug positioning.)
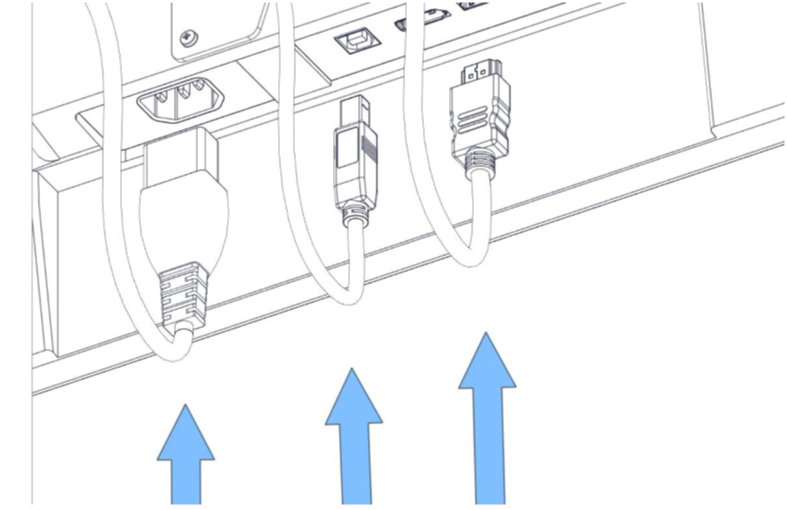
Step 27
Plug the 3 cables into the relevant ports in the underside of the monitor.
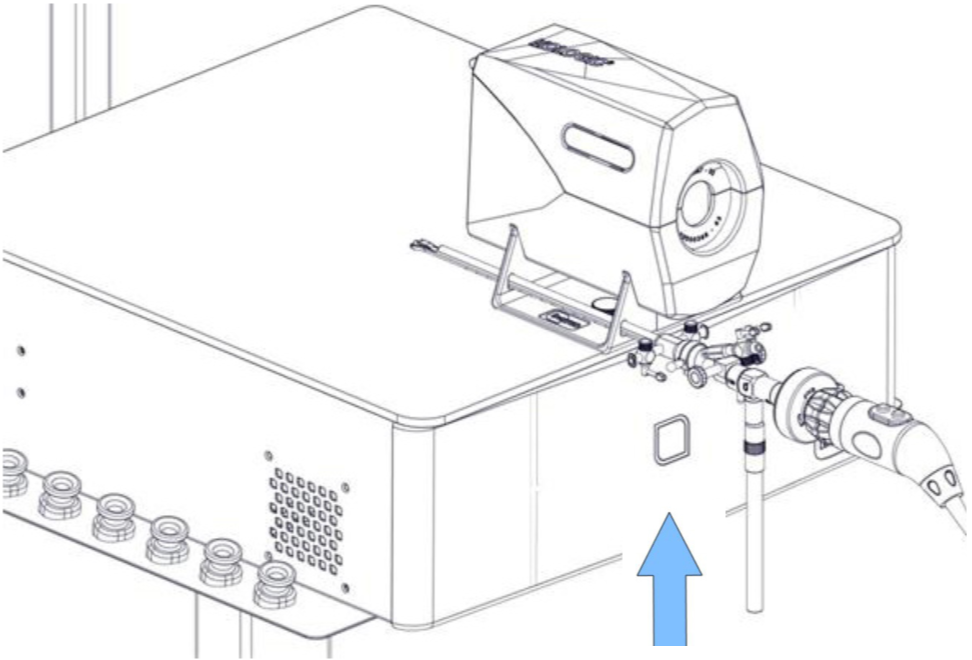
Step 28
Plug the system on using the power switch on the front of the sim station. Once the computer has loaded up, select the HystAR icon on the touch screen monitor and follow the instructions inside the software.
Related articles
Community Discussions (0)
Real-world experiences from other users around this article.
Did this solve your problem?