

SupportBack to inovusmedical.com
SupportBrowse guidesCommunity DiscussionsSign in
Support

Self-service technical support, hardware setup guides and Totum user guides from the Inovus Medical team.

Back to inovusmedical.com

Support

  • Support Center
  • Browse articles

Policies

  • Warranty Information
  • Returns & Refunds
  • Delivery Information
  • Customs Information

Legal

  • Privacy Policy
  • Terms of Use
  • Cookies

© 2026 Inovus Limited. Company reg: 07919081

Support Center

Hardware
  • How do I clean my simulator?
  • I Am Using QuickTime Player for Mac to Run My Camera and the Image Is Inverted (Flipped Round), How Do I Fix This?
  • I've purchased a Pyxus HD or Pyxus HD Move simulator and cannot get the camera to work (Mac and Windows users)
  • I've purchased a Pyxus HD or Pyxus HD Move simulator but can't access or log on to LapSkills, what should I do?
  • HystAR Basic Simulator Setup
  • HystAR Pro Setup Manual
  • HystAR Setup Manual
  • Seating Technique Trainer
Product Videos
Software
  • I didn't receive my Totum invite email
  • I have an issue with the Totum software
  • I've signed in but can't see my licence or modules
  • Preparing Your PC for Totum: Drivers and Windows Updates
  • The camera is black or not showing in Totum, how do I fix it?
  • Why hasn't my session uploaded? (and how to avoid losing videos)
Accounts
  • I didn't receive my Totum invite email
  • I've purchased a Pyxus HD or Pyxus HD Move simulator but can't access or log on to LapSkills, what should I do?
  • I've signed in but can't see my licence or modules
Downloads
Updates
  • Preparing Your PC for Totum: Drivers and Windows Updates
Assessments
Groups
Connections
Permissions
Camera
  • I Am Using QuickTime Player for Mac to Run My Camera and the Image Is Inverted (Flipped Round), How Do I Fix This?
  • I've purchased a Pyxus HD or Pyxus HD Move simulator and cannot get the camera to work (Mac and Windows users)
Administration
Policies
  • Customs Information
  • Delivery Information
  • My order has arrived damaged or with a missing item
  • Returns & Refunds
  • Warranty Information
Support CenterHardware
Setup guide

HystAR Basic Simulator Setup

Assemble the HystAR Basic drip tray simulator.

Overview
Easy•10–15 mins
Requirements
Mains power
HystAR Basic#bozzini#hysteroscopy#assembly#hardwareUpdated 03/11/2026

Welcome to the step-by-step assembly guide for the HystAR Basic Simulator. Whether you prefer step by step instructions or a video demonstration, this guide will walk you through the assembly process.

Before you begin, take a moment to review the package's contents and acquaint yourself with the included components. The following content has been crafted to provide you with all the insights required to transform individual parts into a functional and invaluable tool for honing your surgical skills.

Step 1

Begin the assembly of your HystAR Basic simulator by sliding the white acrylic plate through the slot at the rear of the drip tray, remembering to stop halfway before progressing to Step 2.
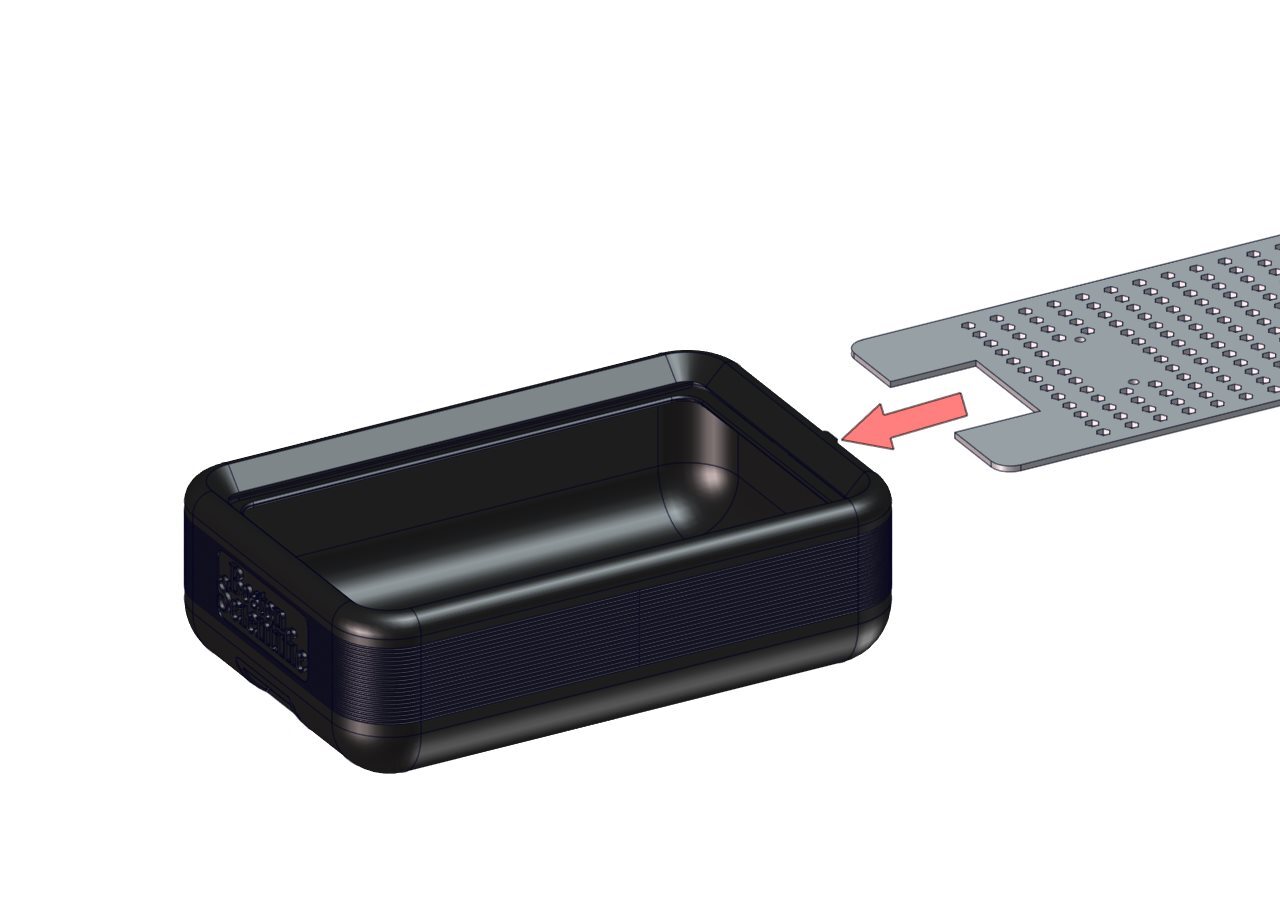
Step 1

Step 2

With the acrylic plate positioned halfway into the drip tray, place the U-shaped bracket onto the plate and align the two circular bolt holes on the bracket with those on the plate.
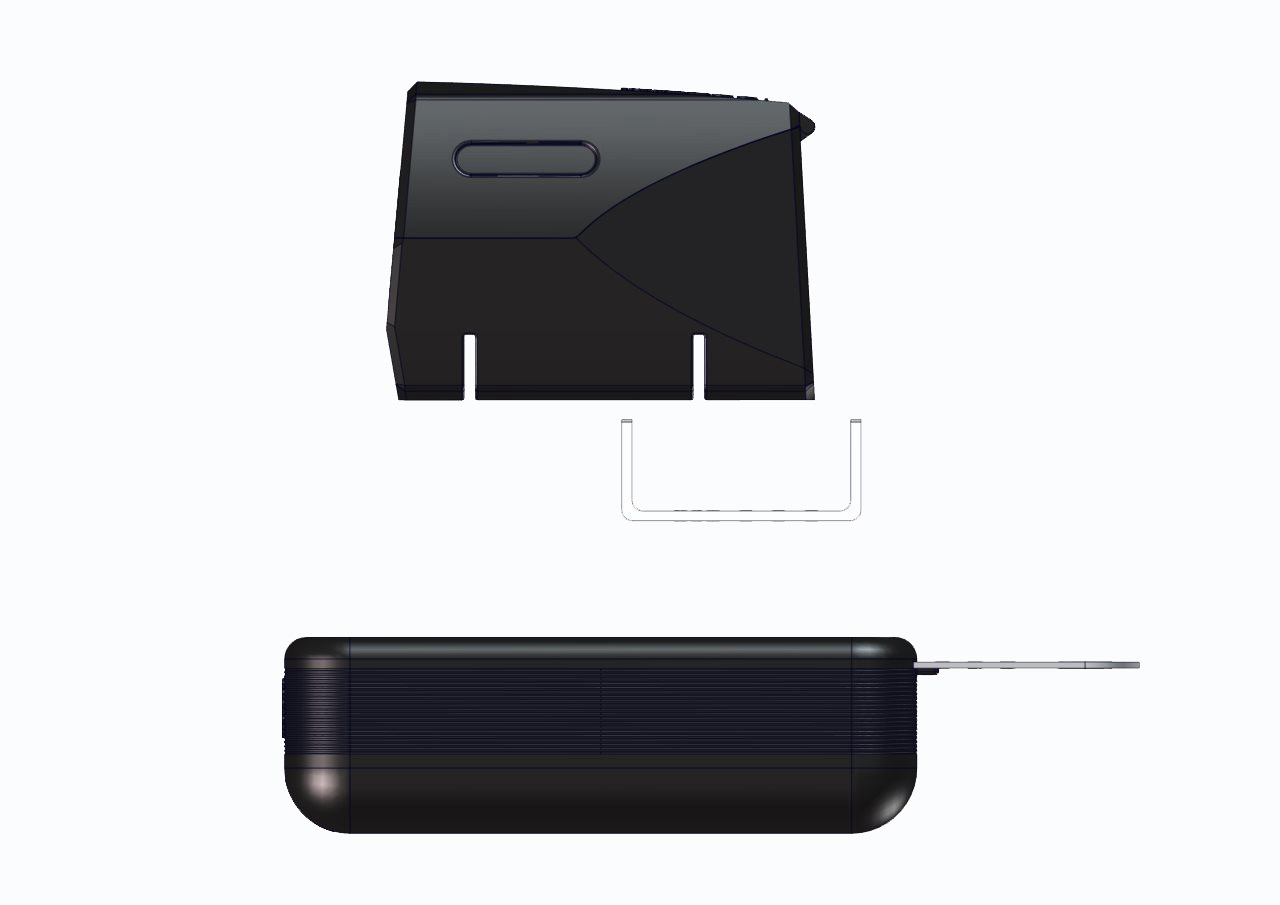
Step 2

Step 3

Using 2 x 00000640 bolts and 2 x 00001159 nuts provided, secure the bracket to the plate.
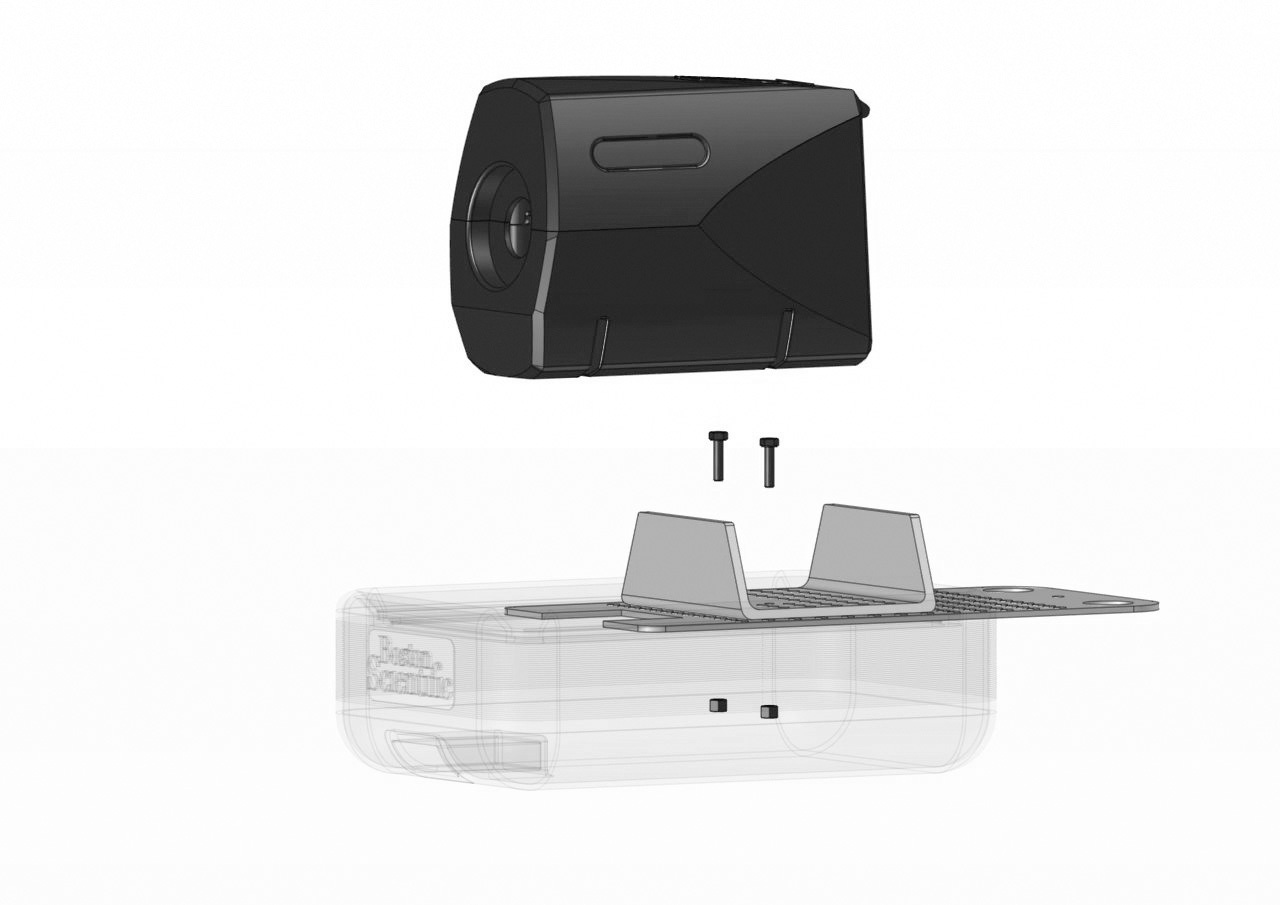
Step 3

Step 4

Use the remaining bolt and nut to secure the acrylic plate at the rear of the drip tray. This ensures that the plate remains stationary while the simulator is in use.
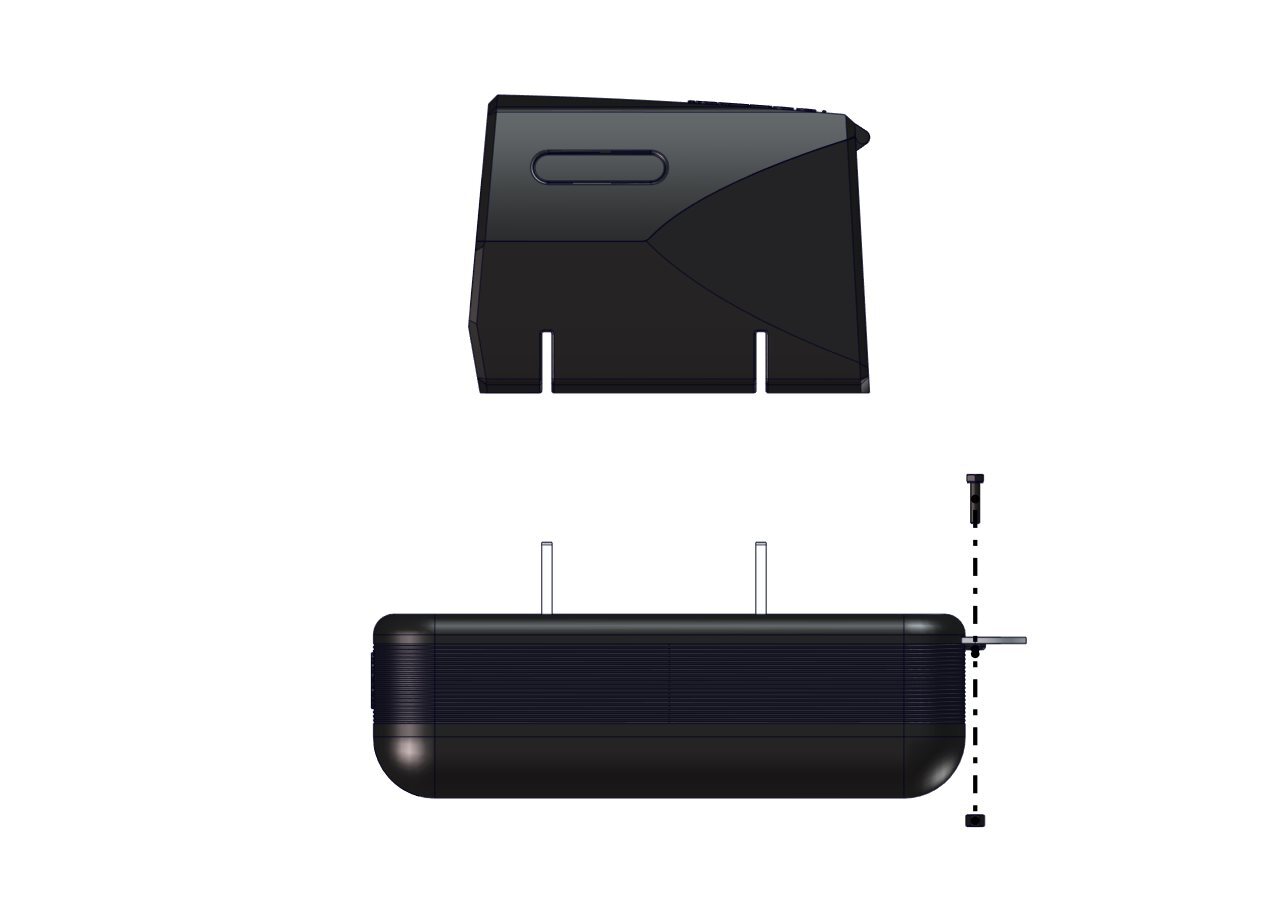
Step 4

Step 5

You may now place the uterus housing onto the U-shaped bracket. Please note this is a push fit fixture.
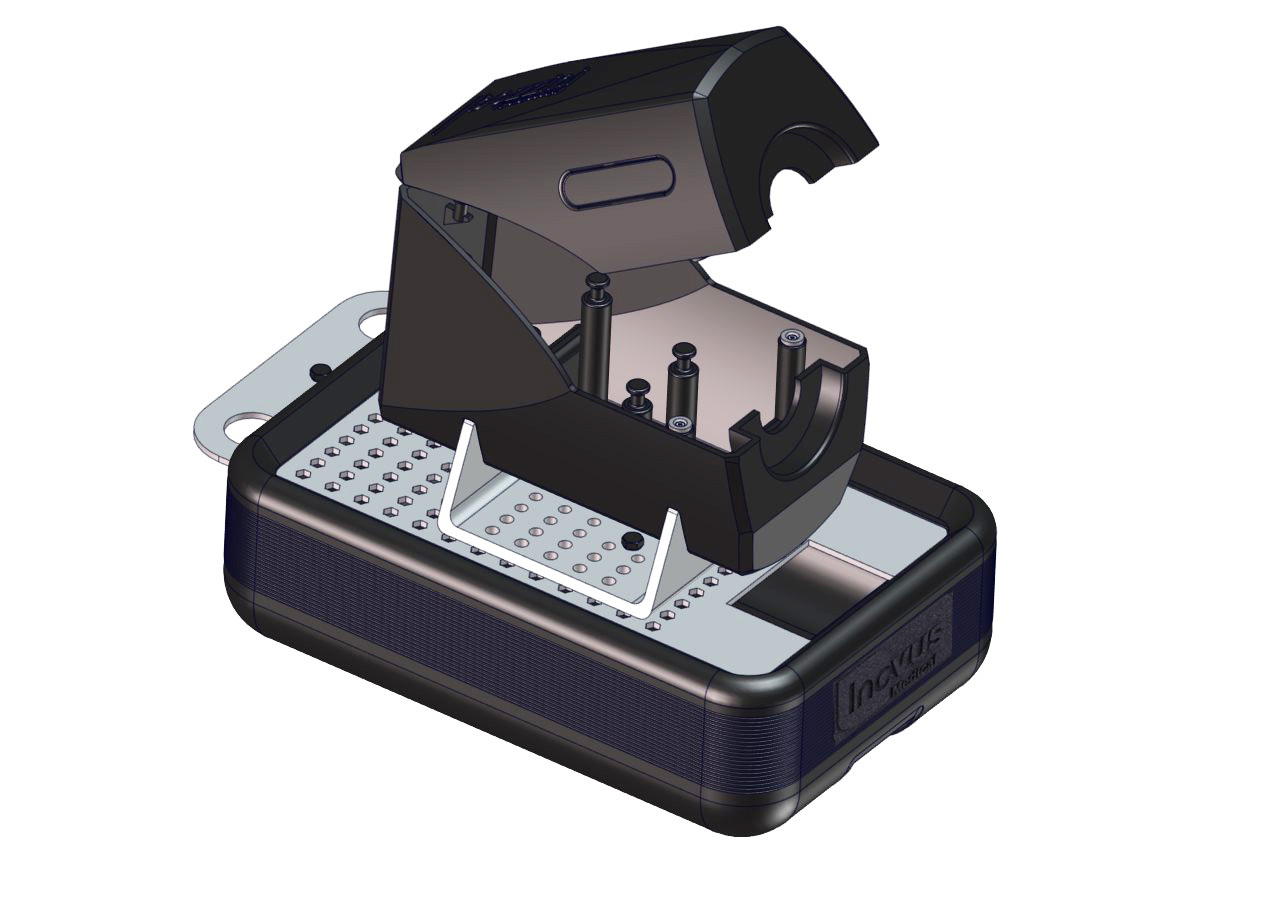
Step 5

Step 6

Secure one of the uterus models within the housing by hooking the loops onto the internal fixings.
Step 6

Step 7

Place the simulator onto a suitable surface for use.
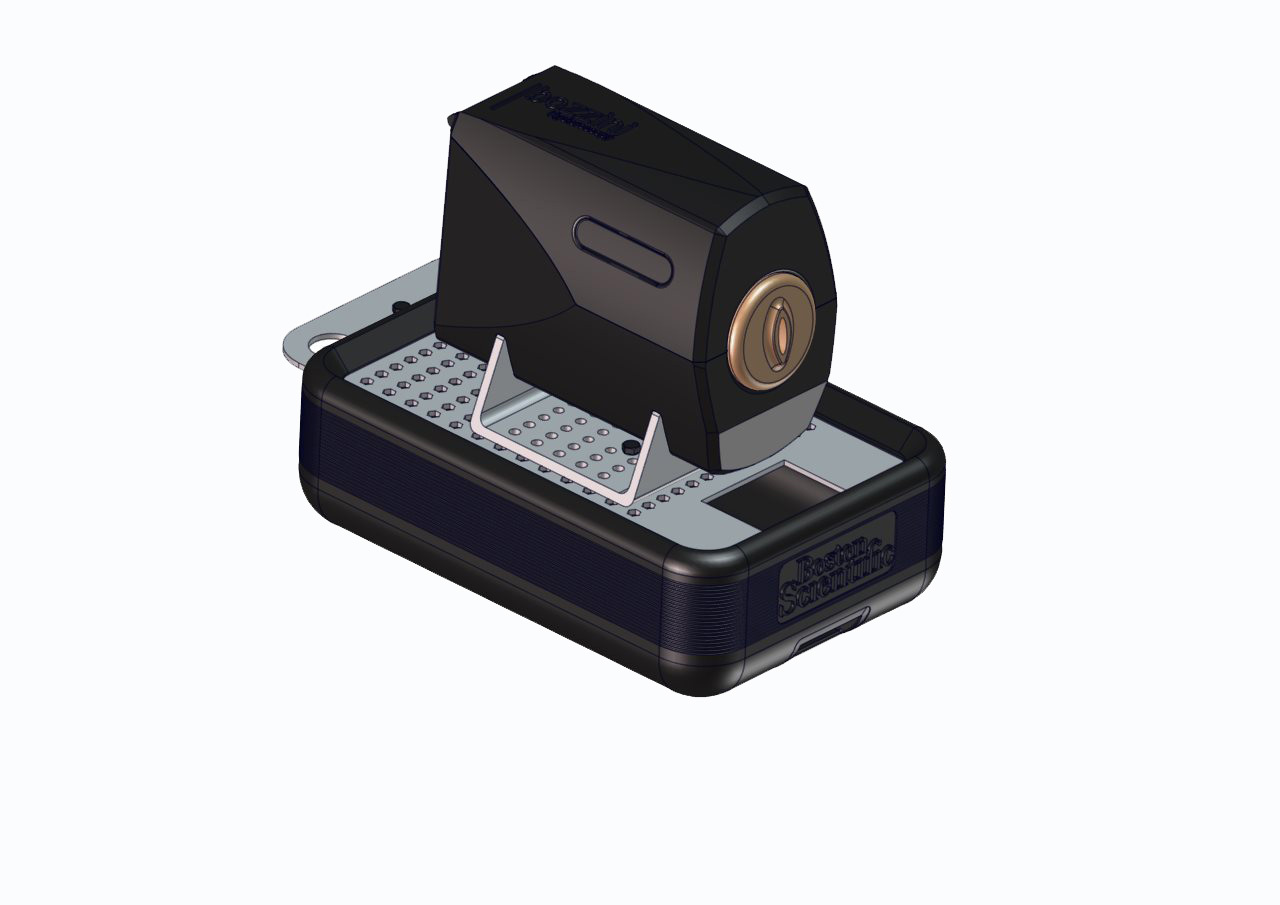
Step 7

Step 8

Using the clamp provided, anchor the simulator at the front of the drip tray. This should prevent movement during use.
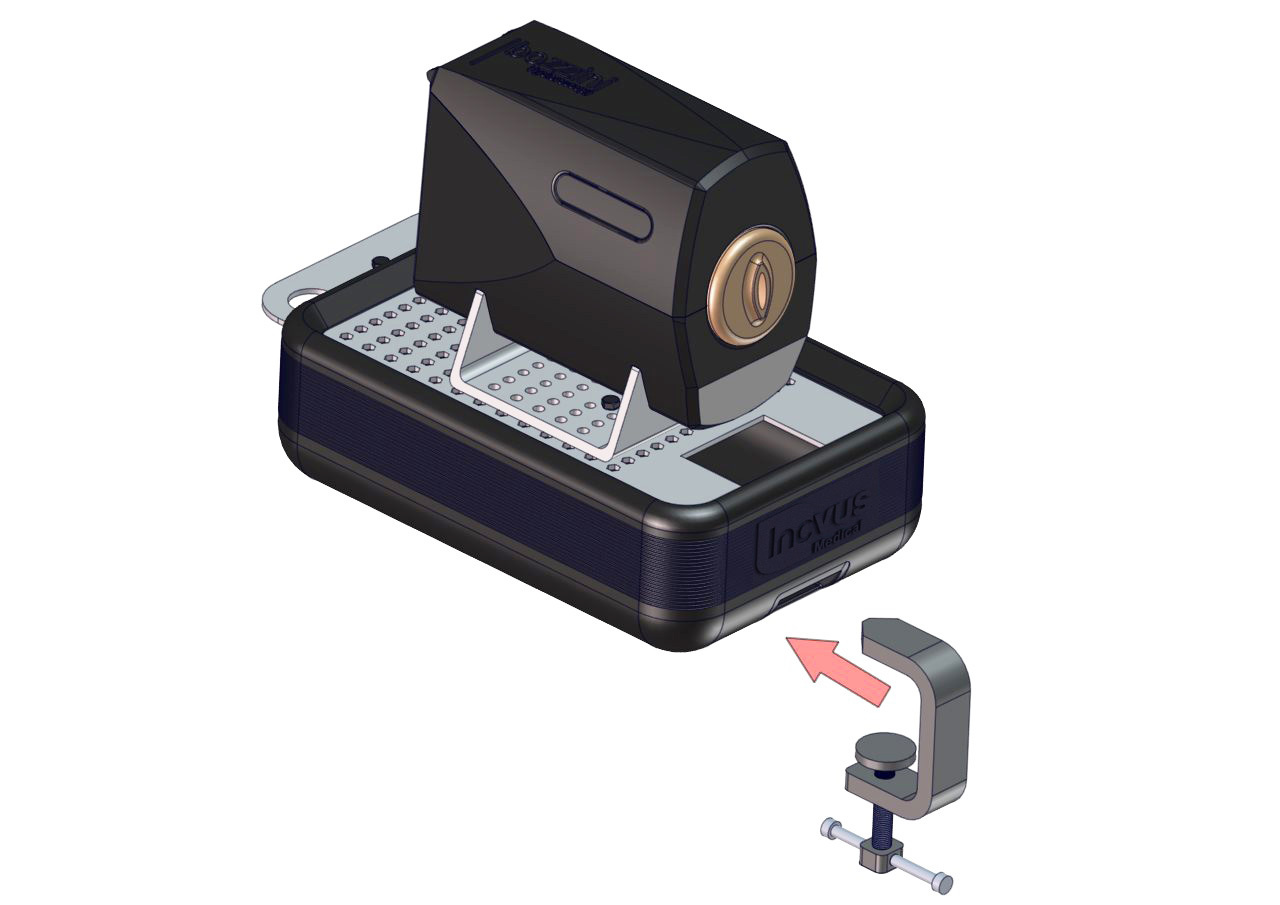
Step 8

Related articles

Video

HystAR Basic

An affordable, portable hysteroscopy simulation package with fully irrigatable uterine models.

2 min EasyHystAR Basic

Community Discussions (0)

Real-world experiences from other users around this article.

Explore Community Discussions→·Ask a Question

Did this solve your problem?

Contents

  • Step 1
  • Step 2
  • Step 3
  • Step 4
  • Step 5
  • Step 6
  • Step 7
  • Step 8